👉 How to create a blog using Bluehost and WordPress (2021)
– Step-by-step tutorial for beginners –
_
Since I just started a new WordPress blog using Bluehost, I thought it might interest some of you who want to create a travel blog (or on another theme).
For each step I took a screenshot. You just have to do as shown on this page and in a few minutes you will have your own blog created with Bluehost!
Don’t be scared, it’s super easy!
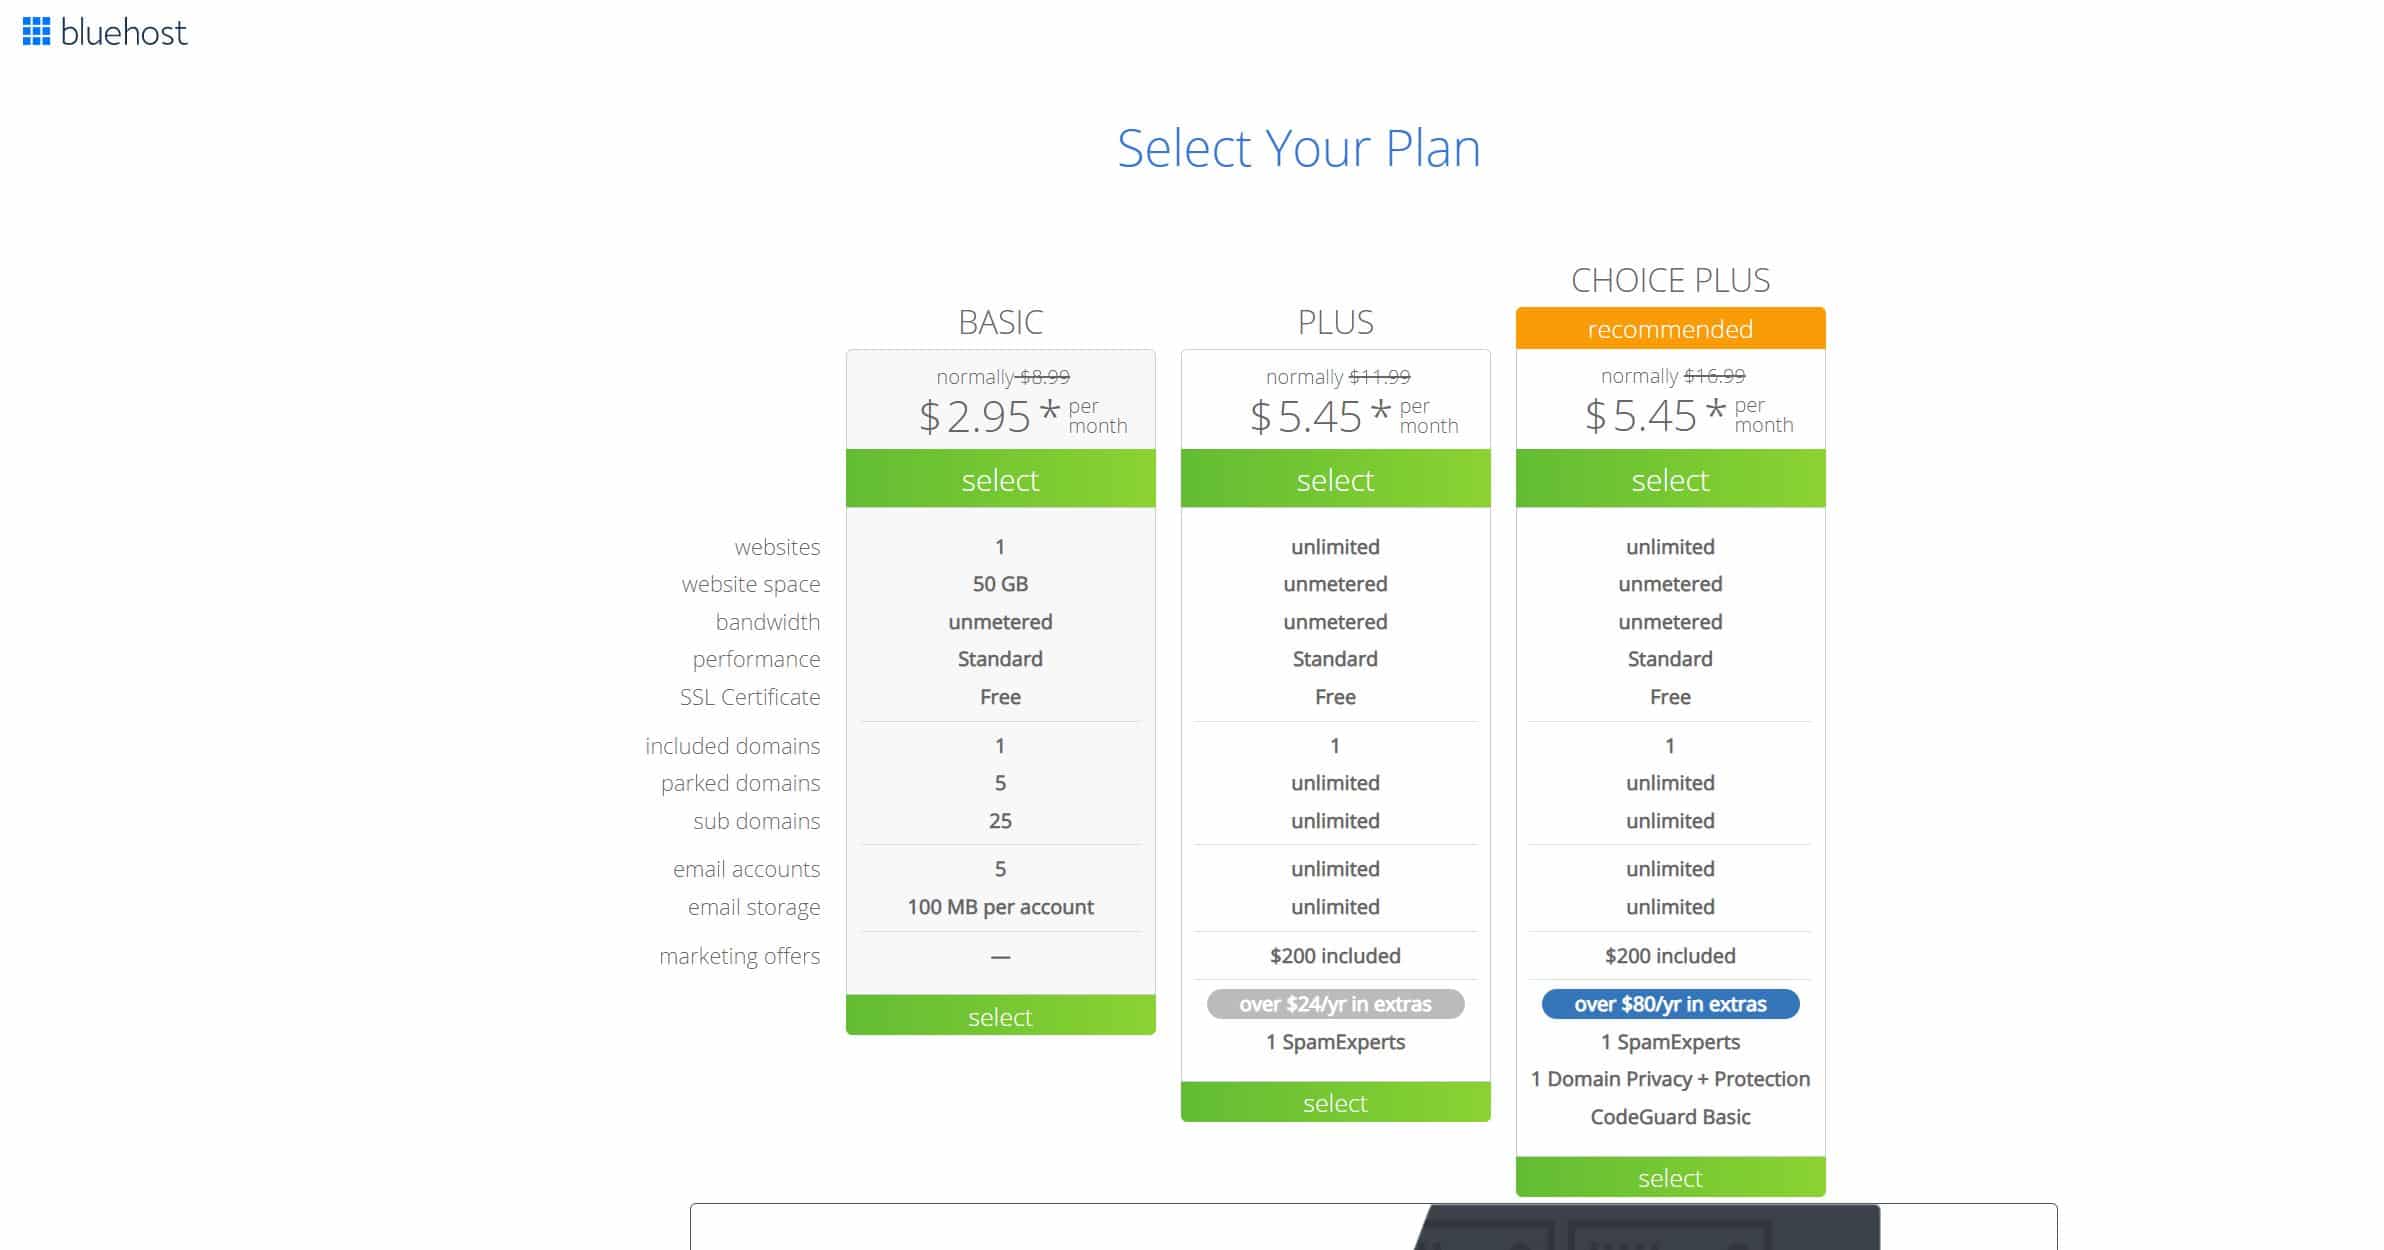
Which Bluehost plan is best for bloggers?
If you have never blogged before, I recommend this one. If your blog takes off and makes millions of views (which I hope you do), you can change for a more powerful plan later on.
👉 Click on the following link to make your blog with Bluehost!
(choose the BASIC plan)
_

Ok, so let’s start our own new blog, just follow my lead :
Step 1
Step 2
Step 3
Step 4 – Choose the Basic plan
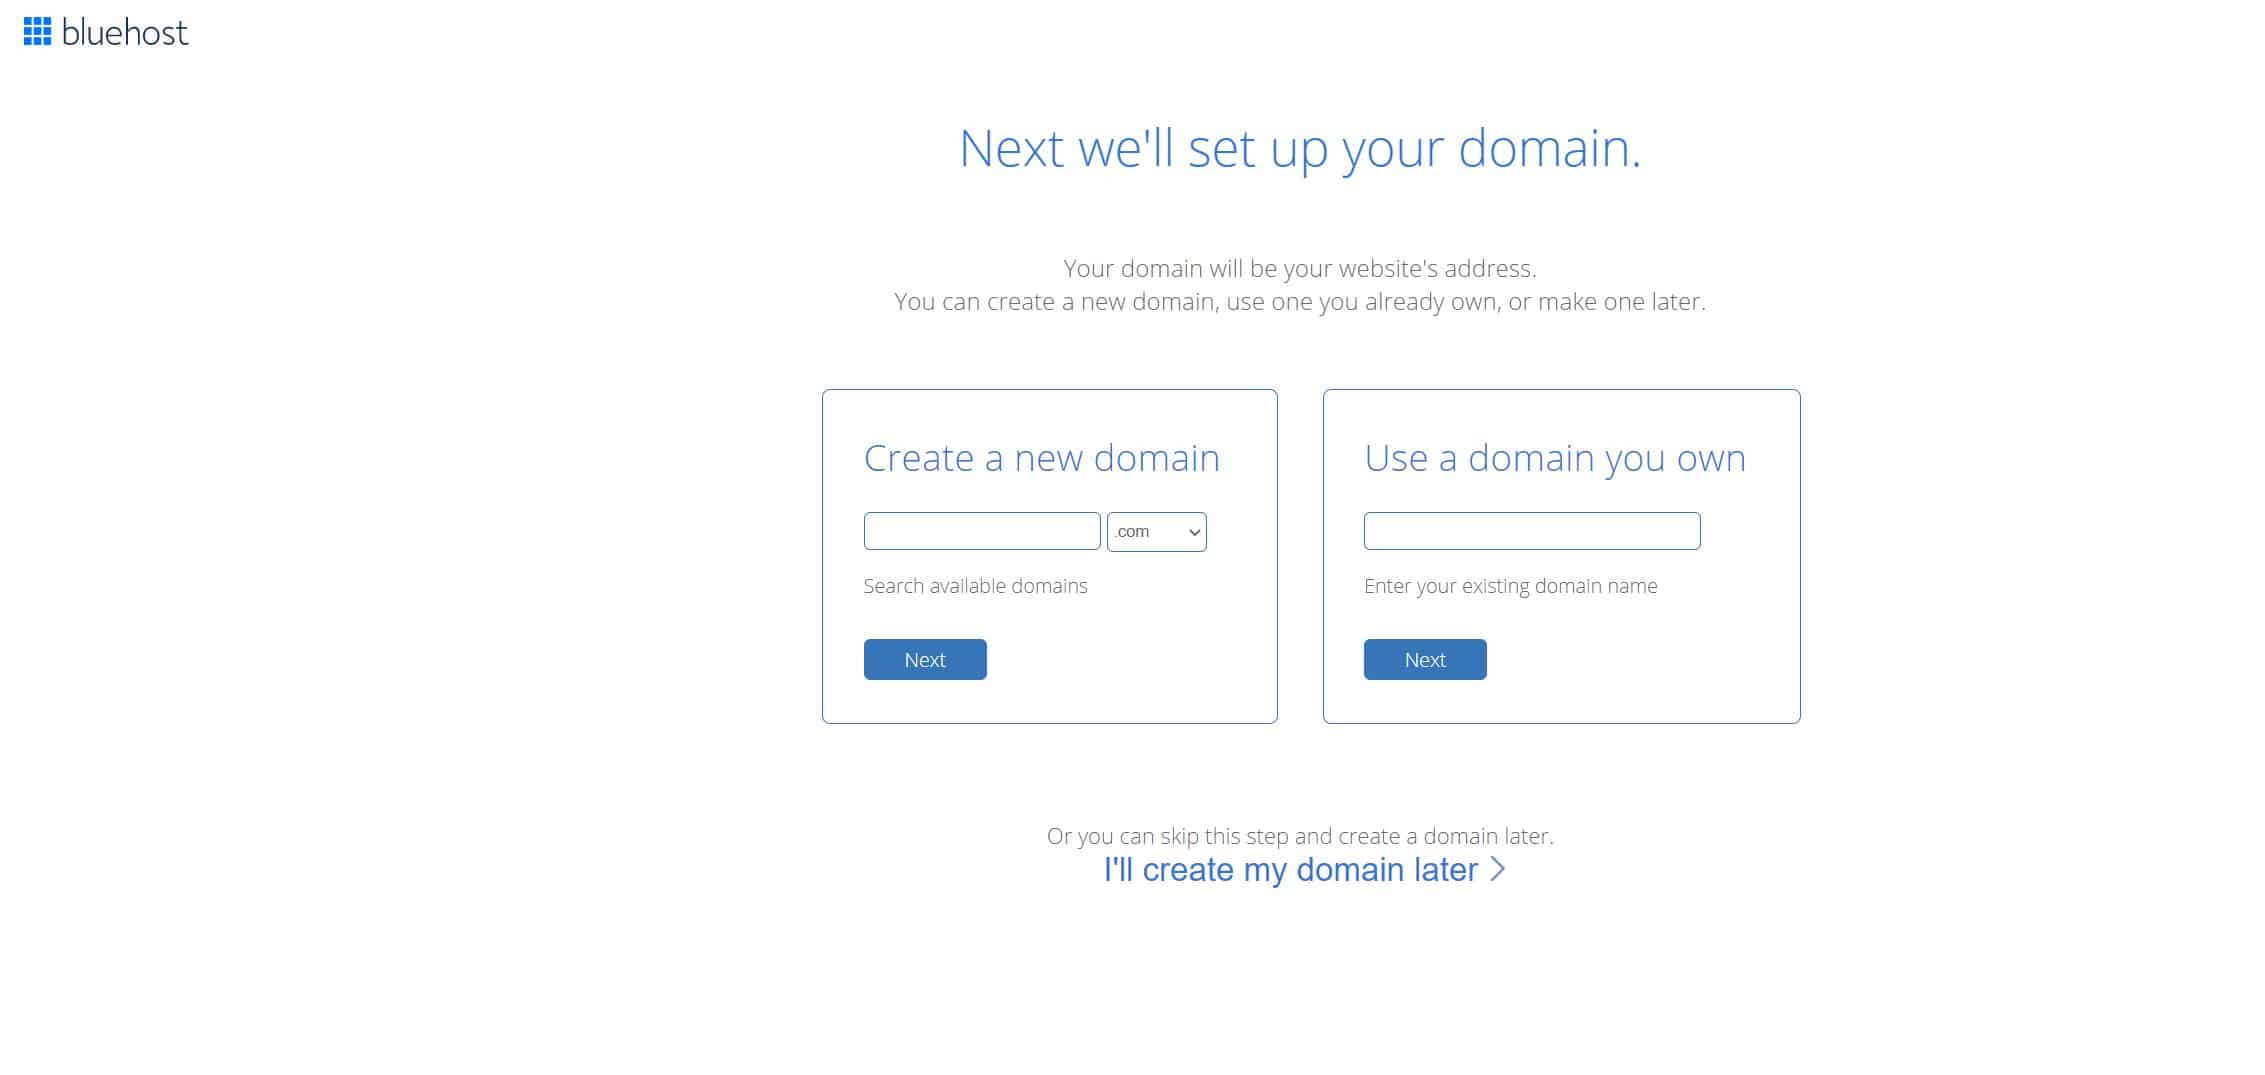
Step 5 – Don’t select any of this (you don’t need it)
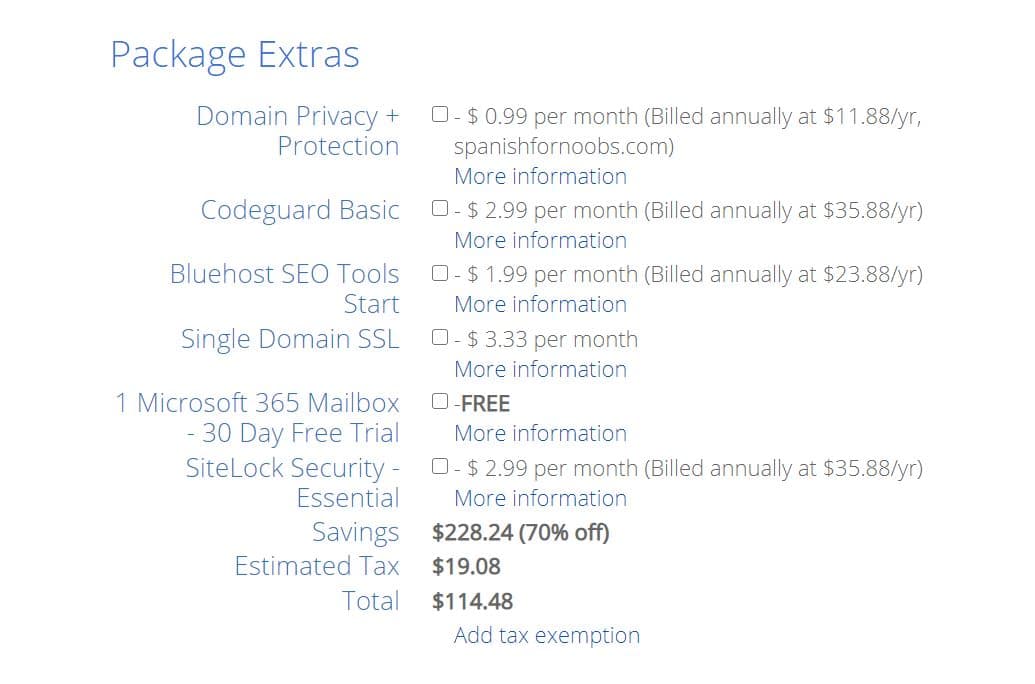
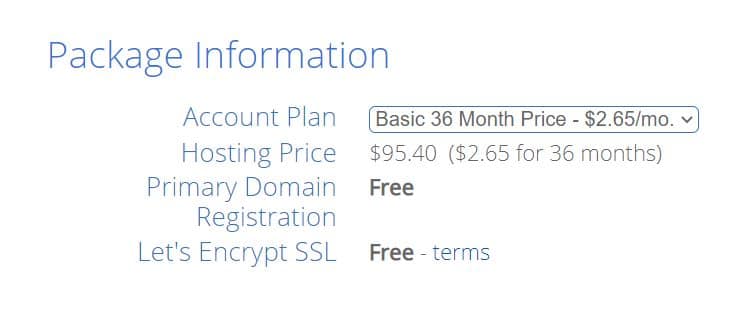
Step 6 – Enter your payment info

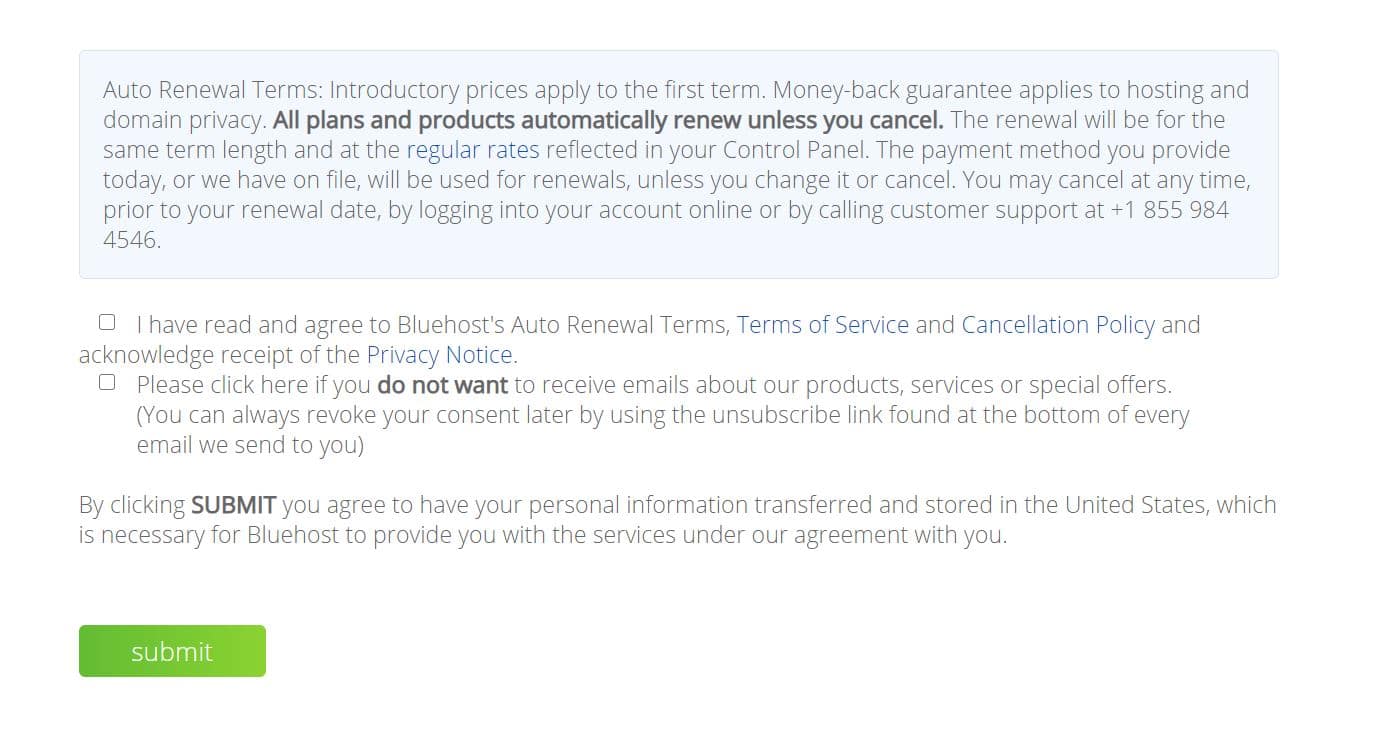
Step 7 – Select and click on “submit”
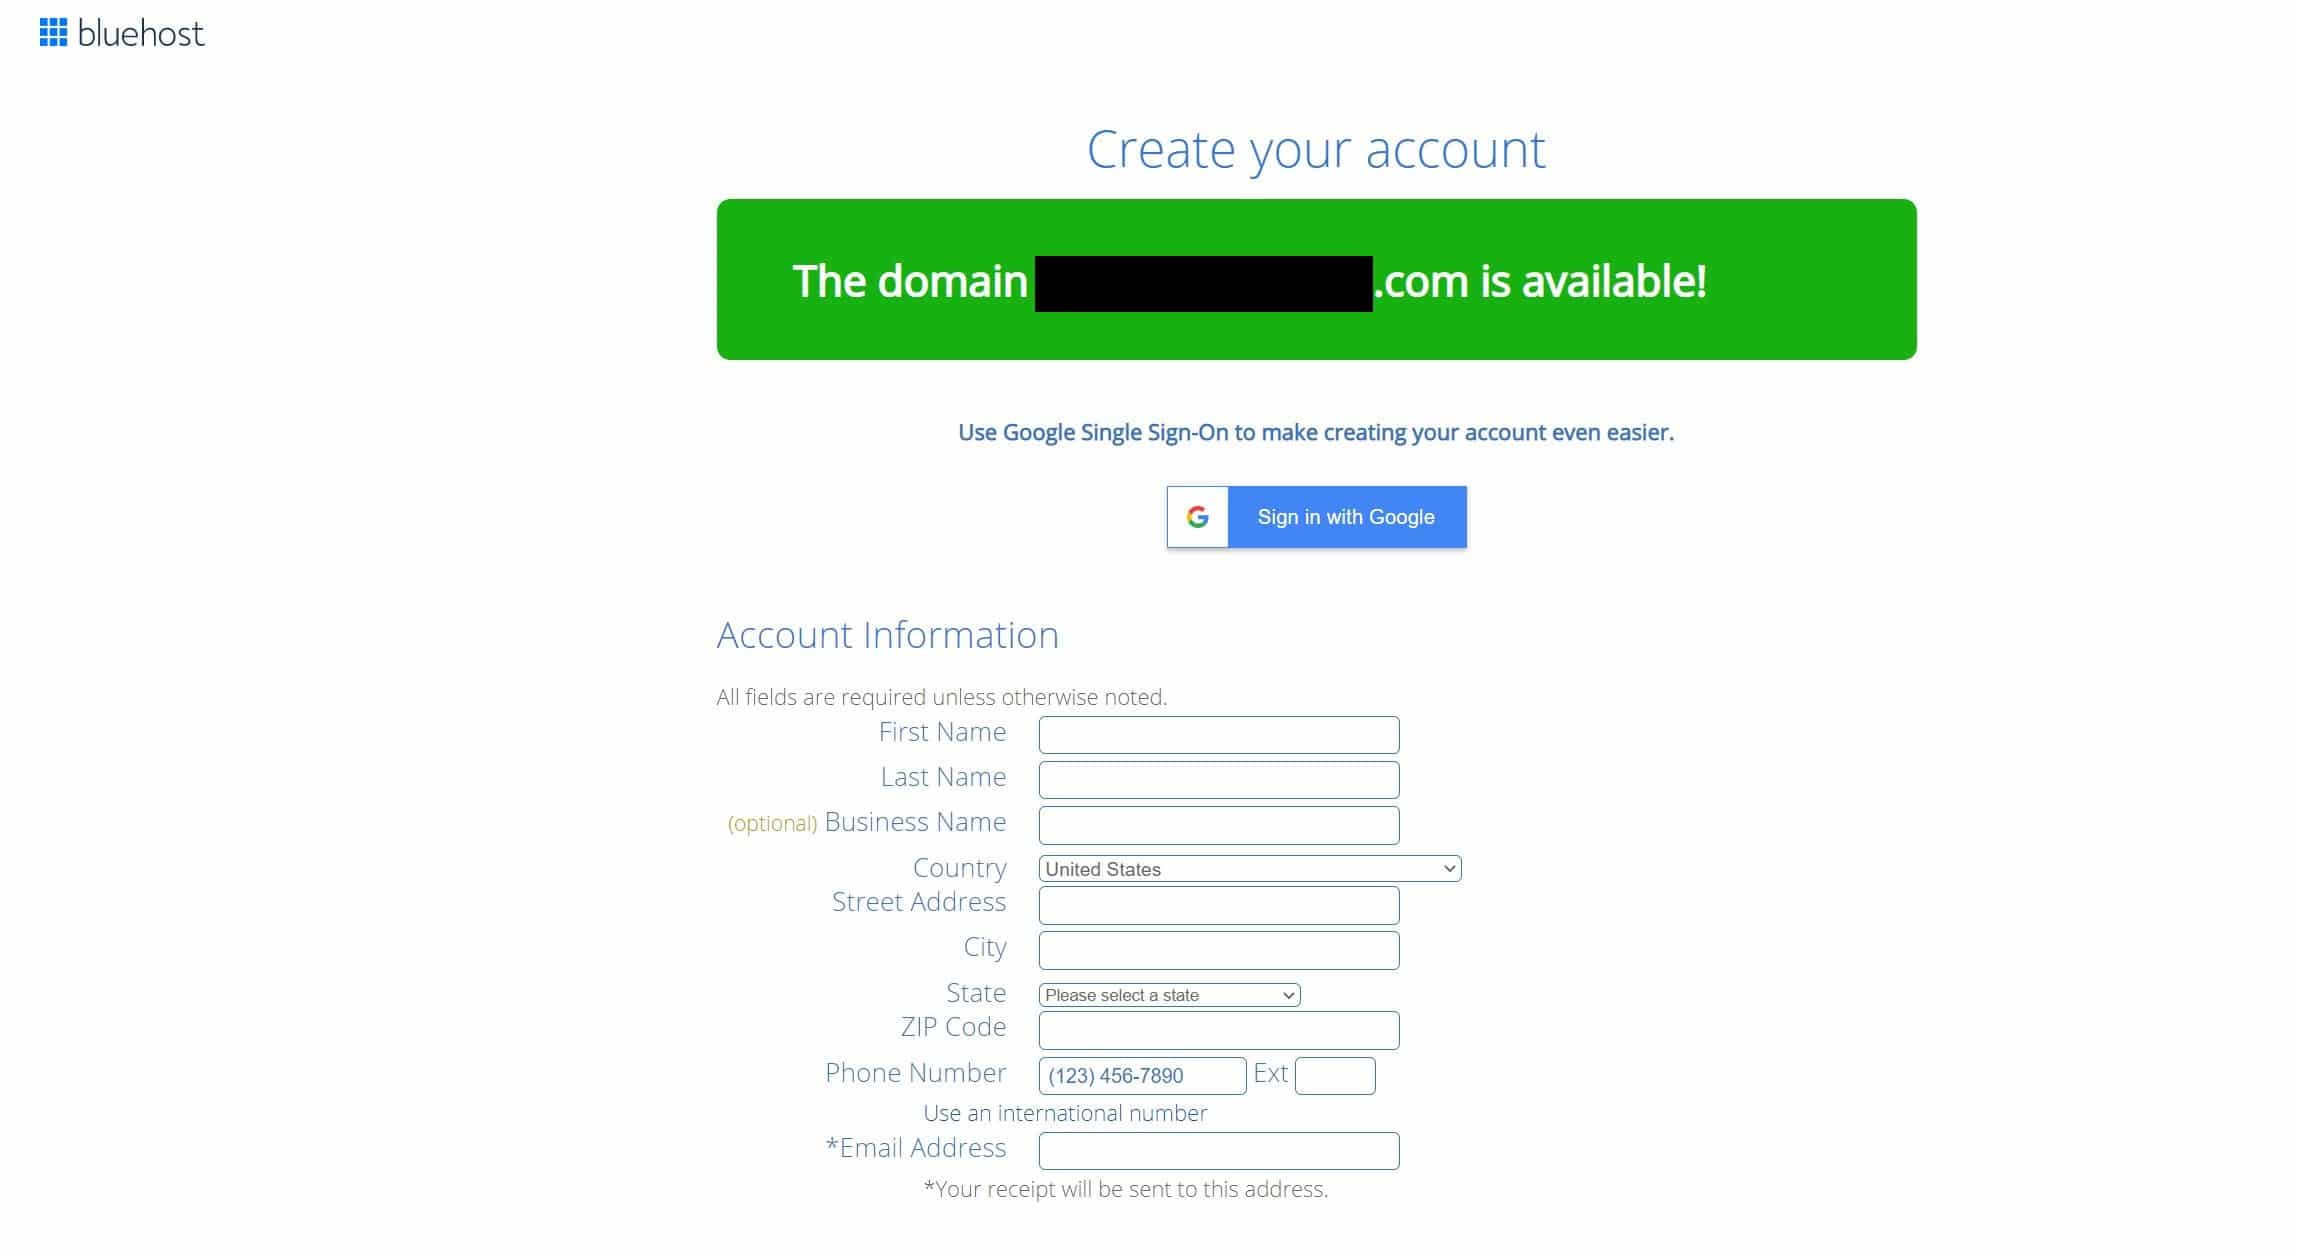
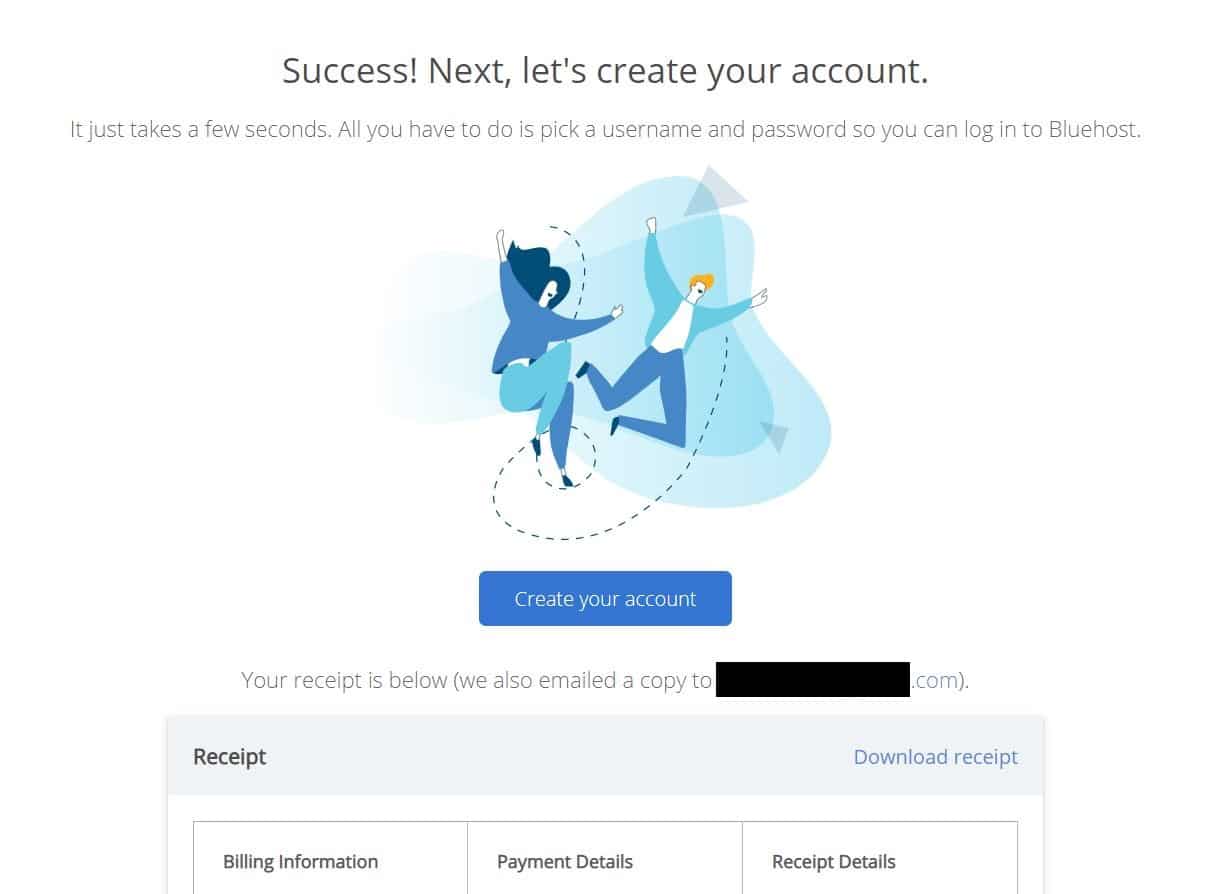
Step 8 – Click on “Create your account”
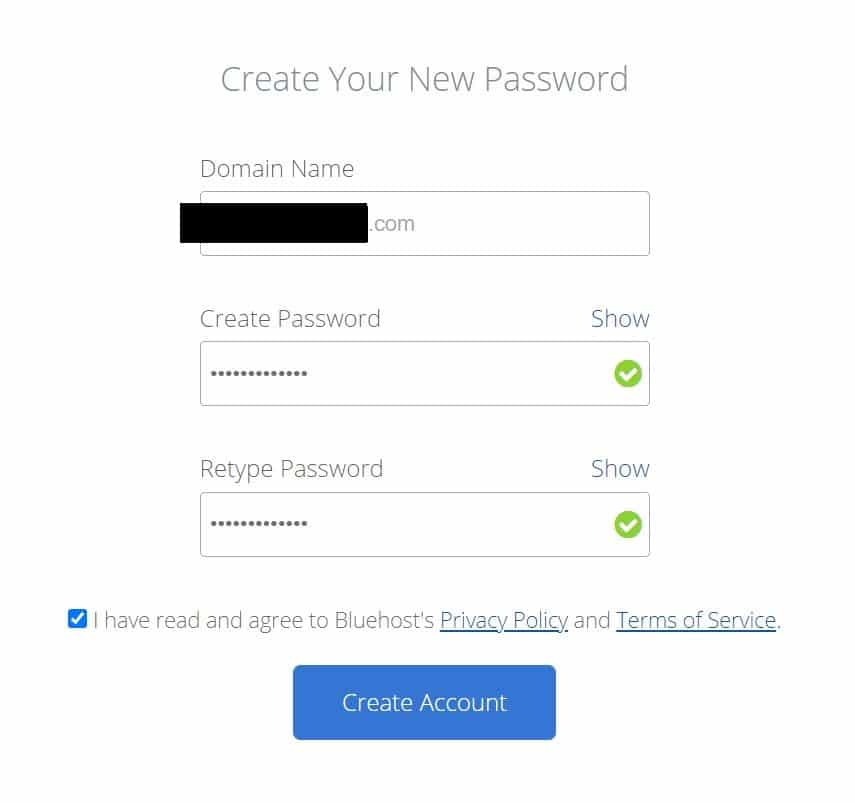
Step 9 – Choose a difficult password (NOT the website’s name or your own name, but something hard to hack)
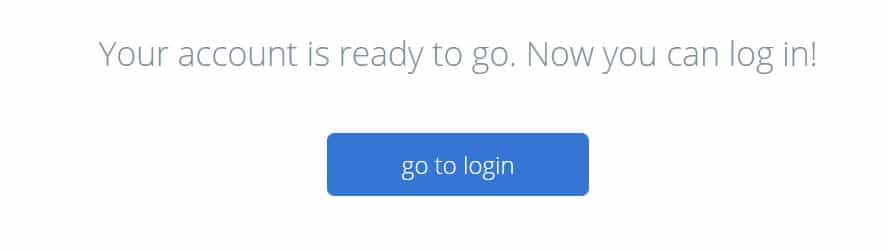
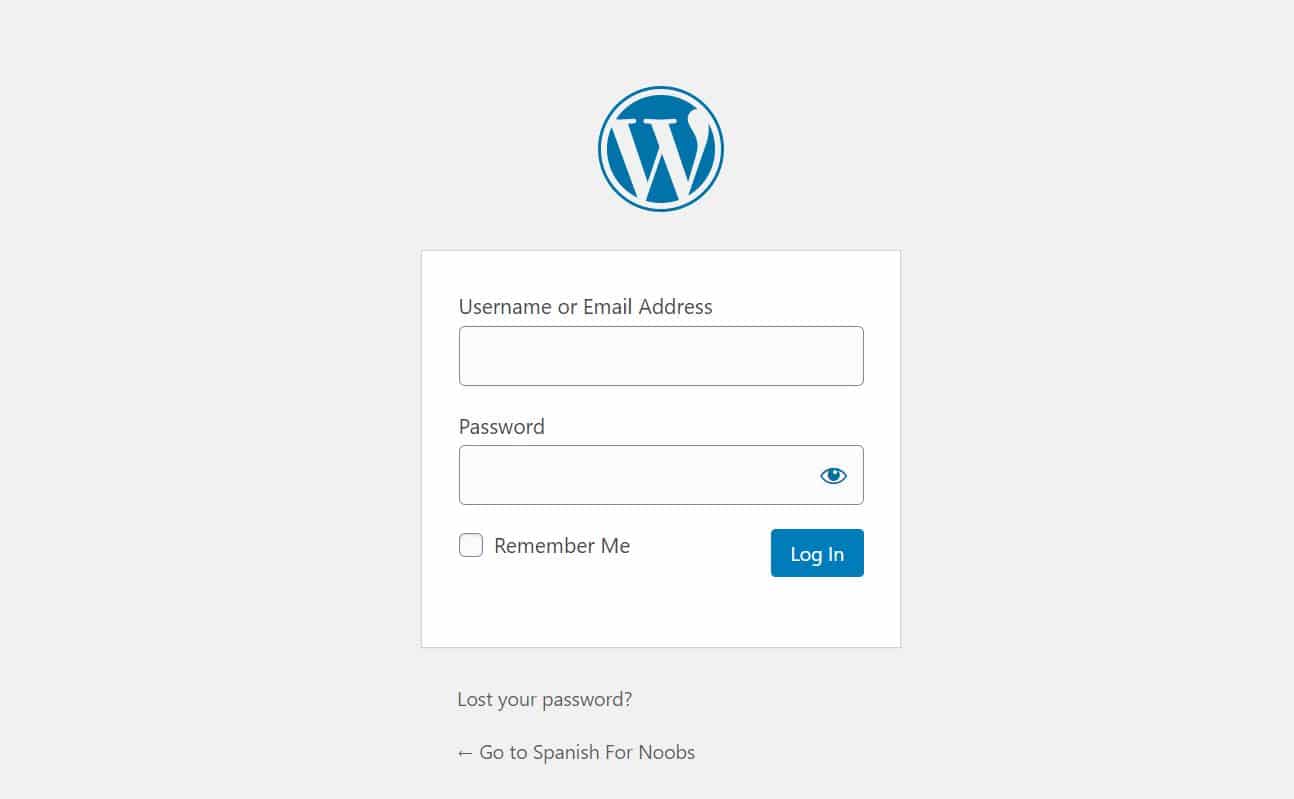
Step 10 – Click on “Login”
Step 11

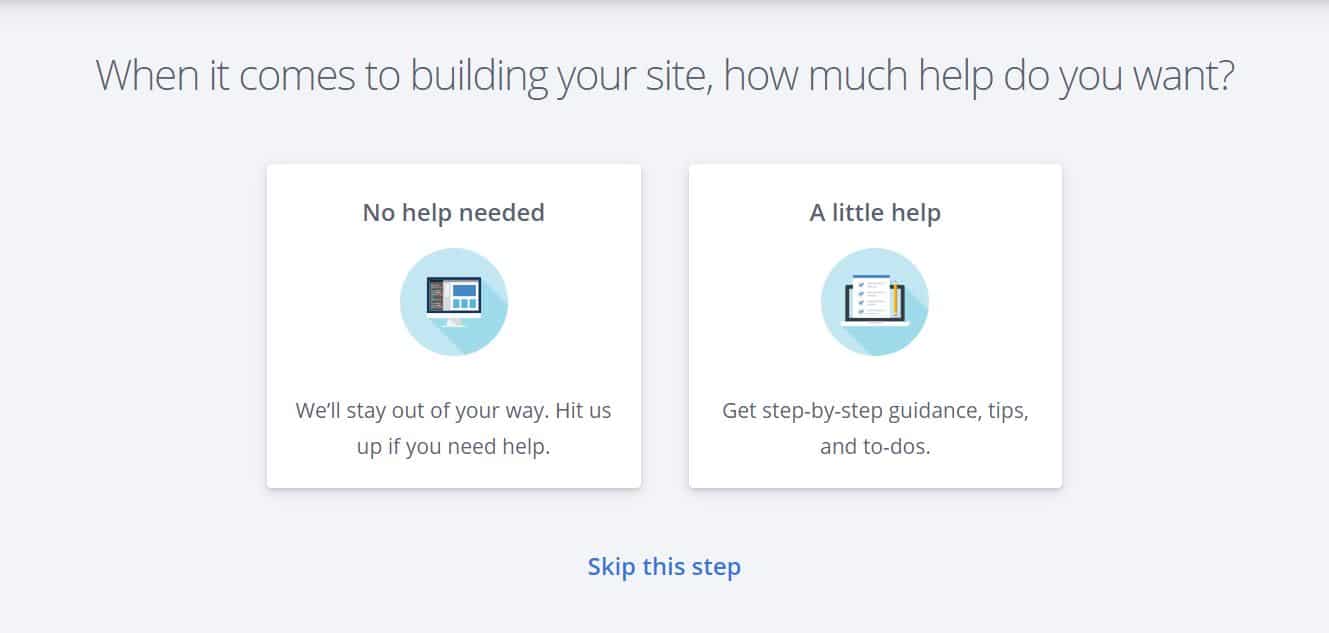
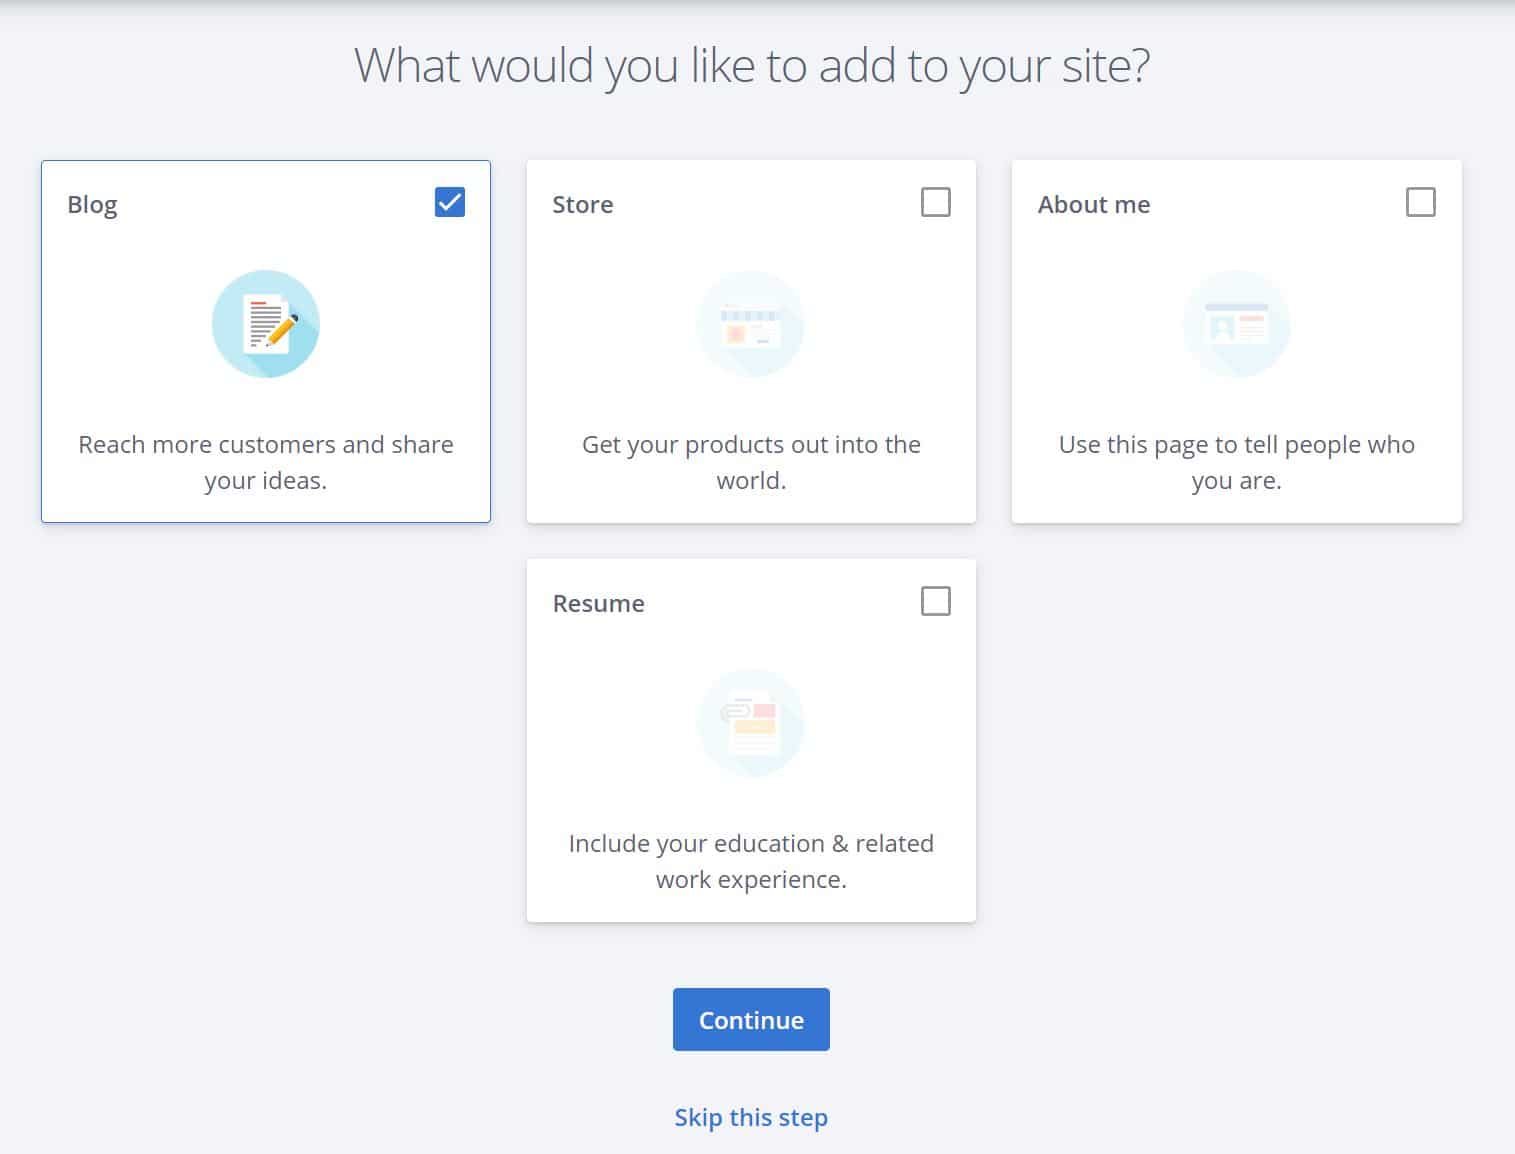
Step 12 – If it’s your first website ever, choose “a little help”
Step 13 – Select “Blog”

Step 14
Step 15
Step 16 – Select “Blog”
Step 17

Step 18 – There’s no need to select a premium theme for now, so select ‘free’ (I’m blogging since 2012 and never paid for a premium theme)

Step 19
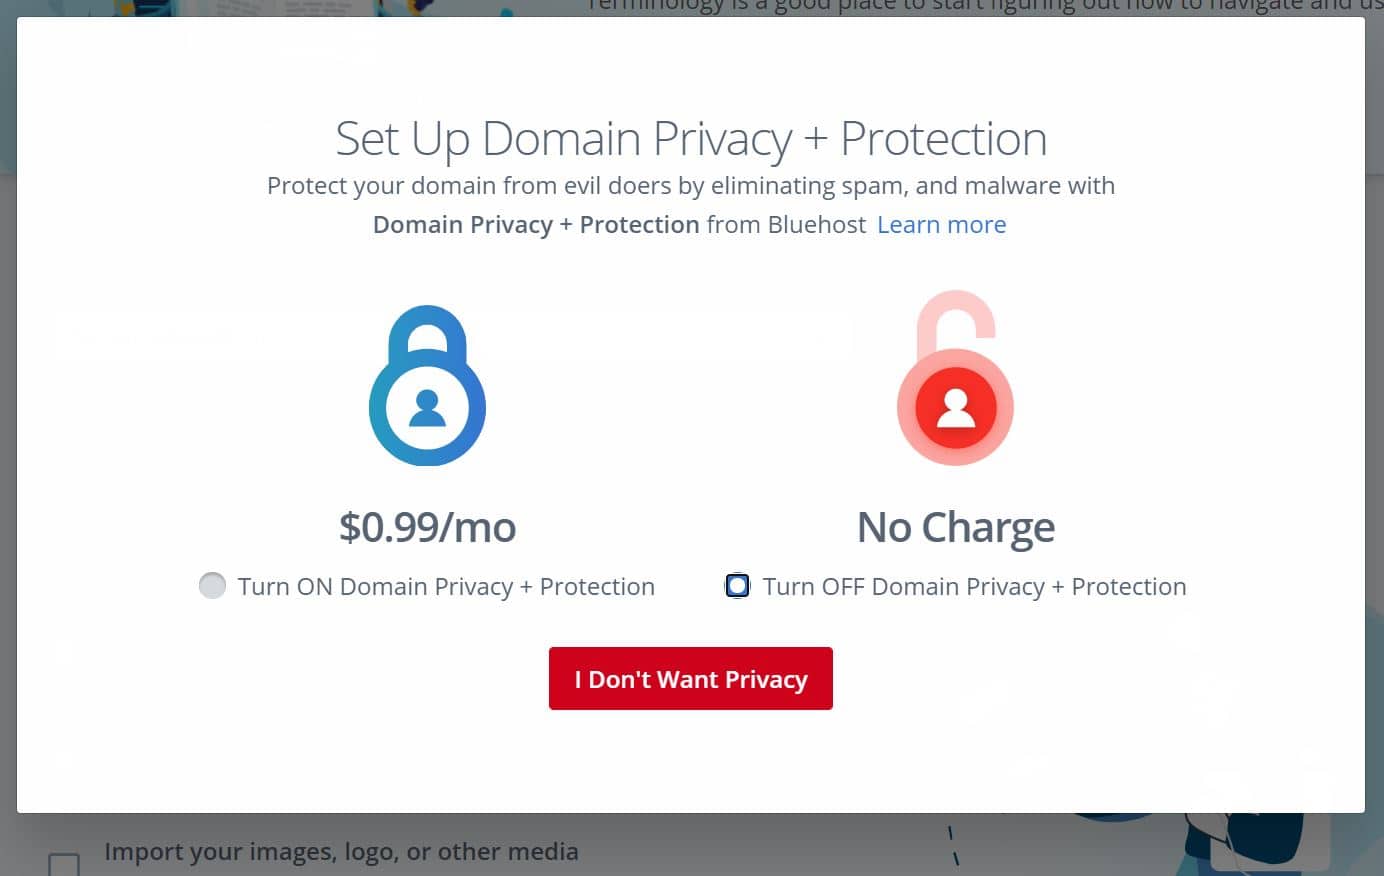
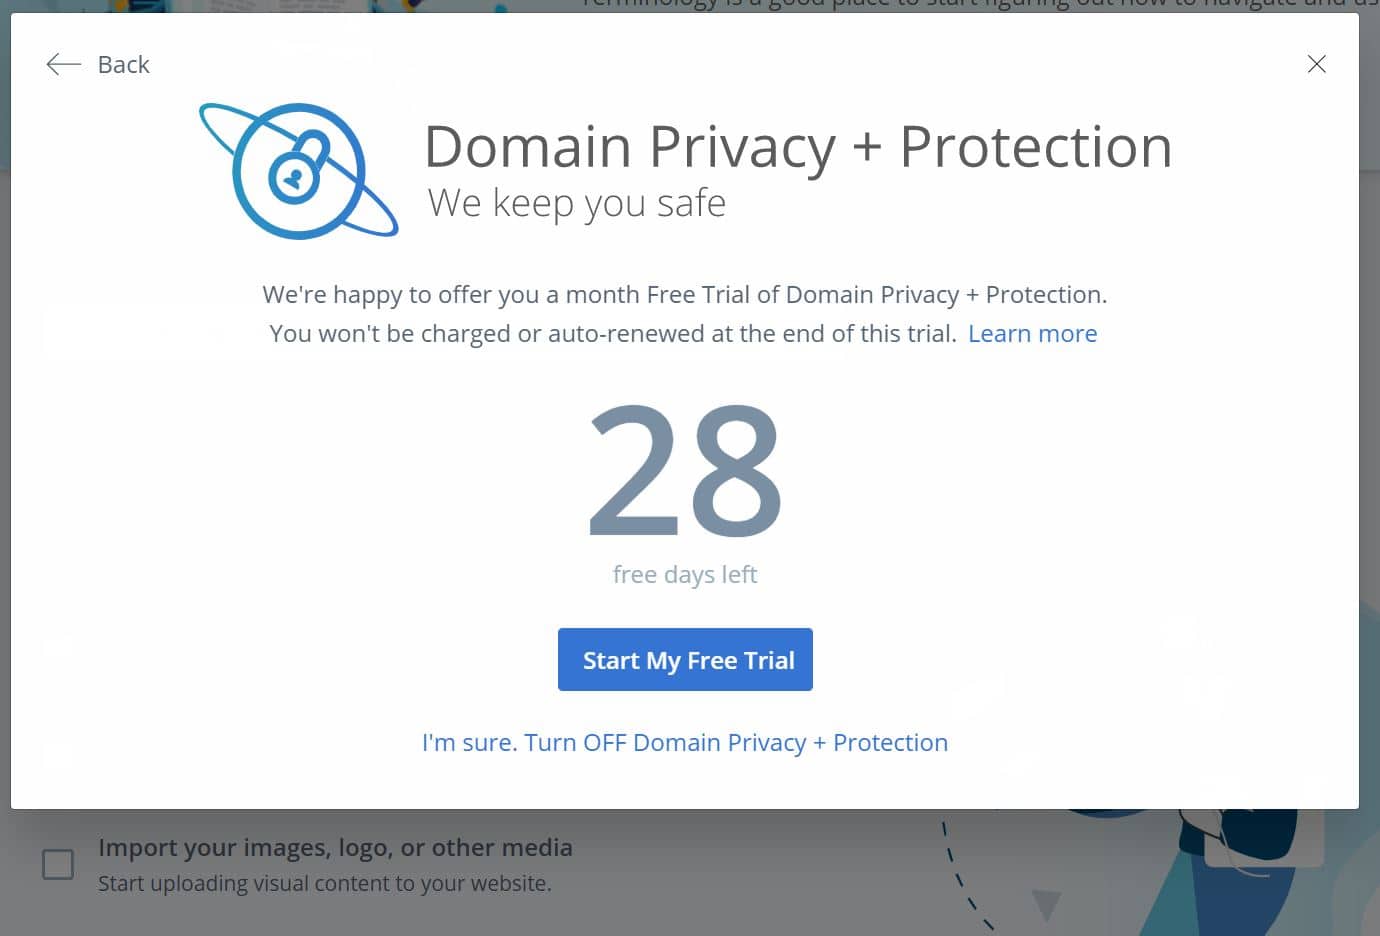
Step 20 – Select “No charge”
Step 21
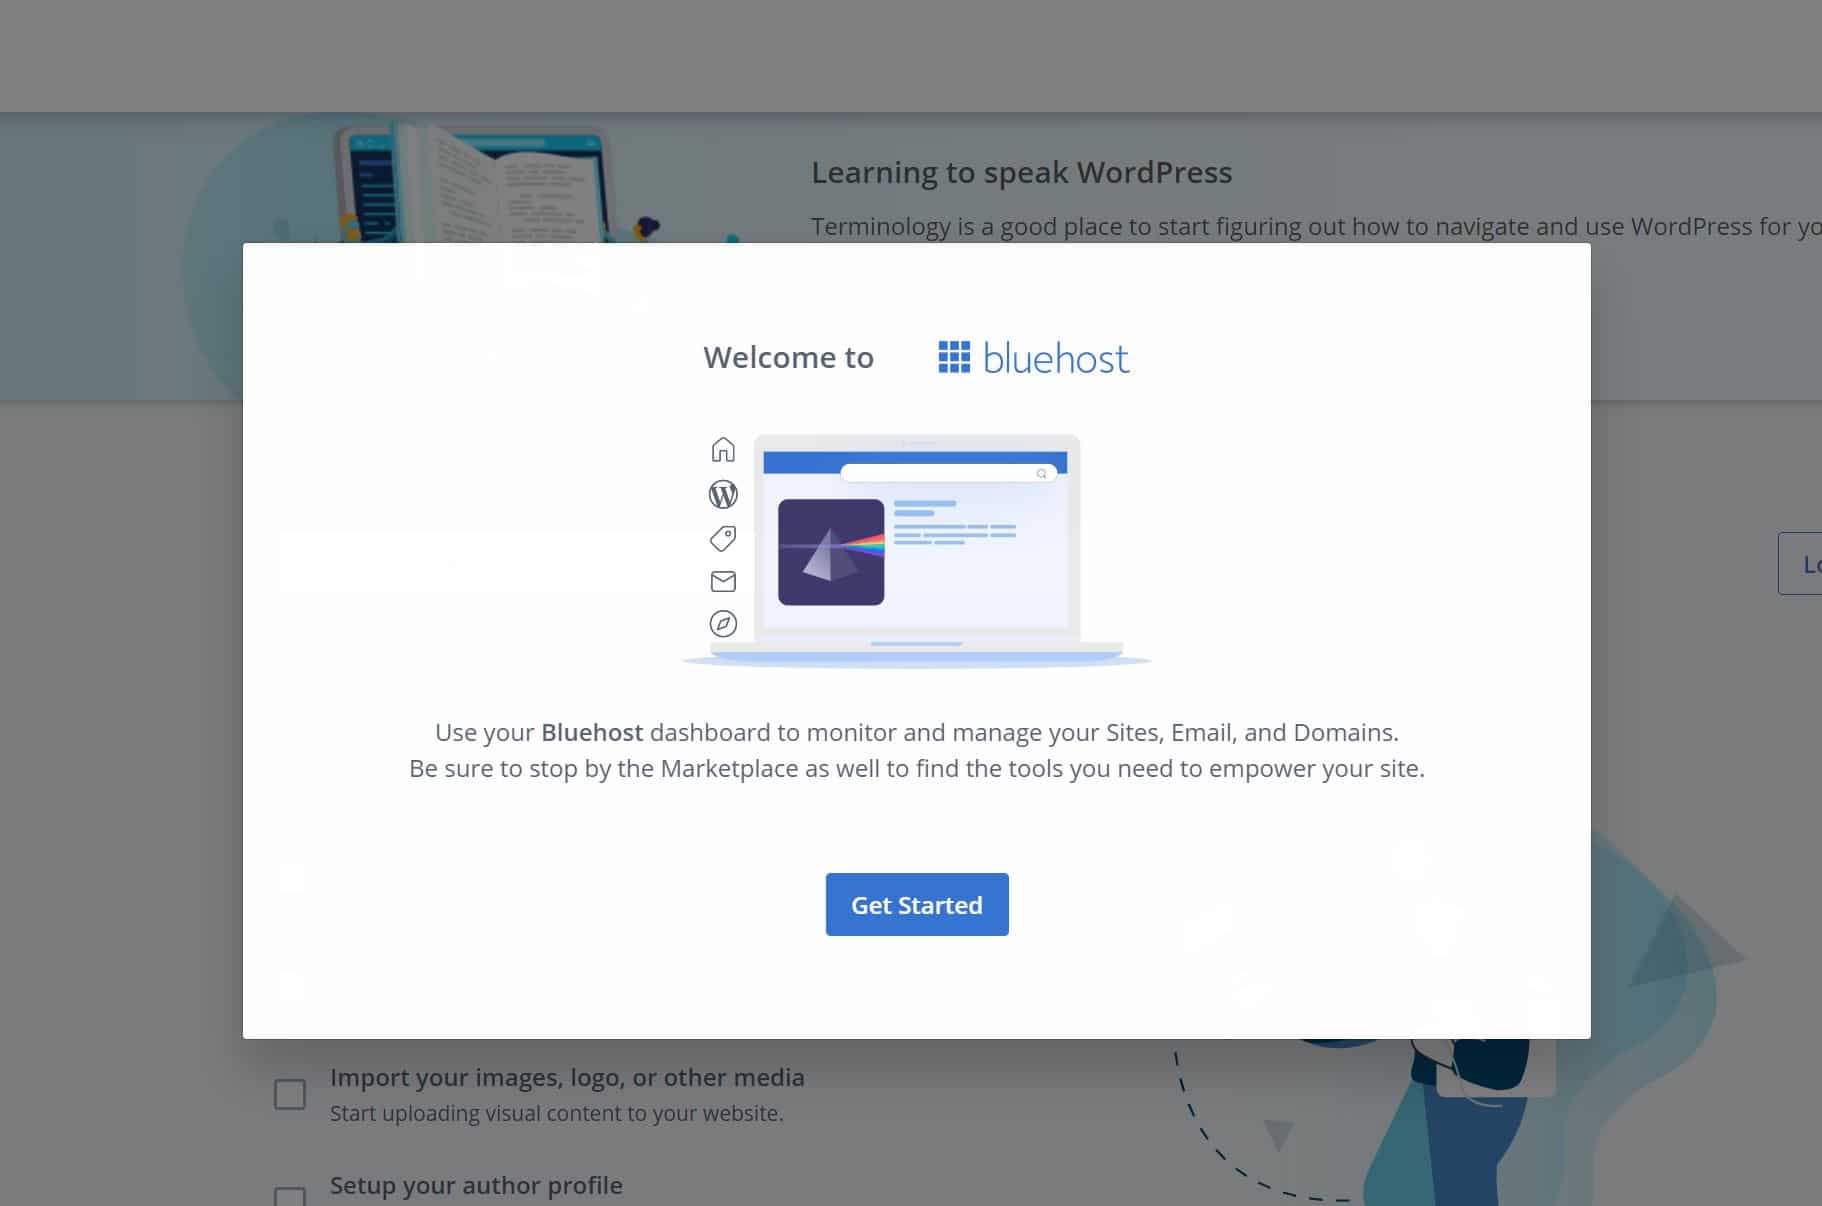
Step 22 : click on “Log in to WordPress”
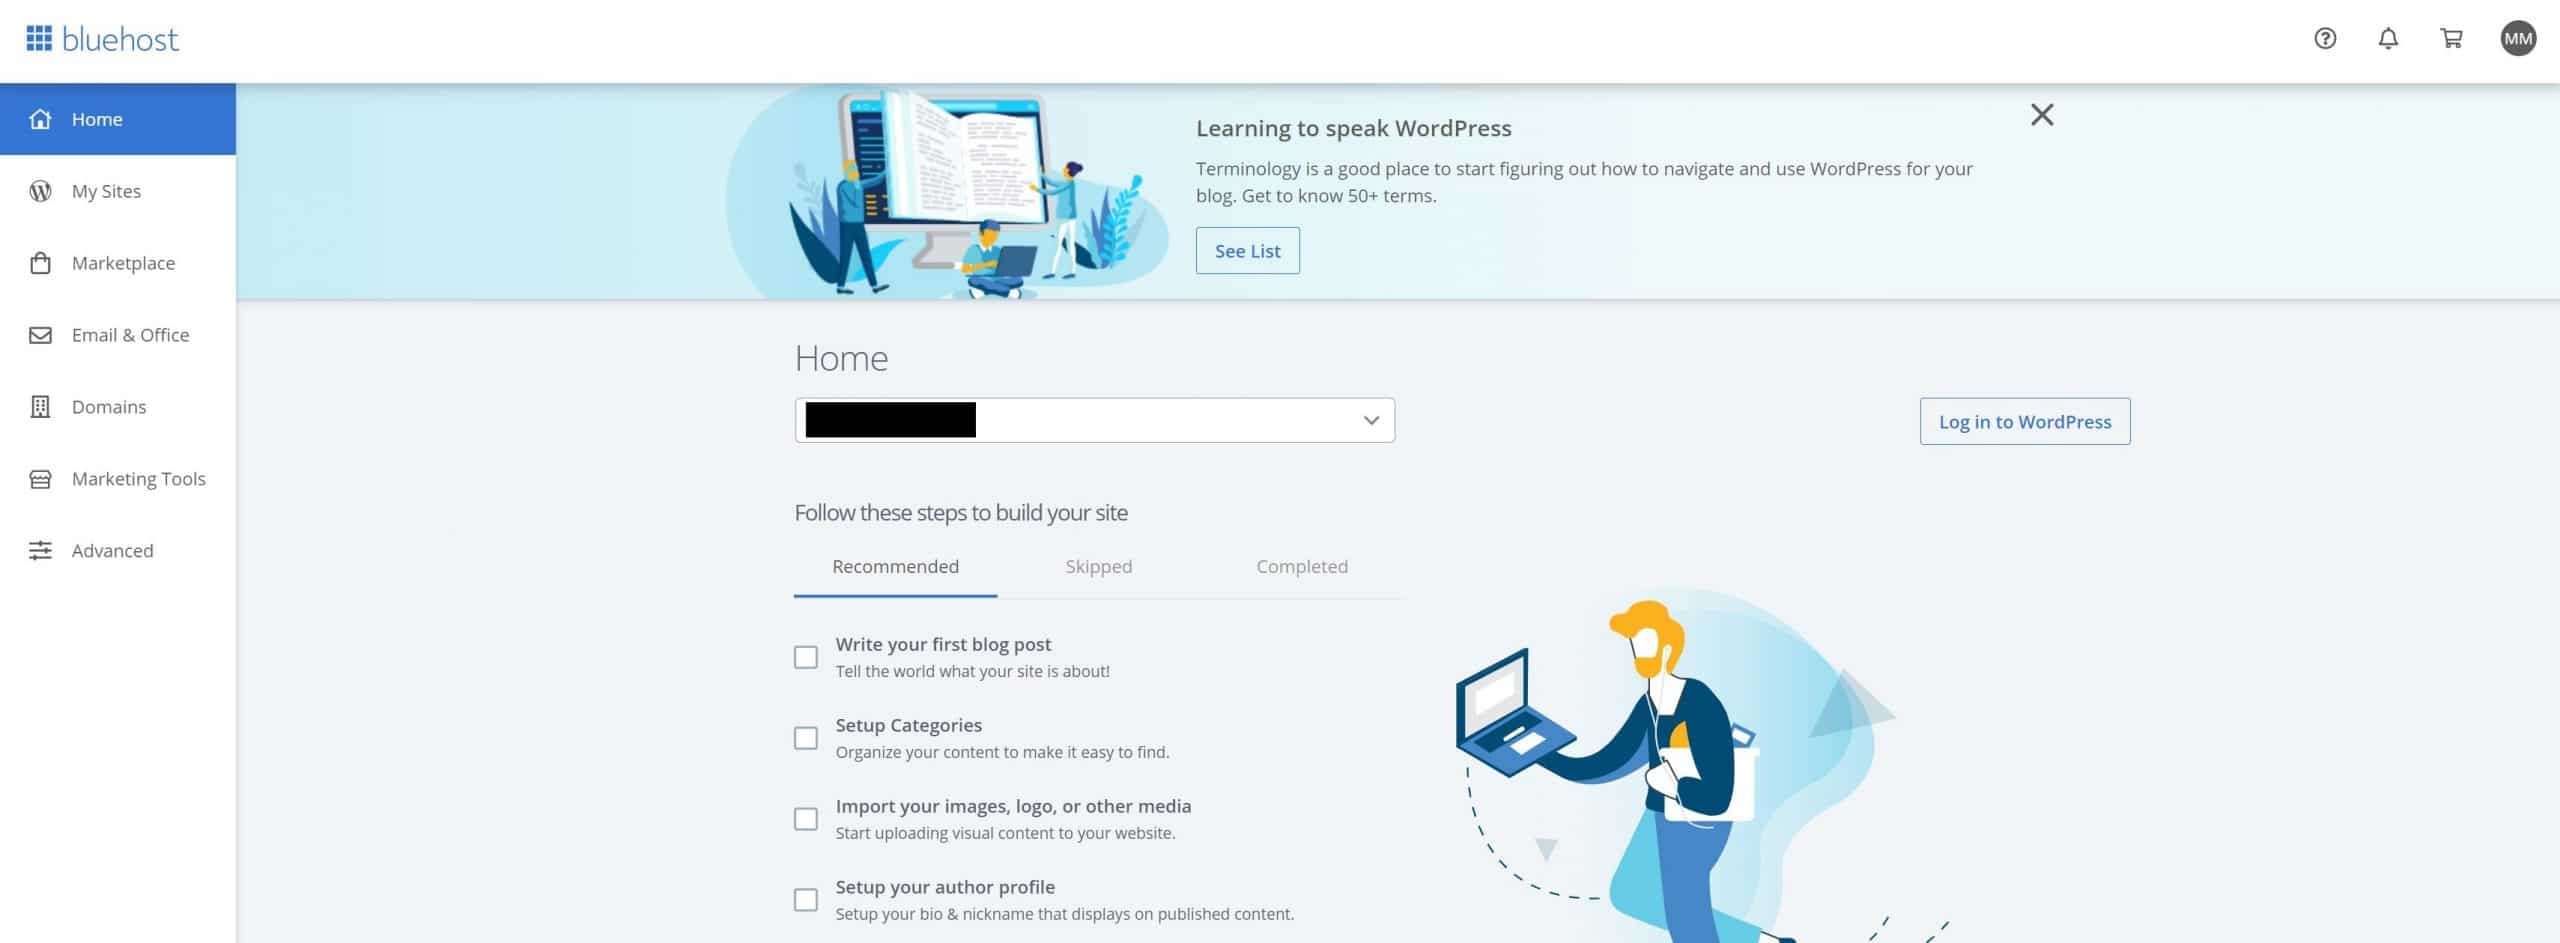
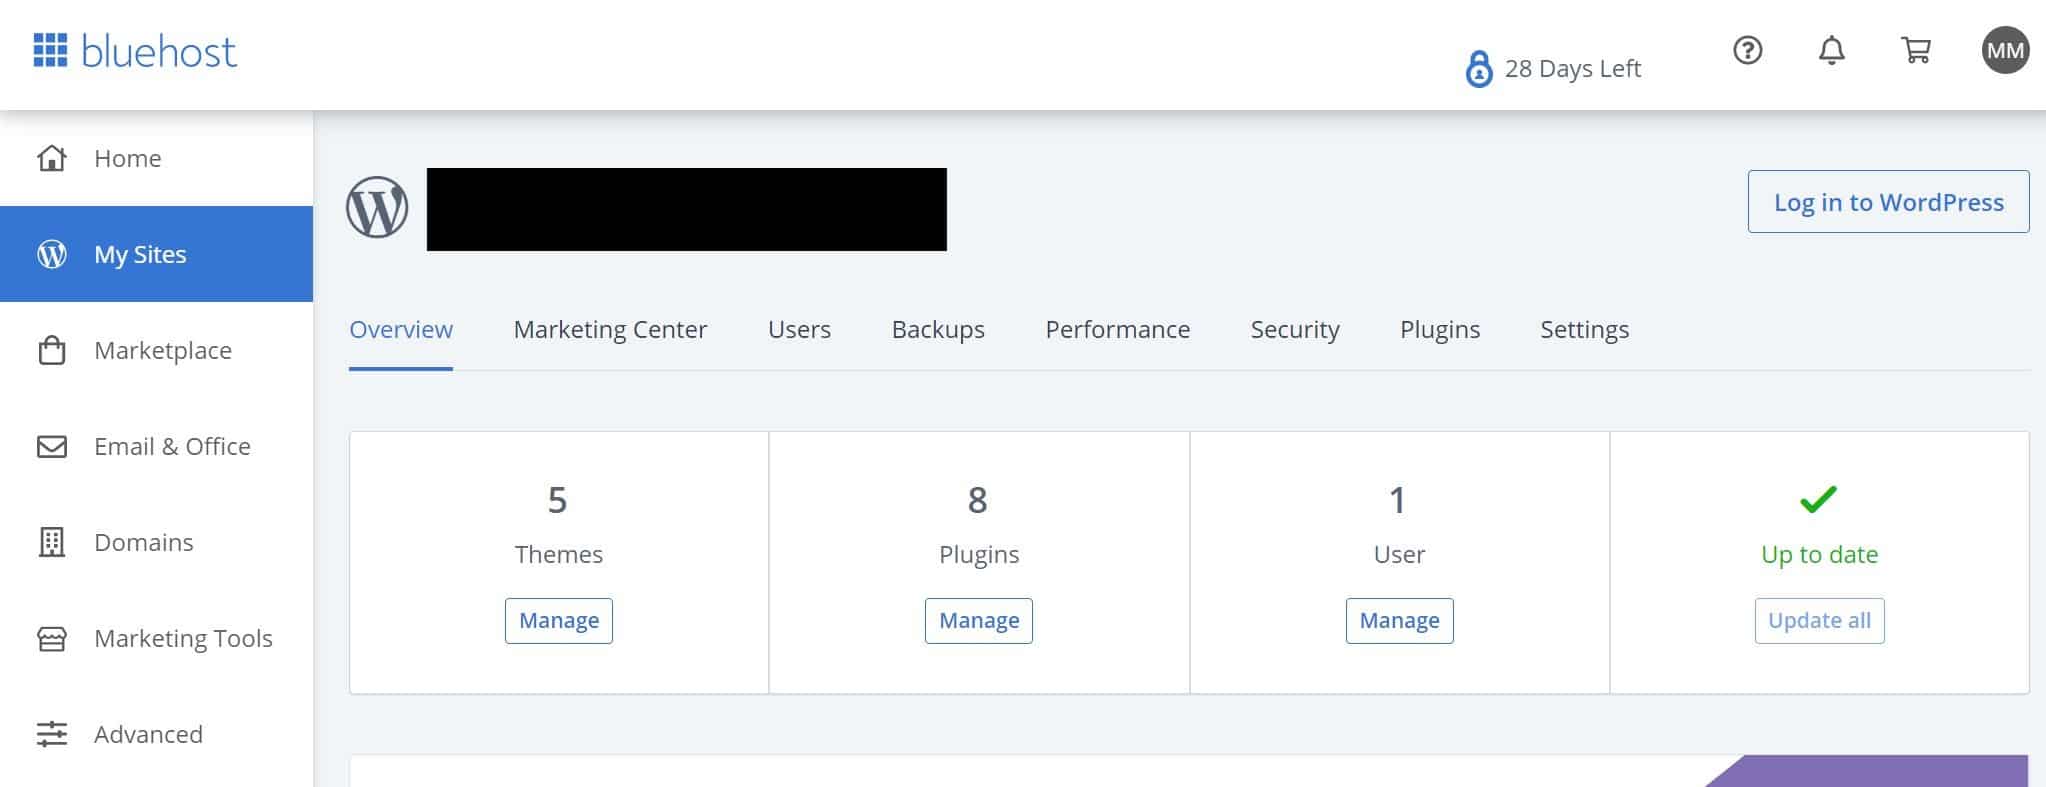
Step 23 : it redirects to your WordPress dashboard
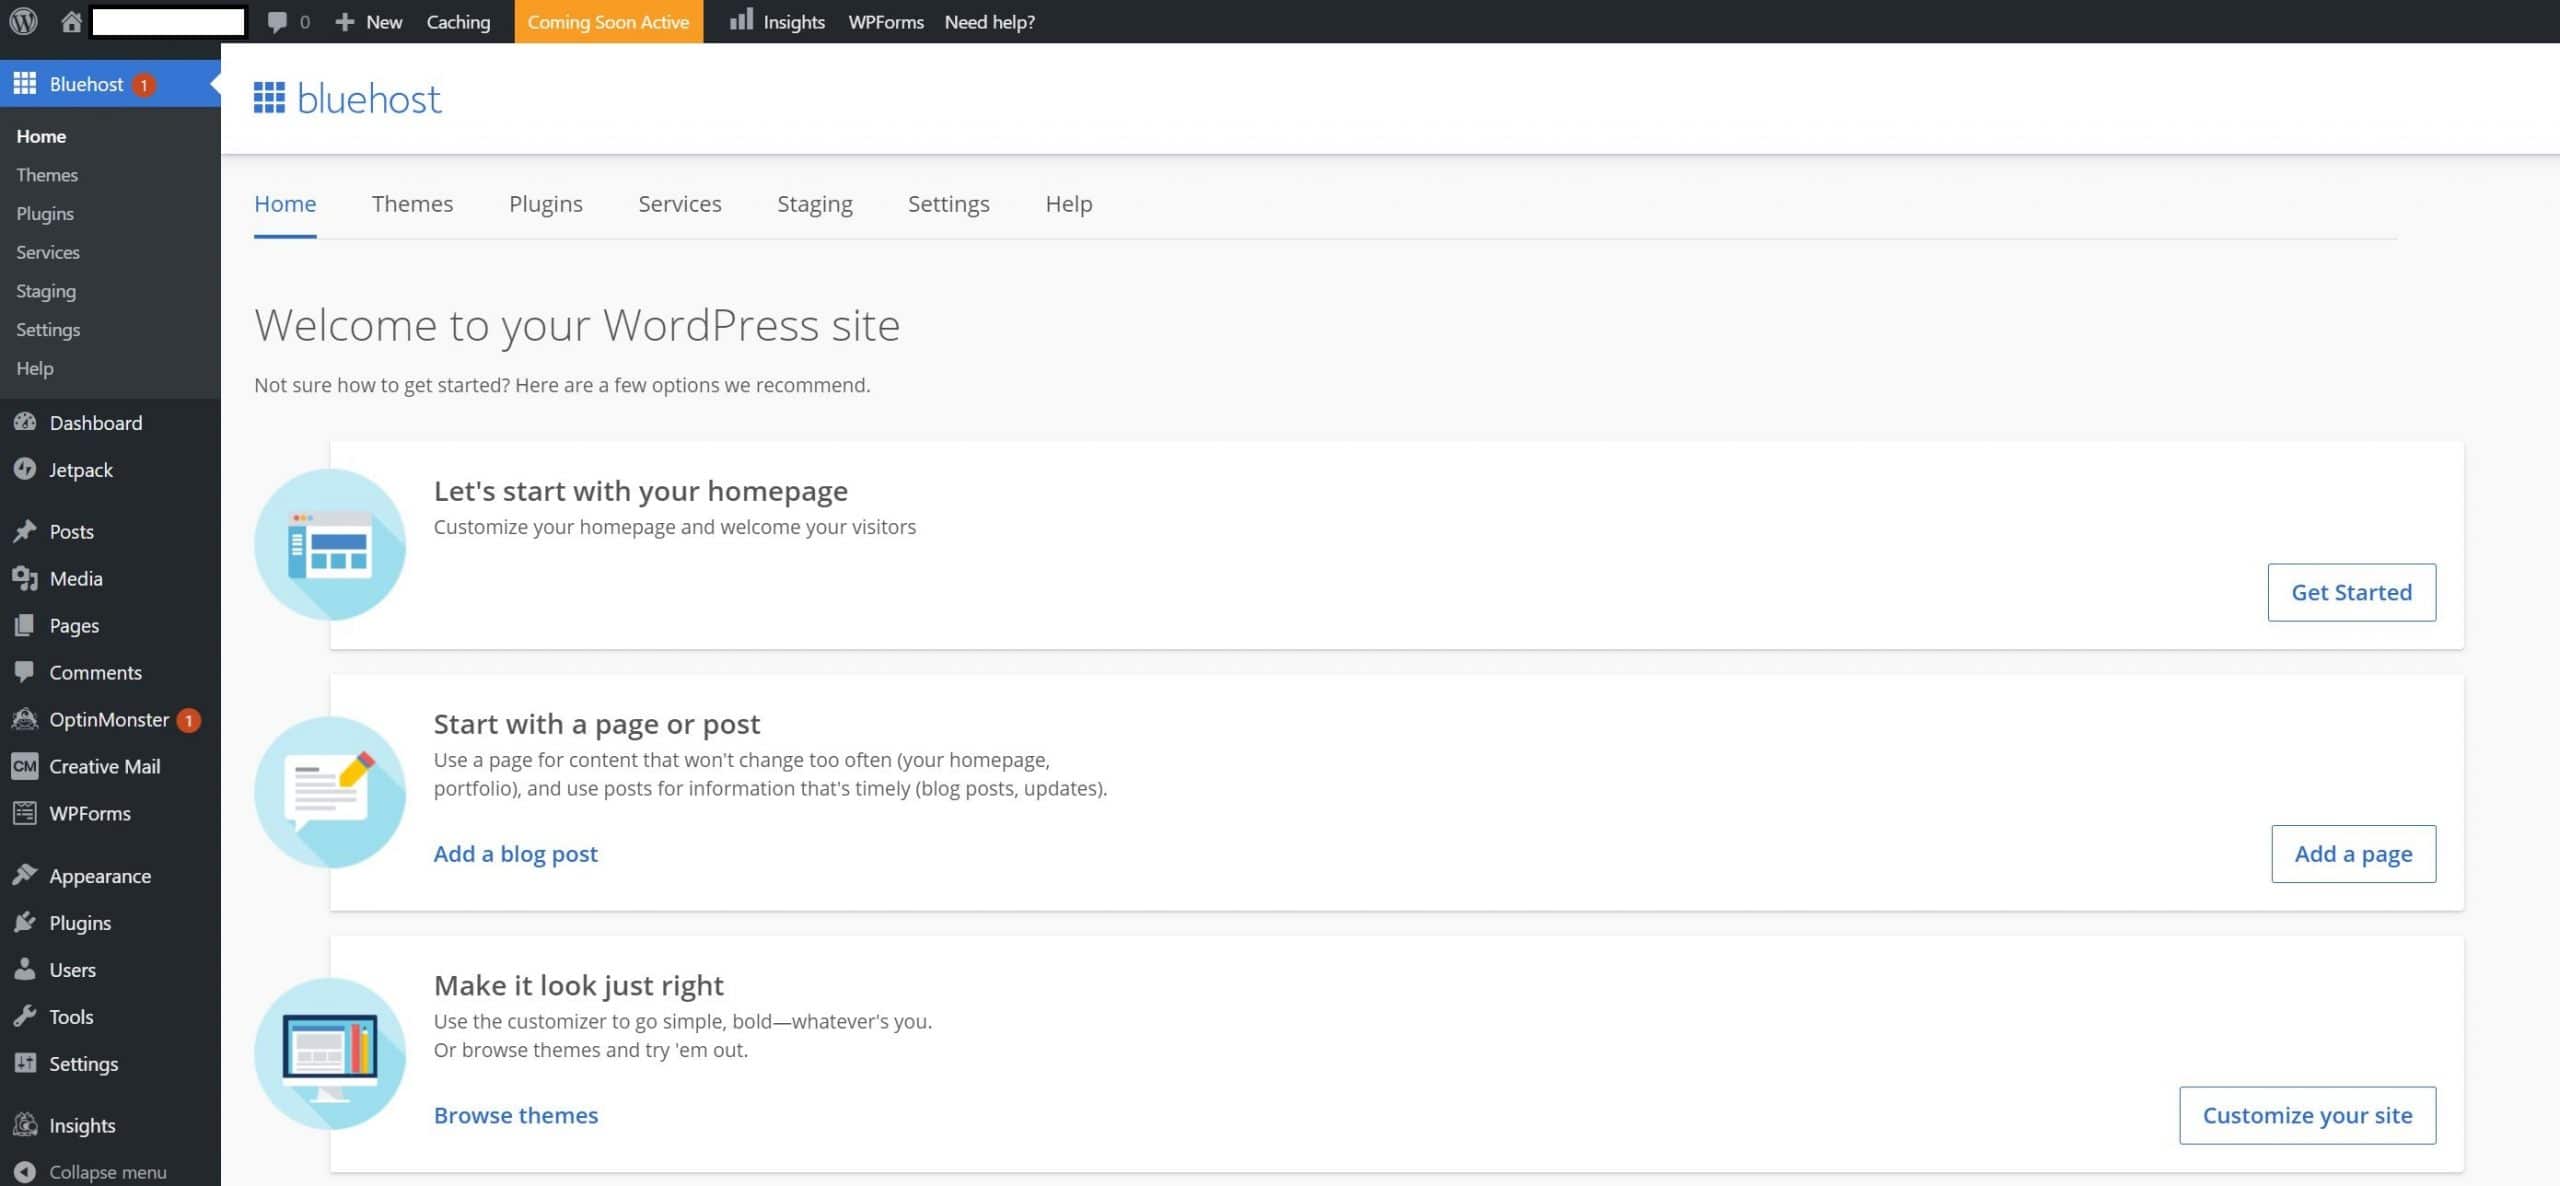
Step 24 : go to “Plugin”
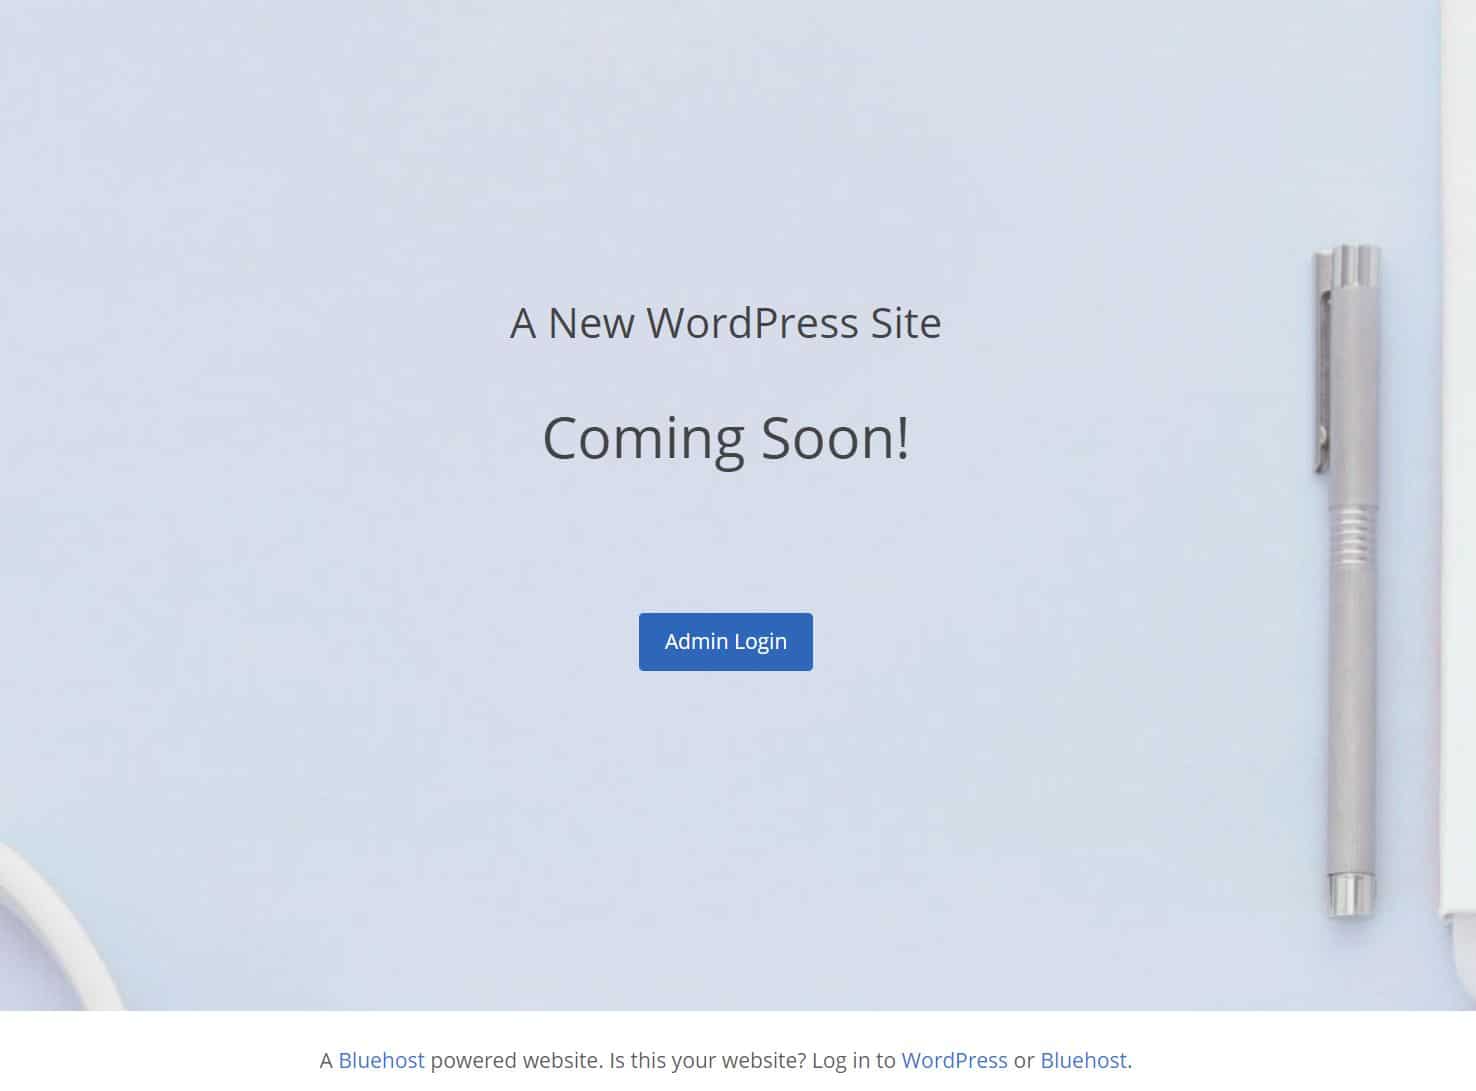
Step 25 : this page shows when you type your new blog url in Google Chrome
Step 26
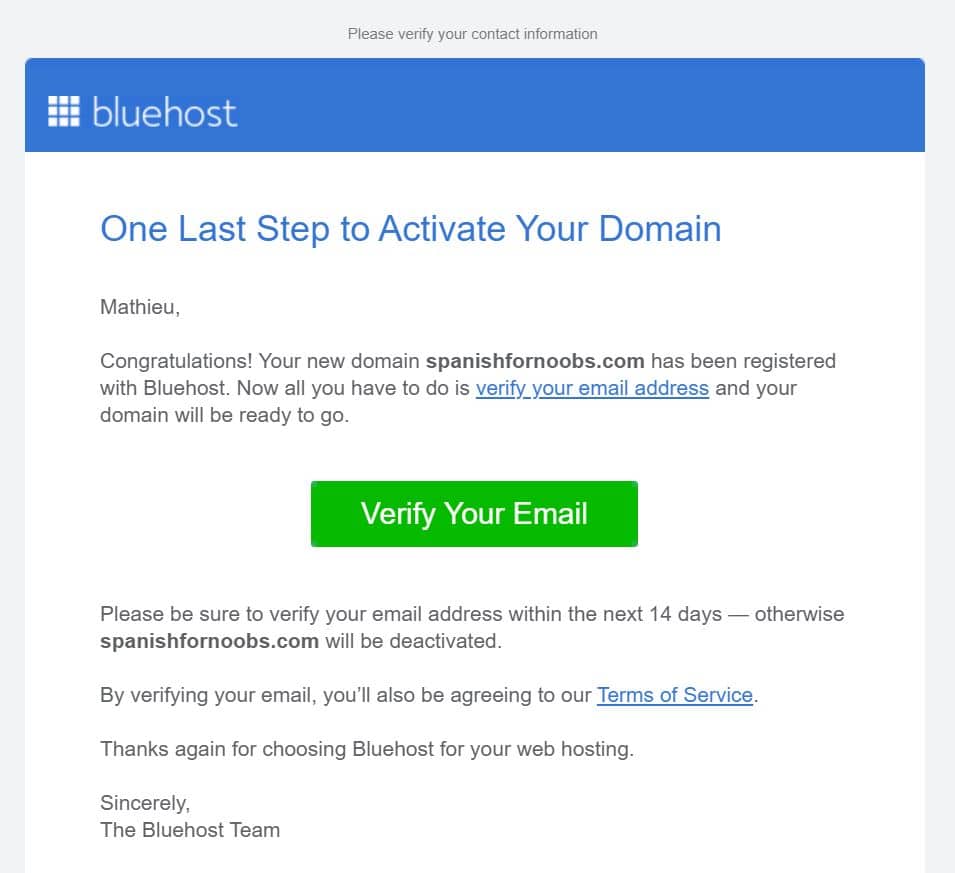
Step 27 : don’t forget to verify your email!
Step 28

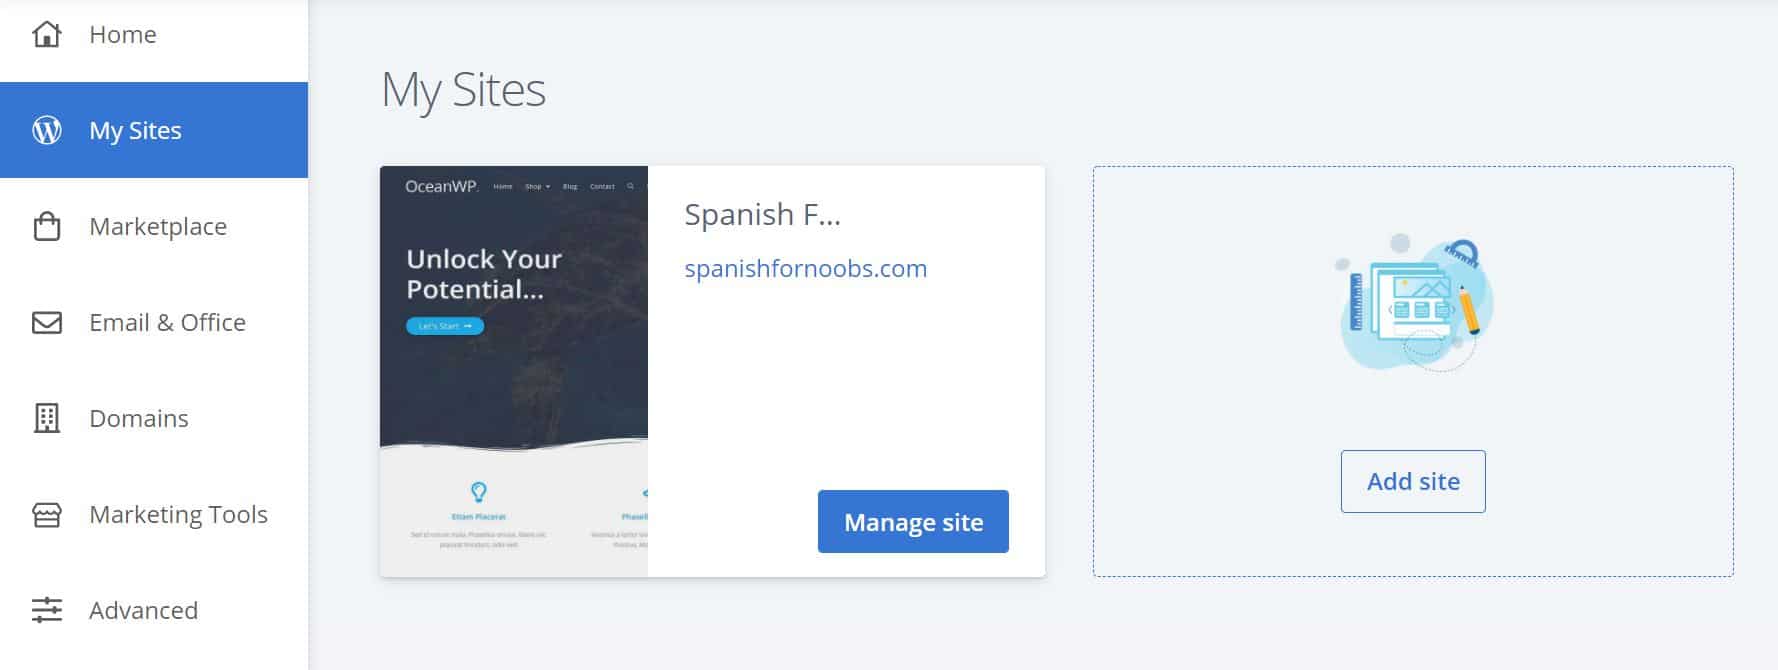
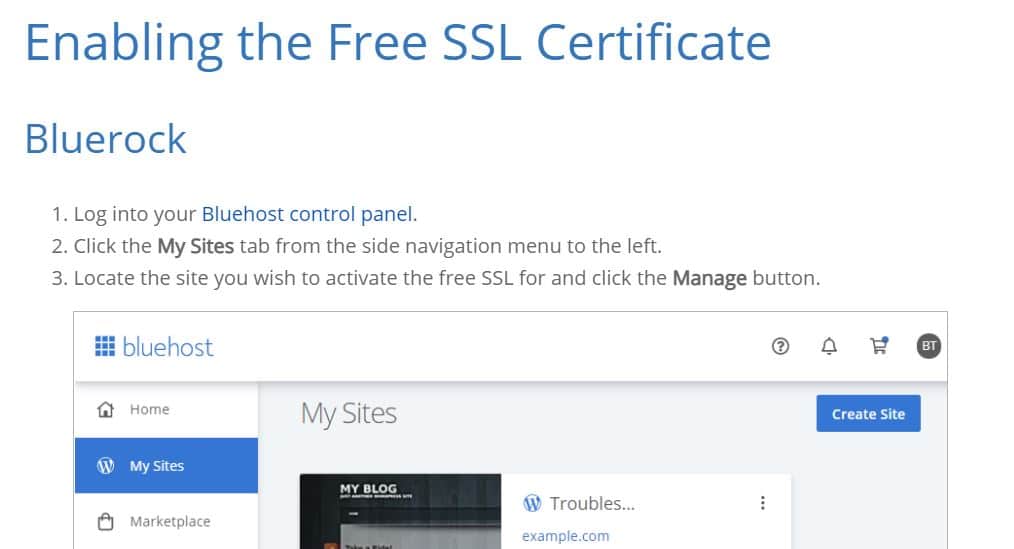
Step 29 : click on “My sites” and “Manage site”
Step 30 : Login to WordPress (upper right corner)
Step 31 : click on “Coming Soon Active” (in orange)
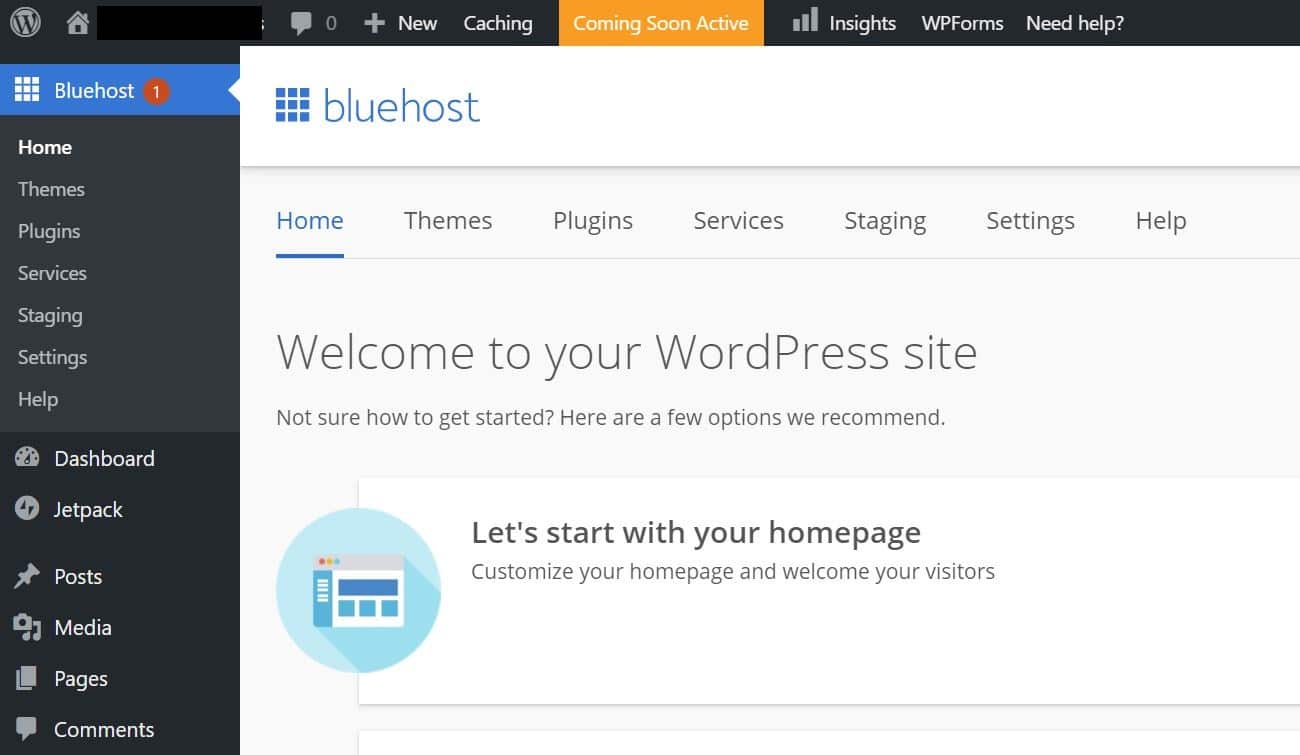
Step 32 : click on “Launch your site”
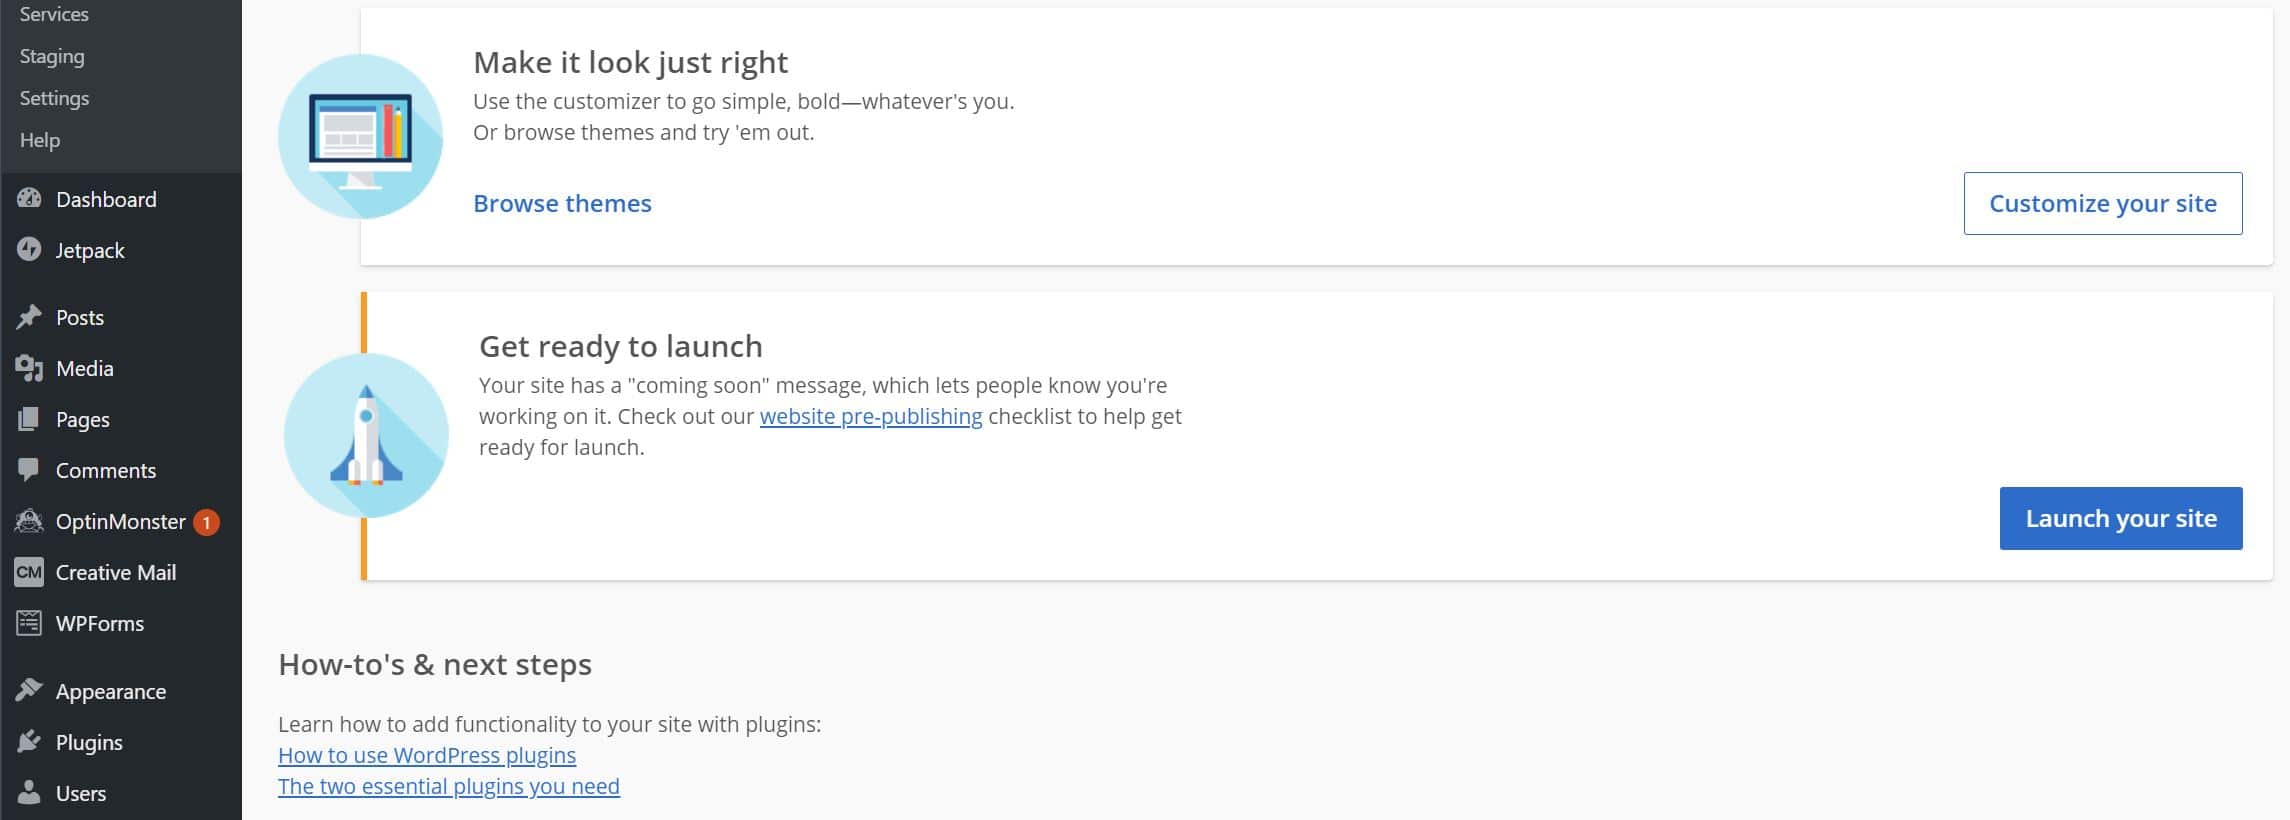
Step 33

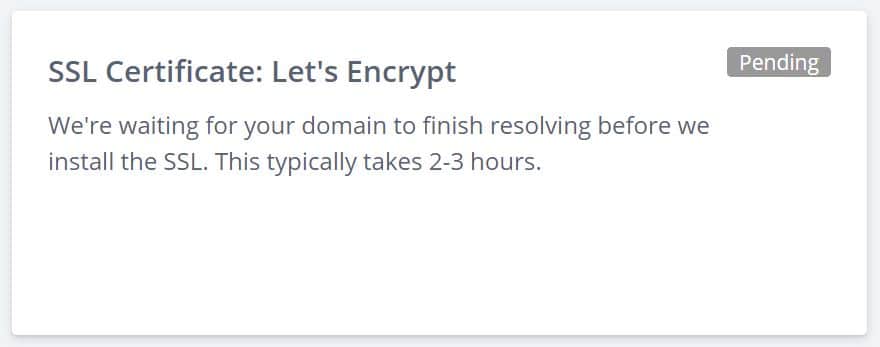
Step 34 : IMPORTANT ! Activate https!!!
Step 35 – Go grab a coffee, you have to wait 2 or 3 hours before your website gets an https certification (so you get the lock at the left of your URL – means that your site is safe for visitors)
WHAT’S NEXT? FINAL THINGS TO DO + TIPS :
How to go to my WordPress Dashboard ? Just enter your website’s name followed by /wp-admin or /wp-login
Ex : https://mytravelblog/wp-admin or https://mytravelblog/wp-login
If your password doesn’t work, just click on : “Error: The password you entered for the username XXX is incorrect. Lost your password?” ; then “get a new password”
_____________________________________________________________________________________________
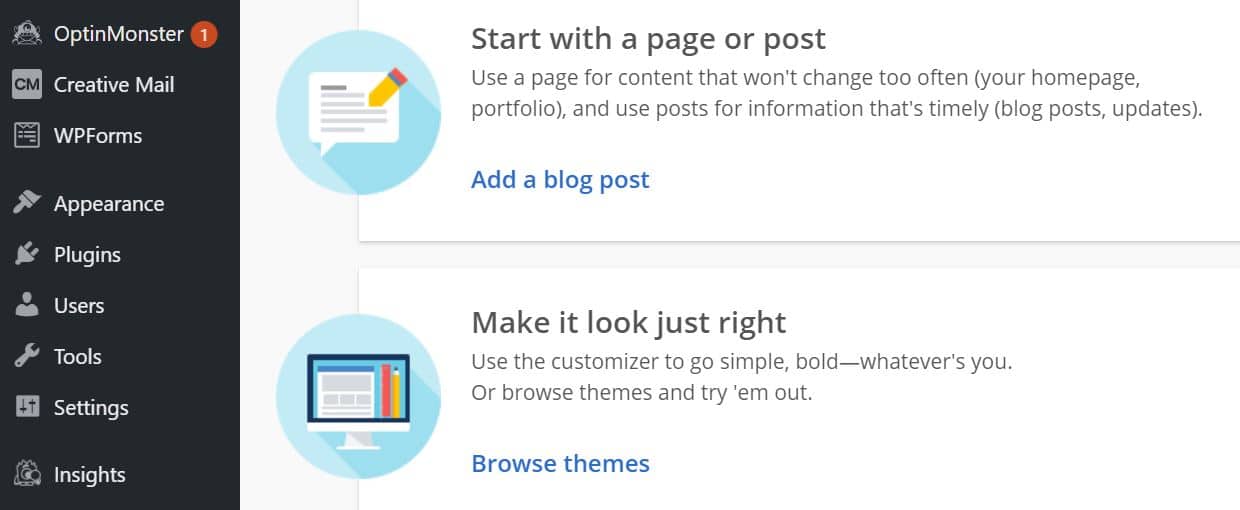
Change or add Plugins:
Go to ‘Plugin’ => ‘add new’
Some useful plugins are : Classic Editor, Contact form, Google Analytics for WordPress by MonsterInsights, etc… (essential plugins list here)
_____________________________________________________________________________________________
Change the Permalink Settings (Very important!)
Go to “Settings” => “Permalinks” => “Common Setings” => “Post name”
_____________________________________________________________________________________________
Custom your homepage
Create a page, go to settings => reading => Your homepage displays => A static page (select below) => Homepage => Select page title
_____________________________________________________________________________________________
Create a menu
First, create the pages you want to see on the main menu then go to Appearance => Menus => In ‘Menu Name’ let’s rename it ‘Main menu’ (or whatever you want). => Click on ‘Create Menu’
In ‘Menu Settings’, select ‘Main Navigation’.
Then add the pages you want in your main navigation menu from the ‘Pages’ column on the left (You can also remove the one that shows in the Menu structure by default (if you want to remove them, click on the down arrow the click on ‘remove’).
_____________________________________________________________________________________________
Check as well: