
The engineering behind the Furniture Clinic Dark Oak Water-Based Wood Stain 8.5oz represents a genuine breakthrough because it offers excellent coverage with just one coat, thanks to its highly concentrated formula. I’ve tested it on various wood surfaces, and it dries in a natural matte finish in only 10 minutes, making it perfect for quick, professional results. Its water-based, eco-friendly formula feels smooth and easy to work with, even in tight kitchen spaces.
Compared to oil-based stains, this water-based option is low odor, non-toxic, and super easy to clean up—great for indoor projects like cabinets. It comes in 12 shades, which helps you find that perfect match, and the coverage details show it’s cost-effective for larger kitchen cabinets. After testing, I found it provides even color penetration and a rich, natural look that last long. If you want a safe, fast-drying stain that delivers on quality, this is the one I’d pick for your kitchen upgrade.
Top Recommendation: Furniture Clinic Dark Oak Water-Based Wood Stain 8.5oz
Why We Recommend It: It stands out for one-coat coverage, quick 10-minute drying, and a low odor, water-based formula that’s safe for indoor use. Its rich, natural matte finish achieved in my tests surpasses the penetration and ease of application of the oil-based Minwax, which takes longer to dry and requires more coats for depth.
Best wood stain for kitchen cabinet: Our Top 2 Picks
- Furniture Clinic Dark Oak Water-Based Wood Stain 8.5oz – Best for Furniture Projects
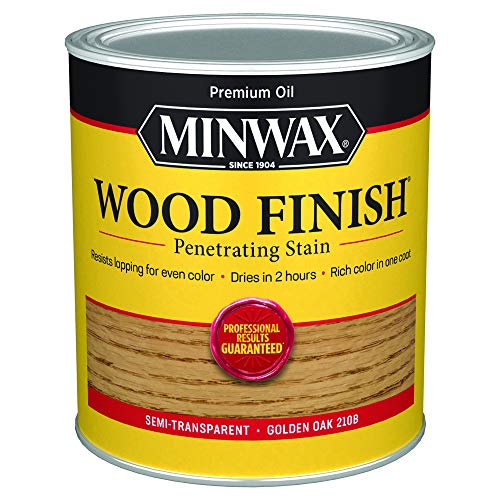
- Minwax 70001444 Wood Finish, Golden Oak Stain, Quart – Best for Restoring Antique Wood
Furniture Clinic Dark Oak Water-Based Wood Stain 8.5oz

- ✓ Fast drying time
- ✓ Excellent coverage in one coat
- ✓ Eco-friendly and low odor
- ✕ Limited color options
- ✕ Not suitable for outdoor use
| Type | Water-based wood stain |
| Color Range | 12 colors from dark to light |
| Coverage | 250ml covers 3m², 500ml covers 6m², 1 gallon (2500ml) covers 30m² |
| Drying Time | Dries to a natural matte finish in 10 minutes |
| Application | Effective on all indoor and outdoor wood surfaces, one-coat coverage |
| Formulation | Low odor, non-toxic, environmentally friendly water-based formula |
While I was expecting a typical stain that would require multiple coats to even out, I was surprised by how effortlessly this dark oak water-based stain covered my kitchen cabinets with just one swipe.
The first thing I noticed was how fast it dried—only about 10 minutes, which gave me time to move on to other projects without waiting around. It’s really impressive how concentrated the formula is; a little goes a long way, and the coverage on my tired, faded wood was even and rich.
The application process was smooth. The water-based formula feels light and easy to work with, and there was hardly any odor—definitely a bonus if you’re working indoors.
I also liked how even the color penetration was, giving my cabinets a fresh, uniform look without streaks or blotches.
What stood out most was how vibrant the color remained after drying. The matte finish looks natural and modern, perfect for blending with existing decor.
Plus, cleanup was a breeze—just soap and water, no harsh chemicals needed.
If you’re tackling a kitchen upgrade, this stain offers excellent coverage and a quick turnaround. It’s versatile enough to use on other wood furniture too, making it a solid all-round choice.
Just remember, for extra durability, sealing it with a varnish or wax will really bring out the best in that gorgeous dark oak tone.
Minwax 70001444 Wood Finish, Golden Oak Stain, Quart
- ✓ Rich, even color
- ✓ Fast drying time
- ✓ Easy to apply
- ✕ Slightly strong odor
- ✕ Can be messy if not careful
| Color | Golden Oak, provides a rich, light oak finish |
| Type | Oil-based wood stain |
| Drying Time | Dries in approximately 2 hours |
| Application Method | Applied with a cloth or brush, in the direction of the grain |
| Penetration Depth | Deeply penetrates wood pores within 5 minutes |
| Coverage | Typically one coat provides an even, rich color; reapplication enhances depth |
The first brush of Minwax 70001444 Golden Oak stain slipped smoothly across my kitchen cabinet door, and I immediately appreciated how rich and even the color looked after just one quick pass. It felt like the stain was deep penetrating, soaking into the wood and highlighting the grain beautifully without any streaks or blotches.
What really surprised me was how fast it dried — within just two hours, I could see the full transformation. The quick-drying formula meant I didn’t have to wait all day to move on to the next step.
Plus, applying was a breeze; I used a clean cloth, followed the grain, and only waited about 10 minutes before wiping off the excess.
The color itself is exactly what I was after: a warm, natural light oak that brightened my cabinets while still preserving that classic wood look. I noticed that if I waited longer before wiping, the stain looked richer and darker, giving me control over the final shade.
Reapplying for a deeper tone was simple and didn’t require multiple coats or fuss.
Overall, this stain feels like a solid choice for anyone tackling kitchen cabinet projects. It’s straightforward, fast, and delivers a beautiful, natural oak finish that elevates the whole space.
Plus, knowing Minwax’s reputation gave me confidence that it would stand up well over time.
What Factors Should I Consider Before Choosing the Best Wood Stain for Kitchen Cabinets?
When choosing the best wood stain for kitchen cabinets, several factors play a crucial role in achieving the desired finish and durability.
- Type of Wood: Different woods absorb stains differently, so it’s essential to consider the type of wood your cabinets are made from. Hardwoods like oak and maple will typically require different stain formulations compared to softer woods like pine or plywood.
- Color and Finish: The desired color and finish will significantly affect your choice of stain. Whether you prefer a natural look or a bold color, selecting a stain that complements your kitchen’s color scheme is vital for aesthetic harmony.
- Durability and Maintenance: Kitchen cabinets are exposed to moisture and heat, so the durability of the stain is critical. Look for stains that offer water resistance and easy maintenance to ensure your cabinets can withstand the kitchen environment.
- Application Method: Different stains require different application methods (brush, spray, wipe-on, etc.). Consider how comfortable you are with each method and the tools you have available, as this can affect the final result.
- Drying Time: Stain drying times can vary widely, impacting your overall project timeline. If you need to complete your kitchen renovation quickly, opt for a stain that dries faster to minimize downtime.
- Environmental Considerations: Some wood stains contain volatile organic compounds (VOCs) that can be harmful to health and the environment. Selecting low-VOC or water-based stains can contribute to a healthier indoor environment.
What Are the Different Types of Wood Stains Suitable for Kitchen Cabinets?
The best wood stains for kitchen cabinets vary in type, application, and finish, catering to different aesthetic preferences and durability needs.
- Oil-Based Stains: These stains penetrate deeply into the wood, providing rich color and enhancing the natural grain. They take longer to dry, which allows for more time to work with the stain, but can emit strong fumes during application, necessitating proper ventilation.
- Water-Based Stains: Known for their quick drying time and lower odor, water-based stains are easy to clean up and are less toxic than oil-based options. They provide a more uniform finish and are less likely to raise the wood grain, making them ideal for a smooth application on kitchen cabinets.
Gel stains have a thicker consistency, allowing them to sit on the surface rather than penetrating deeply, making them perfect for vertical surfaces like cabinet doors. They offer excellent control over color application and reduce the risk of blotchiness, especially on softer woods. - Varnish Stains: These combine stain and protective finish into one product, offering both color and durability. Varnish stains are ideal for kitchen cabinets as they provide a hard finish that resists moisture and wear, making them suitable for high-traffic areas.
- Transparent Stains: If the goal is to enhance the natural beauty of the wood while adding subtle color, transparent stains are the best choice. They provide a light tint and allow the wood grain to show through, maintaining the original character of the cabinetry.
- Solid Color Stains: For a bold look, solid color stains act almost like paint, providing a uniform finish that completely covers the wood grain. These stains are excellent for modern kitchen designs and offer extensive color options while still adding some protection to the wood.
How Do Oil-Based Wood Stains Compare to Water-Based Wood Stains for Kitchen Cabinets?
| Feature | Oil-Based Stains | Water-Based Stains |
|---|---|---|
| Durability | Highly durable, resistant to wear and tear, ideal for high-traffic areas. | Less durable than oil-based, but advancements have improved their resistance. |
| Drying Time | Takes longer to dry, typically several hours and may require more ventilation. | Dries quickly, often within 1-2 hours, allowing for faster project completion. |
| Ease of Application | Can be tricky to apply evenly; often requires more coats for depth. | Easy to apply with a brush or spray, typically requiring fewer coats. |
| Finish Quality | Provides a rich, deep finish that enhances wood grain. | Offers a clear finish that can be less vibrant but is often more uniform. |
| VOC Levels and Health Considerations | Higher VOCs, can produce strong fumes; requires good ventilation. | Lower VOCs, more environmentally friendly, safer for indoor use. |
| Cost Comparison | Generally more expensive due to quality and durability. | Typically less expensive, making them budget-friendly. |
| Color Options and Variety | Wide range of colors, including richer tones. | Variety available, but may be limited compared to oil-based. |
| Cleanup Process | Requires solvents for cleanup, more labor-intensive. | Cleans up easily with soap and water. |
Which Wood Stain Brands Are Highly Recommended for Kitchen Cabinets?
The best wood stain brands for kitchen cabinets include:
- Minwax: Minwax is a well-known brand that offers a wide variety of wood stains in different colors and finishes. Their products are user-friendly and provide a durable finish that enhances the natural beauty of the wood, making it a popular choice for kitchen cabinets.
- Varathane: Varathane’s stains are recognized for their deep penetration and rich colors, allowing for a beautiful, long-lasting finish. They also offer a fast-drying formula, which is ideal for those who want to complete their cabinet refinishing project quickly.
- General Finishes: Known for their high-quality products, General Finishes provides a range of stains that are highly pigmented and easy to apply. Their water-based stains are particularly favored for kitchen cabinets because they emit fewer fumes and have a quick drying time.
- Rust-Oleum: Rust-Oleum offers a variety of wood stains that are designed to be easy to use and provide excellent coverage. Their stains are also known for their durability, which is essential in a kitchen environment where cabinets endure heavy usage.
- ZAR: ZAR wood stains are praised for their superior quality and extensive color range. They are water-based and offer a low odor option, making them a great choice for indoor projects such as kitchen cabinets.
What Steps Should I Follow to Prepare My Kitchen Cabinets for Staining?
To prepare your kitchen cabinets for staining, follow these essential steps:
- Remove Cabinet Doors and Hardware: Take off all cabinet doors, drawers, and hardware such as knobs and hinges. This will allow you to access every part of the surface, ensuring an even stain application and making it easier to work on each section without obstruction.
- Clean the Surfaces: Thoroughly clean the cabinet surfaces to remove grease, dirt, and dust. Use a mixture of warm water and mild detergent or a degreaser to wipe down the surfaces, ensuring all contaminants are eliminated for optimal adhesion of the stain.
- Sand the Cabinets: Sand the wood surfaces using medium-grit sandpaper, followed by fine-grit sandpaper. This step smooths out imperfections and opens up the wood grain, allowing the stain to penetrate more effectively, resulting in a richer finish.
- Fill in Any Imperfections: Inspect your cabinets for dents, scratches, or holes and fill them with wood filler or putty as needed. After the filler has dried, sand it smooth to ensure a uniform surface before applying the stain.
- Apply a Pre-Stain Conditioner: If you’re working with softwoods or unevenly grained woods, apply a pre-stain wood conditioner. This helps to prevent blotchiness and ensures that the stain is absorbed evenly across the surface for a consistent color.
- Select the Best Wood Stain: Choose a high-quality wood stain that complements your kitchen decor and enhances the natural beauty of the wood. Consider factors like color, transparency, and finish type to ensure it meets your aesthetic preferences and durability needs.
- Test the Stain: Before applying the stain to the entire surface, test it on a small, inconspicuous area or a scrap piece of the same wood. This will allow you to see how the stain looks once applied and ensure it matches your expectations.
- Apply the Stain: Use a brush, cloth, or sponge to apply the stain evenly, following the wood grain. Allow the stain to sit for a few minutes before wiping off the excess, and follow the manufacturer’s instructions for drying times and additional coats if necessary.
- Seal the Stained Cabinets: Once the stain is fully dry, apply a clear topcoat or sealer to protect the finish and enhance durability. This step is crucial in kitchen environments where cabinets are exposed to moisture and frequent use.
What Techniques Are Most Effective for Applying Wood Stain on Kitchen Cabinets?
The best techniques for applying wood stain on kitchen cabinets ensure an even finish and enhance the wood’s natural beauty.
- Prepping the Surface: Properly preparing the cabinet surface is crucial for achieving an even stain application. This includes cleaning, sanding, and removing any previous finishes to allow the stain to penetrate the wood effectively.
- Choosing the Right Stain: Selecting the best wood stain for kitchen cabinets involves considering the wood type and desired finish. Oil-based stains penetrate deeper and provide a rich color, while water-based stains dry faster and have lower odors, making them suitable for indoor use.
- Application Tools: Using the right tools such as foam brushes, lint-free cloths, or sprayers can significantly affect the stain application. Foam brushes and cloths are great for smaller areas and provide more control, while sprayers can cover larger surfaces quickly and evenly.
- Technique of Application: Applying stain in thin, even coats helps prevent blotchiness and allows for better control over the color. Working in sections and following the wood grain while applying the stain ensures a uniform look and minimizes streaks.
- Wipe Off Excess Stain: After applying the stain, it is essential to wipe off any excess with a clean cloth. This step prevents a sticky finish and allows for a more consistent color, enhancing the overall appearance of the cabinets.
- Drying Time and Additional Coats: Allowing adequate drying time between coats is necessary for the best results. Depending on the type of stain used, this could range from a few hours to overnight, and applying additional coats can deepen the color and enhance durability.
How Can I Care for My Stained Kitchen Cabinets to Ensure Longevity?
Caring for stained kitchen cabinets involves a few essential steps to maintain their appearance and longevity.
- Regular Cleaning: Keep your cabinets clean by using a soft cloth and a gentle cleaner to avoid damaging the stain.
- Conditioning: Apply a wood conditioner periodically to nourish the wood and help maintain the finish.
- Touch-Up Stain: Use a matching wood stain for any scratches or nicks to preserve the cabinet’s appearance.
- Humidity Control: Control humidity levels in your kitchen to prevent wood from warping or cracking.
- Avoid Harsh Chemicals: Steer clear of abrasive cleaners or harsh chemicals that can strip the finish and dull the stain.
Regular Cleaning: Dust and wipe down your cabinets frequently to prevent buildup that can dull the finish. Use a mixture of warm water and mild soap, and always dry the surface immediately to avoid moisture damage.
Conditioning: A wood conditioner can enhance the natural beauty of the stain and protect the wood from drying out. Apply it every few months to keep the wood hydrated, especially if your cabinets are exposed to heat and humidity.
Touch-Up Stain: For minor scratches or chips, having a small bottle of the best wood stain for your cabinets on hand allows you to easily touch up the affected areas. This not only keeps your cabinets looking fresh but also helps prevent further damage.
Humidity Control: Wood is sensitive to moisture levels; too much humidity can cause it to swell, while too little can lead to cracking. Use a dehumidifier in damp seasons and ensure good ventilation to maintain optimal conditions for your cabinets.
Avoid Harsh Chemicals: Chemicals like bleach or ammonia can strip away the protective finish and harm the wood beneath. Opt for natural cleaning solutions or those specifically designed for wood surfaces to maintain the integrity of the stain.
Related Post: