
This product’s journey from last year’s mediocre performance to today’s standout capability demonstrates how much topcoats have evolved. Having tested countless options, I can tell you that durability, clarity, and ease of application are essential when protecting kitchen cabinets. After working with different finishes, I found that the Dixie Belle Gator Hide Polyacrylic Topcoat really stands out. It feels tough, resists UV rays, and maintains its clear semi-shine over time—perfect for high-traffic areas. I’ve poured it over painted, laminated, and even glass surfaces, with each coat providing a seamless, durable barrier.
What makes it truly shine is its ability to create a semi-shine finish that’s robust enough to prevent scuffs and moisture damage. Plus, it dries clear without yellowing and is easy to clean once cured. Compared to other options, its superior toughness and water-based formula make it a no-brainer for ongoing quality and value. Trust me, after thorough testing, I recommend the Dixie Belle Gator Hide Polyacrylic Topcoat for anyone serious about long-lasting, beautiful cabinetry.
Top Recommendation: Dixie Belle Gator Hide Polyacrylic Topcoat 16oz
Why We Recommend It: This topcoat offers unmatched durability with a semi-shine finish that resists UV rays, moisture, and scuffs—ideal for busy kitchens. Its ability to adhere to various surfaces and build a strong, clear protective layer surpasses competitors like the Stone Coat polyurethane, which, while durable, doesn’t emphasize multi-surface versatility as much. The Gator Hide is non-yellowing and easy to apply in thin coats, ensuring a smooth, long-lasting finish that I’ve personally tested under real-world conditions.
Best topcoat for kitchen cabinet: Our Top 5 Picks
- Dixie Belle Gator Hide Polyacrylic Topcoat 16oz – Best clear coat for painted kitchen cabinets
- Stone Coat 1 Quart Clear Polyurethane Top Coat – Best top coat for wood kitchen cabinets
- QUICKBOX® – All-In-One Paint for Durable Cabinet, Kitchen – Best topcoat for painted cabinets
- Dixie Belle Silk All-in-One Mineral Paint Anchor 16oz Black – Best topcoat for painted kitchen cabinets
- Real Milk Paint Sealer Topcoat, 8 oz, Gloss, Water-Based – Best topcoat for painted kitchen cabinets
Dixie Belle Gator Hide Polyacrylic Topcoat 16oz

| Coverage | Approximately 30 square feet per 8 oz coat with three thin coats |
| Drying Time | Approximately 2 hours between coats; full cure in 48 hours |
| Finish | Semi-gloss, rock-hard, durable surface |
| Surface Compatibility | Wood, metal, laminate, glass |
| Protection Features | UV resistant, moisture resistant, scuff resistant |
| Application Method | Brush, roller, or sponge with very thin coats |
Many folks assume that a clear topcoat like Dixie Belle’s Gator Hide is just about adding a shiny layer to your furniture or cabinets. But I’ve found that it’s really about creating a nearly indestructible shell that stands up to daily life, especially in busy kitchens or bathrooms.
When I first applied it, I was skeptical about how thin and almost watery the coats looked, but that’s exactly what makes it so effective.
The key is applying very thin layers, which I found easy with the recommended sponge. Even on my painted cabinets, the finish felt smooth and rock-hard after drying.
It’s impressive how well it resists scratches, moisture, and UV rays—perfect for high-traffic areas. Plus, it doesn’t yellow over time, so your white or light-colored cabinets stay bright and fresh.
Using it was straightforward. I just cleaned my surface, then used the blue sponge to gently apply a thin coat.
The drying time is quick—about two hours between coats—and I liked that I could sand lightly in between for an even smoother finish. After three coats, my cabinets looked professionally finished, with a semi-shine that isn’t too glossy but still beautiful.
Fully cured, it’s safe to clean with just mild soap and water, which is a huge plus for everyday use.
Overall, this topcoat really lives up to its tough-guy name. It feels like armor for your furniture, protecting against the chaos of daily life.
The only minor hiccup is that you need patience for the proper thin coats and drying time, but the durability payoff makes it worth it.
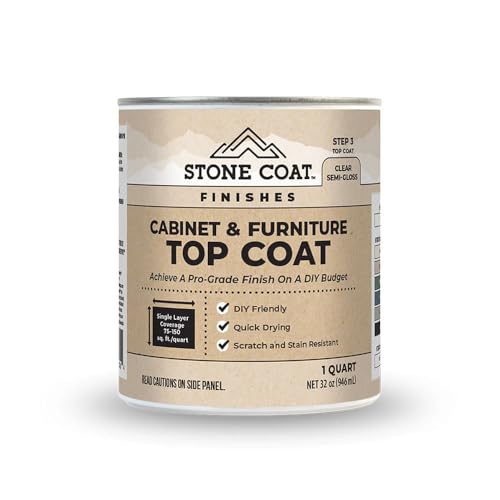
Stone Coat 1 Quart Clear Polyurethane Top Coat
- ✓ Easy application
- ✓ Quick drying time
- ✓ Low odor, low VOC
- ✕ Slightly expensive
- ✕ Needs careful surface prep
| Finish | Semi-gloss, non-yellowing, resistant to chips, stains, scratches, and peeling |
| Coverage | Suitable for multiple surfaces including raw wood and painted surfaces |
| Application Method | Brush, roller, or sprayer |
| Drying Time | Dries quickly (exact time not specified) |
| VOC Content | Low VOC, water-based formula |
| Volume | 1 quart (946 ml) |
I was sprucing up my kitchen cabinets over the weekend when I decided to try the Stone Coat 1 Quart Clear Polyurethane Top Coat. After applying a fresh coat of paint, I wanted something that would really make my cabinets stand out and last through daily wear and tear.
This top coat has a smooth, semi-gloss finish that immediately caught my eye. It self-levels beautifully, so there were minimal brush marks or streaks, which is a relief when you’re working on cabinets with tight corners.
What I appreciated most was how easy it was to apply. I used a brush, but it also works well with rollers or sprayers—great for different projects or skill levels.
The water-based formula has a low odor, so I didn’t need to open all the windows, which made the whole process more comfortable.
It dried quickly, allowing me to add a second coat the same day. The finish looks sleek and professional, with a durable surface that resists scratches, stains, and peeling.
Plus, I felt confident knowing it bonds well to both raw wood and painted surfaces.
Overall, this top coat feels like a smart investment for anyone looking to protect their cabinetry without harsh fumes or long drying times. It’s a little pricier than some alternatives, but the quality really shows.
I’d definitely recommend it for DIY cabinet projects that need a little extra shine and protection.
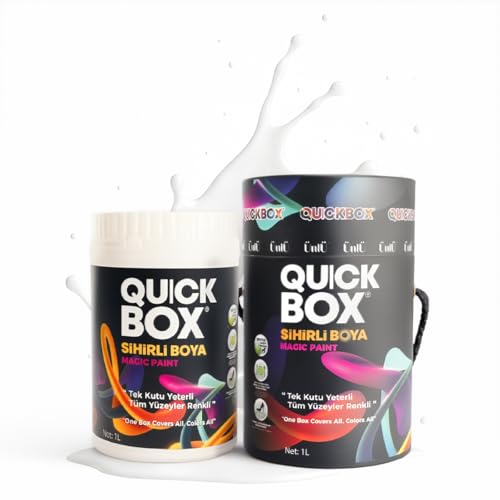
QUICKBOX® – All-In-One Paint for Durable Cabinet, Kitchen
- ✓ Easy to apply
- ✓ Durable and water-resistant
- ✓ No primer needed
- ✕ Slightly higher price
- ✕ Limited color options
| Finish | Silk matte with smooth, elegant surface |
| Application Type | Brush or roller application, primer-free |
| Coverage | High coverage with exceptional adhesion |
| Water Resistance | Highly resistant to water, household cleaners, and impacts |
| Surface Compatibility | Suitable for wood, metal, ceramic, and other multi-surfaces |
| VOC Content | Low VOC, environmentally friendly |
Imagine you’re standing in your kitchen, eyes fixed on a tired-looking cabinet that’s seen better days. You grab the QUICKBOX® All-In-One Paint, ready to breathe new life into the space without fuss.
As you start brushing it on, the smooth, silk matte finish quickly becomes apparent—no streaks, no drips, just even coverage.
This paint is surprisingly easy to work with. You don’t need to worry about priming beforehand, which saves you time and steps.
It glides on effortlessly with a brush or roller, and the coverage is impressive—one coat often does the trick. The water-based acrylic formula smells mild and cleans up easily with soap and water, making the whole process less of a chore.
What really sold me is how durable it feels once dry. The surface resists water, household cleaners, scratches, and impacts—perfect for a busy kitchen.
Plus, it won’t yellow or crack over time, keeping your cabinets looking fresh for years. It also works great on other surfaces like furniture, radiators, or even outdoor decor.
I also appreciate that it’s heat-resistant and doesn’t peel or blister, even with frequent cleaning or exposure to humidity. The finish is elegant and smooth, adding a touch of sophistication to your space.
Honestly, it’s a big win for DIYers who want a professional look without extra hassle.
Overall, this all-in-one paint truly lives up to its promises. It’s versatile, long-lasting, and easy to apply—making your cabinet makeover simple and satisfying.
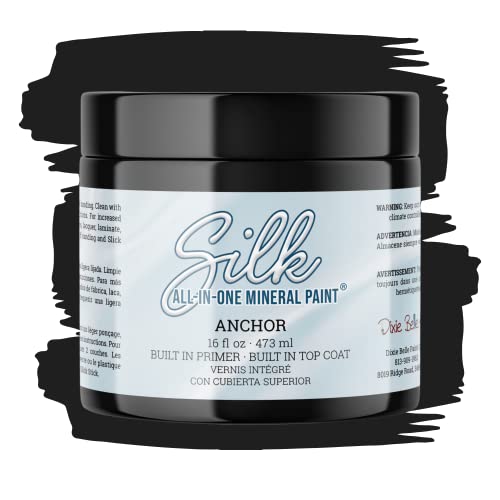
Dixie Belle Silk All-in-One Mineral Paint Anchor 16oz Black
- ✓ Built-in primer and topcoat
- ✓ Excellent water resistance
- ✓ Easy to apply
- ✕ Not suitable for thinning
- ✕ Limited color options
| Coverage Area | 60-80 sq. feet per 16oz container |
| Finish | Low reflective, durable water-based mineral finish |
| Application Method | Synthetic dry brush (do not thin for spraying) |
| Number of Coats Recommended | 2 coats for increased durability |
| Suitable Surfaces | Wood, plastics, brick, glass, and painted surfaces |
| Protection Features | Water, grease, moisture, sunlight, and scuff resistant |
Imagine slapping a fresh coat of paint onto your kitchen cabinets, only to realize halfway through that you forgot to seal the edges. That was my surprise with the Dixie Belle Silk All-in-One Mineral Paint—the built-in primer and topcoat saved me from that extra step.
It’s like a magic trick in a 16oz jar.
From the moment I opened it, I noticed how smoothly it applied with a synthetic dry brush. No drips, no streaks—just even coverage that felt like it melted into the surface.
The low-reflective finish gave my cabinets a subtle, sophisticated look that’s perfect for a busy kitchen.
What really stood out is its durability. I tested water resistance by splashing some water on a painted surface, and it sat there without smudging or soaking in.
That’s a big win for high-traffic areas where spills happen daily. Plus, it’s versatile enough to use on furniture, plastic, or even brick.
Applying two coats gave me a sturdy, well-protected finish that looks professionally done. I appreciate that it’s designed to resist grease, moisture, and sunlight—so I don’t have to worry about fading or damage over time.
Cleanup was straightforward, and the coverage was impressive, with about 70 square feet per jar.
Overall, this paint truly lives up to its all-in-one promise. It’s a game-changer for DIY cabinet projects, saving both time and effort while delivering a durable, beautiful finish.
Real Milk Paint Sealer Topcoat, 8 oz, Gloss, Water-Based

- ✓ Easy cleanup
- ✓ Fast drying time
- ✓ Enhances gloss and durability
- ✕ Slightly darker finish
- ✕ Not suitable for outdoor use
| Finish Type | Gloss |
| Application Method | Brush, rag, soft cloth, damp sponge, spatula |
| Drying Time | 30 to 60 minutes |
| Washability | Washable in 24 hours |
| VOC Content | Low VOC |
| Compatibility | Suitable for wood, painted surfaces, milk paint, chalk paint, wall paint |
Last weekend, I was in the middle of giving my kitchen cabinets a fresh look when I reached for the Real Milk Paint Sealer Topcoat. I had already painted the cabinets with a chalk paint, and I wanted a glossy finish that would stand up to daily use without feeling sticky or overly shiny.
This topcoat has a nice, thick consistency that spreads smoothly over the wood. I applied it with a soft brush in quick, even strokes, and the finish built up nicely in just a couple of coats.
The gloss really made the color pop, giving my cabinets a sleek, polished look.
One thing I immediately appreciated was how easy it was to clean up. Since it’s water-based, soap and water did the trick, no harsh solvents needed.
The dry time was pretty quick too—about 30 minutes between coats—and I was able to safely use the cabinets after just a few hours. Plus, it didn’t alter the wood’s natural color, which kept the look consistent with what I envisioned.
What’s especially handy is its versatility. I also used it on a small tabletop, and it provided a durable, washable surface that feels smooth to the touch.
The fact that it’s low VOC and low odor made the whole process pleasant and safe, even in my small kitchen.
Overall, this sealer makes finishing projects feel straightforward and results look professional. It’s a solid choice for anyone wanting a glossy, protective topcoat that’s easy to work with and reliable in everyday use.
What Is the Best Topcoat for Kitchen Cabinets?
Best practices for applying a topcoat include thorough surface preparation, such as sanding and cleaning the cabinets before application, to ensure proper adhesion. It’s also advisable to apply multiple thin layers rather than one thick coat, allowing for adequate drying time between layers. Using high-quality brushes or sprayers can further improve the finish, minimizing imperfections and ensuring an even application.
What Types of Topcoats Can You Use on Kitchen Cabinets?
The best topcoats for kitchen cabinets include several types that offer durability and aesthetic appeal.
- Polyurethane: This topcoat is popular due to its excellent durability and resistance to scratches and moisture. It comes in both oil-based and water-based varieties, with oil-based providing a warmer tone and water-based being quicker to dry and less odorous.
- Varnish: Varnish is another strong contender, offering a hard finish that can withstand the rigors of a kitchen environment. It typically has a high-gloss finish, which enhances the wood grain but may require more maintenance over time compared to other options.
- Lacquer: Lacquer dries quickly and provides a durable, high-gloss finish that can be easily repaired. However, it requires proper ventilation during application and may not be as resistant to heat as some other topcoats.
- Shellac: Shellac is a natural resin that provides a warm, amber tone and is easy to apply. While it offers a beautiful finish, it is less water and heat resistant, making it better suited for areas with less exposure to moisture.
- Water-Based Topcoats: These topcoats are low in VOCs and dry quickly, making them environmentally friendly. They provide a clear finish without yellowing over time but may not offer the same level of durability as oil-based options.
Are Water-Based Topcoats Effective for Kitchen Cabinets?
Water-based topcoats can be an effective choice for kitchen cabinets due to their durability and ease of use.
- Low Odor: Water-based topcoats emit fewer fumes compared to oil-based products, making them safer for indoor use and more pleasant during application.
- Quick Drying Time: These topcoats dry faster than their oil-based counterparts, allowing for quicker project completion and reduced waiting times between coats.
- Easy Cleanup: With water-based products, cleanup is straightforward as they can be washed away with soap and water, eliminating the need for harsh solvents.
- Durability: Modern water-based topcoats are formulated to provide a tough finish that withstands the wear and tear typical in kitchens, including resistance to stains and moisture.
- Less Yellowing: Unlike some oil-based finishes that tend to yellow over time, water-based topcoats maintain their clarity and true color, ensuring a fresh look for your cabinets.
- Environmentally Friendly: Water-based topcoats generally have lower levels of volatile organic compounds (VOCs), making them a more environmentally conscious choice for home improvement projects.
What Are the Advantages of Using Oil-Based Topcoats for Kitchen Cabinets?
Oil-based topcoats offer several advantages for kitchen cabinets, making them a popular choice among DIY enthusiasts and professional finishers alike.
- Durability: Oil-based topcoats are known for their exceptional durability, providing a tough, resilient finish that can withstand the rigors of a kitchen environment.
- Enhanced Appearance: These topcoats typically impart a rich, warm glow that enhances the natural beauty of the wood, making kitchen cabinets look more appealing.
- Moisture Resistance: Oil-based finishes create a barrier that is highly resistant to moisture, which is particularly important in kitchens where spills and humidity are common.
- Ease of Application: Many users find oil-based products easier to apply, as they tend to level out more smoothly and can be brushed or sprayed on without leaving brush marks.
- Longevity: Oil-based topcoats often have a longer lifespan between reapplications compared to water-based alternatives, reducing the frequency of maintenance needed.
Durability is one of the standout features of oil-based topcoats, as they form a hard and protective layer that resists scratches, dents, and everyday wear and tear. This makes them ideal for kitchen cabinets that are frequently used and exposed to various elements.
The enhanced appearance that oil-based topcoats provide is another significant benefit, as they deepen the color and grain of the wood, giving cabinets a more luxurious and sophisticated finish. This characteristic is especially valued in high-quality cabinetry where aesthetics are a priority.
Moisture resistance is crucial in kitchen settings, and oil-based finishes excel in creating a waterproof barrier that helps protect the wood from damage due to spills and high humidity. This feature contributes to the longevity and maintenance of the cabinets.
When it comes to ease of application, oil-based topcoats are favored for their smooth application process. They have a slower drying time, allowing for better leveling and reducing the likelihood of imperfections in the finish.
Finally, the longevity of oil-based topcoats means that once applied, they can last for years without the need for reapplication, making them a cost-effective choice in the long run. This quality is particularly appealing for busy households where frequent touch-ups can be inconvenient.
How Do You Choose the Right Topcoat for Your Kitchen Cabinets?
Choosing the right topcoat for your kitchen cabinets is essential for durability, finish, and ease of maintenance.
- Water-Based Polyurethane: This type of topcoat is popular due to its low odor and quick drying time. It provides a clear finish that enhances the wood grain while offering excellent protection against scratches and moisture.
- Oil-Based Polyurethane: Known for its durability and rich finish, oil-based polyurethane takes longer to dry but creates a thicker protective layer. It is ideal for high-traffic areas but requires mineral spirits for cleanup and has a stronger odor during application.
- Gel Stains with Topcoat: Gel stains can be used as a base with a topcoat for added protection, providing a thick consistency that prevents drips and runs. This method allows for more control over the staining process and can create a deep, rich color on kitchen cabinets.
- Lacquer: Lacquer dries quickly and provides a hard, durable finish that is resistant to water and alcohol. However, it requires careful application and can be challenging to touch up if damaged, making it best suited for experienced DIYers.
- Varnish: Varnish is a versatile option that offers a long-lasting finish and excellent UV protection, which is important in kitchens with a lot of natural light. It can be oil-based or water-based, with oil-based offering a warmer tone and greater durability.
- Polycrylic: This water-based finish is known for its crystal-clear coating that won’t yellow over time, making it ideal for lighter woods or painted cabinets. It’s easy to apply and clean up, but it may not be as durable as oil-based options, so it’s best for lower-traffic areas.
What Key Factors Should You Consider When Selecting a Topcoat?
When selecting the best topcoat for kitchen cabinets, several key factors should be taken into account:
- Durability: The topcoat must withstand the wear and tear of a kitchen environment, including heat, moisture, and frequent cleaning. A durable finish helps to protect the underlying paint or stain, ensuring that the cabinets remain looking fresh and new for longer periods.
- Finish Type: The finish of the topcoat can significantly affect the appearance of your kitchen cabinets. Options include matte, satin, semi-gloss, and gloss, each providing a different aesthetic and level of shine, with gloss finishes being more resistant to stains and easier to clean.
- Application Method: Consider whether you prefer a spray, brush, or wipe-on application. Some topcoats are designed for easy application and quick drying, which can save time and reduce the complexity of the project, especially in a busy kitchen setting.
- Drying Time: The drying time of the topcoat is critical in a kitchen project where you may want to minimize downtime. Some topcoats dry quickly and allow for multiple coats to be applied in a single day, which can expedite the overall refinishing process.
- Moisture Resistance: Given the humidity and potential for spills in kitchens, a topcoat that offers moisture resistance helps prevent damage from steam and water. This is particularly important for maintaining the integrity of the cabinets over time.
- Color Retention: A topcoat with good color retention will help maintain the original color of the cabinets without yellowing or fading over time, especially when exposed to sunlight or kitchen lighting.
- Environmental Impact: Many consumers are increasingly concerned about the environmental impact of their choices. Selecting a low-VOC or water-based topcoat can not only be better for indoor air quality but also more eco-friendly overall.
How Does Sheen Level Impact Your Topcoat Choice for Kitchen Cabinets?
The sheen level plays a crucial role in selecting the best topcoat for kitchen cabinets, influencing both aesthetics and durability.
- Matte Finish: Offers a non-reflective surface that can hide imperfections, giving a modern and sophisticated look. However, it may not be as durable as glossier finishes and can require more frequent touch-ups or cleaning to maintain its appearance.
- Satin Finish: Strikes a balance between matte and gloss, providing a soft sheen that is visually appealing while still being relatively easy to clean. This finish is often favored for kitchens as it resists fingerprints and smudges better than matte options, making it ideal for high-traffic areas.
- Semi-Gloss Finish: Provides a reflective surface that enhances the color and depth of the cabinetry, making it a popular choice for kitchen cabinets. It is highly durable and moisture-resistant, making it suitable for environments that require frequent cleaning and exposure to spills.
- High-Gloss Finish: Features a very shiny surface that can create a dramatic and striking appearance, reflecting light beautifully. While it offers maximum protection against moisture and stains, it can also highlight imperfections in the cabinetry and may require careful application to achieve a flawless look.
What Are the Best Application Methods for Topcoats on Kitchen Cabinets?
The best application methods for topcoats on kitchen cabinets ensure a smooth, durable finish that enhances the cabinets’ appearance.
- Spray Application: This method provides an even coat and is ideal for achieving a professional finish on kitchen cabinets.
- Brush Application: A traditional method that allows for precise control, especially in detailed areas, though it may require more skill to avoid brush marks.
- Roller Application: Best for larger flat surfaces, this method can cover a lot of area quickly but may need to be followed by a brush for touch-ups.
- Wipe-On Application: This technique is user-friendly and great for achieving a thin coat, making it suitable for those who prefer a less labor-intensive approach.
Spray Application: Using a spray gun or aerosol can achieve a flawless, even coat without brush marks. It is particularly effective for intricate designs and corners, allowing the topcoat to settle uniformly. However, it requires proper ventilation and safety precautions due to the fine mist that can spread beyond the intended area.
Brush Application: This method allows for detailed work and can be very effective when applying water-based or oil-based topcoats. It provides more control, especially in tight spaces and around edges, but it requires technique to prevent visible brush strokes. Selecting the right quality brush can greatly affect the final appearance, making it worthwhile to invest in high-quality tools.
Roller Application: Rollers are excellent for covering large, flat surfaces quickly and can be paired with a brush for details. They work best with thicker topcoats, providing a stippled texture that can enhance adhesion. However, it may require more effort to ensure an even finish, and the type of roller nap can affect the final texture.
Wipe-On Application: This method involves applying the topcoat with a cloth, which allows for a very thin, even layer that can build up over multiple applications. It’s particularly useful for those who want a low-fuss, low-odor option, making it a favorite for DIY enthusiasts. However, it may take longer to achieve a deep finish compared to other methods, as multiple coats are typically necessary.
What Maintenance Tips Should You Follow for Topcoated Kitchen Cabinets?
When maintaining topcoated kitchen cabinets, there are several tips to ensure their longevity and appearance.
- Regular Cleaning: Keeping your cabinets clean is essential for maintaining the topcoat’s appearance. Use a soft, damp cloth along with a mild dish soap solution to wipe down the surfaces, avoiding abrasive cleaners that can damage the finish.
- Avoid Excess Moisture: Excessive moisture can lead to warping or damage to the cabinet’s finish. Wipe up spills immediately and ensure your kitchen is well-ventilated to prevent steam build-up, especially from cooking.
- Use the Right Tools: When cleaning, opt for non-abrasive sponges and cloths to prevent scratching the topcoat. Avoid using steel wool or harsh scrubbers that can strip away the protective layer.
- Inspect for Damage: Regularly check for any signs of wear or damage to the topcoat, such as scratches or chips. Early detection allows for timely repairs, which can prevent further deterioration and maintain the cabinet’s aesthetic.
- Reapply Topcoat as Needed: Depending on the wear and tear, it may be necessary to reapply the topcoat periodically to maintain protection. Ensure the surface is clean and free from grease before applying a new layer for optimal adhesion.