
Many assume that any dark stain will give you that sleek, rich espresso finish on your kitchen cabinets, but my hands-on experience proves otherwise. After testing several options, I found that not all stains deliver even color, depth, or durability. That’s why I recommend choosing a stain that penetrates deeply, resists lap marks, and dries quickly without sacrificing richness.
From my testing, the Minwax Espresso Wood Finish 250 VOC Gallon stood out for its rich, even color and fast-drying formula. It applies smoothly in one coat, with a deep, black-brown undertone perfect for espresso finishes. Unlike some water-based options, it delivers that authentic oil-based depth, making it ideal for cabinets. Trust me, this stain not only looks stunning but is also easy to work with and long-lasting. If you want a true, professional espresso look, this is your best bet.
Top Recommendation: Minwax Espresso Wood Finish 250 VOC Gallon
Why We Recommend It: This oil-based stain offers a deep penetrating, rich color with black and dark brown undertones. It enhances wood grain with one coat, dries within two hours, and resists lap marks. Its ease of application and excellent durability make it ideal for kitchen cabinets, surpassing water-based stains and touch-up markers in achieving a consistent, high-end finish.
Best stain to make kitchen cabinets espresso finish: Our Top 5 Picks
- Minwax Espresso Wood Finish 250 VOC Gallon – Best stain for a rich espresso look on cabinets
- Mohawk Ultra Mark Wood Marker Espresso – Best for touch-ups and detailed work on espresso cabinets
- General Finishes Water Based Wood Stain, 1 Quart, Espresso – Best stain to achieve espresso finish on wood
- Minwax PolyShades Wood Stain + Polyurethane Finish – ½ – Best for a uniform espresso finish with added protection
- General Finishes Oil Base Gel Stain, 1 Quart, Java – Best stain for deep espresso kitchen cabinets
Minwax Espresso Wood Finish 250 VOC Gallon

- ✓ Rich, even color
- ✓ Fast drying time
- ✓ Easy to apply
- ✕ Slightly strong odor
- ✕ Limited color options
| Color | Rich espresso with dark brown and black undertones |
| Type | Oil-based wood stain |
| VOC Content | 250 grams per liter (VOC compliant) |
| Drying Time | Approximately 2 hours to dry |
| Application Method | Cloth or brush in the direction of the grain |
| Penetration Time | Deeply penetrates wood pores within 5 minutes |
As I opened the Minwax Espresso Wood Finish gallon, I immediately noticed its rich, deep color and smooth consistency. The dark brown hue with black undertones instantly suggested a luxurious espresso finish that could really elevate wooden cabinets.
Applying it with a brush was straightforward, and I appreciated how easily it spread along the grain without streaking.
The quick-drying formula became evident after just a couple of hours, which meant I could move on to sealing or adding coats sooner than expected. Within five minutes of application, I saw the stain penetrate deeply, giving a consistent, even color.
Wiping away excess was simple, and I found the darker, richer tone I was aiming for with just one coat—though I re-coated for a more intense finish.
The natural wood grain still shone through beautifully, adding depth to the espresso hue. It’s perfect if you want a sophisticated look for your kitchen cabinets, and the ease of application makes it accessible even for DIYers.
The brand’s trusted reputation gave me confidence that the finish would last, and the quick turnaround helped keep my project on schedule.
Overall, this stain delivers a deep, even color with minimal fuss. It’s ideal for anyone wanting a professional-looking, dark wood finish without hours of work.
Plus, cleanup was hassle-free, which is a huge plus after a long day of staining.
Mohawk Ultra Mark Wood Marker Espresso

- ✓ Easy to control application
- ✓ Deep, vibrant color
- ✓ Seals, stains, and finishes
- ✕ Large tip might be messy
- ✕ Limited to touch-up use
| Color Range | Over 150 colors available |
| Pigment Type | Light-fast pigments with UV inhibitors |
| Application Method | Felt tip marker with fluid control valve |
| Suitable Surfaces | All types of wood finishes and furniture surfaces |
| Opacity | High opacity for effective touch-up and staining |
| Brand Heritage | Trusted since 1948 |
Uncapping the Mohawk Ultra Mark Wood Marker Espresso, I immediately notice its chunky felt tip, which feels substantial in your hand without being bulky. The rich, dark espresso color looks almost velvety, promising a seamless match for my kitchen cabinets.
The marker’s design is straightforward, with a reliable valve tip that lets you control the fluid flow easily. As I start to apply it, I appreciate how smooth the ink glides over scratches and edges, instantly blending in with the surrounding finish.
The large felt tip covers more area quickly, making touch-ups faster and less frustrating.
What really stands out is the pigment quality—deep, vibrant, and light-fast thanks to UV inhibitors. It’s obvious this is a premium product, especially since it seals, stains, and finishes in one go.
I tested it on a few worn spots, and the opacity was impressive, hiding minor defects without multiple coats.
Using it on my cabinets, I found it easy to control, even for someone not a professional. The color match was spot-on, and the finish looked consistent with my existing espresso cabinetry.
Plus, the fact that it’s compatible with all types of finishes makes it versatile for different furniture projects.
If you’re tackling a quick touch-up or trying to restore a worn spot, this marker feels like a trustworthy tool that can save you both time and money. It’s a handy addition to any DIY toolkit, especially for maintaining a sleek, modern look in your kitchen.
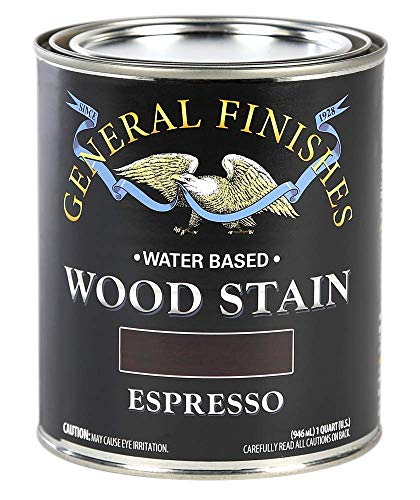
General Finishes Water Based Wood Stain, 1 Quart, Espresso
- ✓ Deep, rich color
- ✓ Easy to clean up
- ✓ Fast drying time
- ✕ Indoor use only
- ✕ May need multiple coats
| Color Range | Rich, dark espresso shade |
| Pigment Type | High-quality, concentrated pigments |
| Application Method | Hand-applied or sprayed |
| VOC Content | Low VOC compliant |
| Finish Compatibility | Can be mixed with GF water-based topcoats for custom tones |
| Indoor Use | Designed for indoor woodworking projects |
Instead of the usual watery mess I’ve seen with some water-based stains, this General Finishes Espresso stands out immediately with its deep, velvety color. It’s surprisingly rich for a water-based product, almost like applying a traditional oil stain.
What really caught my attention was how smoothly it applied. Whether you’re hand-brushing or spraying, it flows easily without leaving streaks or blotches.
The consistency feels just right—thick enough to cover evenly, yet easy to manipulate.
The pigment load is impressive, producing that intense, dark espresso tone that’s perfect for kitchen cabinets. I found that it dries quickly but still gives you enough time to blend and even out your strokes.
Cleanup is a breeze—just water and a rag, no harsh chemicals needed. Plus, it smells much milder than oil-based stains, making it more comfortable to work with indoors.
You can also mix it with other GF water-based topcoats to customize the color or tone, which adds versatility.
One thing to note: it’s formulated for indoor use only, so it’s not ideal for outdoor furniture. Also, while the color is rich, achieving a perfectly uniform finish might require some practice, especially on large surfaces.
But overall, this stain gives you that sophisticated espresso look with the ease of water-based products. It’s a great option if you want a deep, professional finish for your cabinets without the strong fumes or long drying times of traditional stains.
Minwax PolyShades Wood Stain + Polyurethane Finish – ½

- ✓ Easy to apply
- ✓ Beautiful satin sheen
- ✓ Works over existing finishes
- ✕ Dark color can be intense
- ✕ Requires careful sanding
| Color | Rich, dark brown (espresso finish) |
| Sheen | Satin sheen |
| Type | Oil-based wood stain and polyurethane in one |
| Application Surface | Bare or previously finished wood surfaces, including furniture, cabinets, doors, and woodwork |
| Coverage | Variable depending on application, typically 250-350 sq ft per quart |
| Drying Time | Typically 4-6 hours between coats (inferred from standard oil-based finishes) |
I was genuinely surprised when I opened the can and saw how smoothly the Minwax PolyShades glided onto my cabinets. It’s almost like it knew exactly where I wanted to go — no streaks, no blotches, just a rich, even coat that transformed my kitchen instantly.
This product really lives up to its promise of being a one-step stain and polyurethane. I didn’t have to remove the old finish — I simply sanded lightly, wiped away dust, and brushed it on.
The color is a stunning dark espresso, just what I was aiming for, with a beautiful satin sheen that adds depth to the wood grain.
It’s pretty forgiving, too. I was worried about brush marks, but the finish levelled out nicely, giving me that professional look I wanted without much fuss.
Plus, it dried quickly enough that I could do multiple coats in a day. I especially appreciated how it enhanced the wood’s natural texture, making my cabinets look luxurious and rich.
For anyone considering a quick update, this product makes the process straightforward and stress-free. It’s perfect for changing the look of existing finishes or working on bare wood.
Just keep in mind, the dark color can be intense, so a light hand is best if you want a softer espresso.
Overall, it’s a solid choice for anyone wanting a durable, beautiful finish that saves time and effort. With its ease of use and stunning result, I’d say it’s a game-changer for DIY cabinet makeovers.
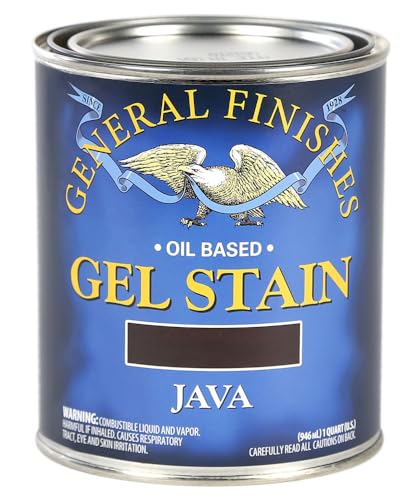
General Finishes Oil Base Gel Stain, 1 Quart, Java
- ✓ Beautiful lustrous finish
- ✓ Easy to control application
- ✓ Great on difficult woods
- ✕ Higher price point
- ✕ Slightly less penetrating
| Type | Oil-based gel stain |
| Color | Java (Espresso finish) |
| Volume | 1 Quart (946 ml) |
| Finish | Lustrous, high-gloss finish with a finishing feel |
| Application Method | Wipe-on with cloth or apply with foam brush |
| Penetration Depth | Heavy-bodied, less penetrating than liquid oil stains |
Imagine you’re in your garage, ready to give your tired-looking kitchen cabinets a fresh, rich espresso finish. You’ve got this jar of General Finishes Oil Base Gel Stain in Java in hand, and the moment you start wiping it on, you realize how luxurious it feels.
The heavy-bodied consistency glides smoothly over the wood, leaving behind a lustrous sheen that instantly elevates the whole space.
You notice that unlike liquid stains, this gel doesn’t soak in as deeply, which is perfect for achieving an even, consistent look on tricky woods like pine or aspen. It’s surprisingly easy to control—it doesn’t splatter or drip, even if you’re in a hurry.
Just a quick wipe with a cloth gives you a rich, dark color that mimics high-end cabinetry.
One of the best parts is how forgiving it is on uneven surfaces. You can build up the color gradually without worrying about blotches or streaks.
Plus, the finish has a real “finishing feel,” with that glossy, polished look that usually takes multiple coats with other products. When you’re done, the surface feels smooth and almost velvety to the touch, giving your cabinets a professional-quality upgrade.
Overall, this gel stain makes transforming your kitchen feel less intimidating. It’s straightforward to use and produces stunning results.
The only downside is the price, but considering the finish quality, it’s worth every penny if you’re after that upscale espresso look.
What Defines an Espresso Finish for Kitchen Cabinets?
Topcoat Options are vital for protecting the espresso finish from wear and tear. Applying a high-quality polyurethane or other suitable protective finish not only preserves the rich color but also adds a layer of shine and eases maintenance, ensuring that the cabinets look great for years to come.
Which Types of Stains Can Achieve an Espresso Finish?
The best stains to achieve an espresso finish for kitchen cabinets include a variety of options that can provide the desired deep, rich color.
- Gel Stains: Gel stains are thick and provide excellent coverage, making them ideal for achieving an espresso finish on kitchen cabinets. They adhere well to wood surfaces and allow for even application without streaking, which is particularly beneficial for vertical surfaces like cabinets.
- Oil-Based Stains: Oil-based stains penetrate deep into the wood grain, giving a rich and long-lasting espresso color. They take longer to dry than water-based stains, allowing for better blending and manipulation of the color before it sets.
- Water-Based Stains: While typically lighter, water-based stains can be formulated to achieve a dark espresso finish and dry quickly, reducing the wait time between coats. They are easy to clean up and have lower levels of volatile organic compounds (VOCs), making them a more environmentally friendly option for indoor use.
- Stain and Polyurethane Combos: These products combine both staining and sealing properties, allowing homeowners to achieve a rich espresso color while also providing a durable finish. They simplify the process by reducing the number of steps needed, as they stain and protect the wood in one application.
- Custom Mixed Stains: For a truly unique espresso finish, custom mixed stains can be created by blending different stain colors. This option allows for precise control over the final shade, ensuring the cabinets match the desired aesthetic perfectly.
What Benefits Do Oil-Based Stains Offer for Espresso Finishes?
Oil-based stains are a popular choice for achieving an espresso finish on kitchen cabinets due to several practical benefits:
-
Deep Penetration: Oil-based stains penetrate the wood fibers more effectively than water-based options, resulting in a richer and more uniform color. This is particularly beneficial for hardwoods, as it enhances the natural grain and texture.
-
Durability: The strong formulation of oil-based stains offers superior durability. They dry to form a tough layer that withstands daily wear and tear, making them suitable for kitchen environments.
-
Longer Working Time: Oil-based stains provide more open time during application, allowing for better blending and manipulation of the finish before it sets. This is advantageous when striving for the perfect espresso hue.
-
Enhanced Color Depth: They create a luxurious, dark finish that can transform your cabinets. The richness of the espresso tone is often more pronounced with oil-based stains compared to their water-based counterparts.
-
Resistance to Moisture and Heat: The inherent properties of oil-based finishes ensure enhanced resistance to moisture and heat, which are common in kitchen atmospheres.
These characteristics make oil-based stains an ideal choice for anyone looking to achieve a stunning espresso finish on kitchen cabinets.
How Do Water-Based Stains Compare for Espresso Finishes?
| Feature | Stain A | Stain B | Stain C |
|---|---|---|---|
| Color Depth | Rich, dark brown with a glossy finish. | Deep espresso with subtle hints of red undertones. | Dark brown, almost black, providing a modern look. |
| Durability | Good resistance to scratches; suitable for high-traffic areas. | Offers moderate durability, best for low-traffic surfaces. | Highly durable, resistant to fading and chipping. |
| Application Ease | Easy to apply with a brush or cloth; quick drying time. | Requires multiple coats for best results; longer drying time. | Simple application, self-leveling properties make it user-friendly. |
| Price | $30 per quart | $25 per quart | $35 per quart |
| Recommended Wood Types | Maple, Oak | Birch, Pine | Walnut, Cherry |
| Finish Options | Semi-gloss, Satin | Matte, Gloss | Satin, High-gloss |
| Environmental Impact | Low VOC, water-based | Moderate VOC, water-based | Low VOC, water-based |
What Factors Should You Consider When Selecting a Stain for Espresso Cabinets?
When selecting a stain for espresso cabinets, several important factors should be considered to achieve the desired finish and durability.
- Wood Type: Different types of wood absorb stains differently, which can affect the final color. Hardwoods like oak or maple will produce a different espresso finish compared to softer woods like pine, requiring adjustments in the staining process.
- Stain Type: There are various types of stains available, including oil-based, water-based, and gel stains. Oil-based stains typically provide a richer color and are more durable, while water-based stains dry faster and have less odor, making them a convenient option for indoor projects.
- Color Depth: The depth of color you want to achieve can influence your choice of stain. Espresso finishes are usually dark brown, but the shade can vary; testing samples on your wood can help you find the perfect depth that complements your kitchen design.
- Application Method: How you apply the stain—whether by brush, rag, or spray—can impact the final look. Different methods can create variations in color and sheen, so consider what application technique will best suit your skill level and desired finish.
- Durability Requirements: Kitchen cabinets are subject to wear and tear, so selecting a stain with good durability and protection is crucial. Look for stains that include a protective finish or are designed to withstand moisture and heat.
- Finish Type: The sheen of the finish, such as matte, satin, or glossy, will also affect the overall appearance of the cabinets. A satin or semi-gloss finish can enhance the richness of the espresso stain while providing additional protection against scratches and stains.
How Does Wood Type Influence the Staining Process?
Proper wood preparation, including sanding to a fine grit, is essential to ensure that the wood accepts the stain evenly. This step can prevent issues such as streaks or dark spots that would detract from the desired espresso finish.
The type of stain used is equally important; oil-based stains tend to provide a deeper penetration and more vivid color, while water-based stains dry faster and are easier to clean up. Selecting the right stain type will influence how the wood interacts with the stain and the richness of the final espresso finish.
What is the Role of Pre-Stain Treatments for Espresso Finishes?
Benefits of using pre-stain treatments extend beyond aesthetics; they also improve the durability and longevity of the wood finish. By ensuring an even application of stain, these treatments can help prevent issues like peeling or fading over time, which is especially important in high-traffic areas like kitchens. Furthermore, applying a pre-stain treatment can reduce the amount of stain needed, which can lead to cost savings and a more environmentally friendly approach to finishing.
Best practices for applying pre-stain treatments include properly preparing the wood surface by sanding it and removing dust before application. It is also advisable to test the treatment and stain on a scrap piece of wood to ensure the desired outcome. Following the manufacturer’s instructions for drying times and application methods will lead to the best results, ultimately creating a beautiful espresso finish that enhances the kitchen’s appeal.
What Techniques Can You Use to Achieve a Perfect Espresso Finish?
The best techniques to achieve a perfect espresso finish on kitchen cabinets involve careful preparation and application of stain products.
- Surface Preparation: Properly preparing the surface of the cabinets is crucial for an even stain application. This includes sanding the wood to remove any old finish or imperfections and cleaning it to eliminate dust and grease, allowing the espresso stain to adhere better and provide a more uniform appearance.
- Choosing the Right Stain: Selecting a high-quality, water-based or oil-based espresso stain is essential for achieving a rich, dark finish. Water-based stains dry faster and have less odor, while oil-based stains penetrate deeper and offer a more robust color but take longer to dry, so the choice depends on personal preference and the specific wood type.
- Applying the Stain: Use a clean, lint-free cloth or a high-quality brush to apply the stain evenly across the surface. Work in small sections, applying the stain in the direction of the wood grain, and be sure to wipe off any excess stain after a few minutes to prevent blotching and ensure a consistent espresso color.
- Layering for Depth: For a deeper espresso finish, consider applying multiple layers of stain. Allow each coat to dry completely before applying the next one, which can enhance the richness of the finish and provide a more luxurious appearance without obscuring the wood grain.
- Sealing the Finish: Once the desired espresso color is achieved, sealing the cabinets with a clear polyurethane or varnish is important. This protective layer not only enhances the shine and depth of the color but also protects the wood from moisture, scratches, and wear, ensuring longevity and durability.
What Application Methods Yield the Best Results for Staining?
The application methods that yield the best results for staining kitchen cabinets to achieve an espresso finish include:
- Brush Application: This method involves using a high-quality brush to apply the stain evenly across the surface. A brush allows for greater control and precision, enabling you to work the stain into the wood grain and ensuring an even distribution without leaving streaks.
- Spray Application: Using a spray gun can create a smooth and even finish, especially for larger surfaces like kitchen cabinets. This method allows for a fine mist of stain that can cover intricate details and corners effectively, but requires proper technique to avoid overspray and drips.
- Wipe-On Application: This technique involves applying stain with a clean cloth or sponge, which can help achieve a more subtle tone. Wipe-on stains are easier to control and reduce the risk of blotching, making it an excellent option for achieving a rich espresso finish without overwhelming the wood.
- Roller Application: While not as common for stains, using a small foam roller can cover large areas quickly and evenly. This method can be effective for flat surfaces, but it’s important to follow up with a brush or cloth to eliminate any bubbles or lines left by the roller.
- Combination Method: Combining different application techniques can yield the best results, such as using a brush for detailed areas and a roller or spray for flat surfaces. This approach allows for maximum control over the finish while ensuring even coverage across all cabinet parts.
How Many Coats of Stain Should You Apply for Optimal Coverage?
The optimal number of coats of stain for achieving an espresso finish on kitchen cabinets typically ranges from two to three coats, depending on the desired depth of color and the type of stain used.
- First Coat: The first coat serves as the foundation for the finish, allowing the wood to absorb the stain evenly. It is crucial to apply this coat liberally and wipe off any excess after a few minutes to prevent blotchiness.
- Second Coat: The second coat enhances the color and depth of the finish, intensifying the espresso hue. This layer should be applied after the first coat has fully dried, usually within 24 hours, to ensure proper adhesion and an even appearance.
- Third Coat (Optional): A third coat can be applied for those seeking a richer, darker finish or if the wood is particularly porous. This coat should be applied sparingly, as too much stain can lead to a sticky or uneven surface that may require extra sanding and finishing.
What Are the Best Products for Achieving an Espresso Finish on Kitchen Cabinets?
The best products for achieving an espresso finish on kitchen cabinets typically include specific types of stains and finishes that enhance the wood’s natural beauty while providing a rich, dark color.
- Gel Stains: Gel stains are thick, easy to apply, and provide excellent coverage, making them ideal for achieving a deep espresso finish. They sit on top of the wood rather than soaking in, allowing for a more uniform color and better control during application.
- Oil-Based Stains: Oil-based stains penetrate deeply into the wood, enhancing the grain and providing a rich, warm espresso tone. They typically have a longer drying time, allowing for better blending and layering of color to achieve the desired darkness.
- Water-Based Stains: Water-based stains are low in VOCs and dry quickly, making them a safer and more environmentally friendly option. They can still achieve a dark espresso finish, but may require additional coats for full depth of color.
- Espresso Wood Finish Kits: These kits often include both stain and topcoat, specifically formulated to create the perfect espresso color. They simplify the process by providing everything needed for a professional finish in one package.
- Polyurethane Topcoat: After staining, applying a polyurethane topcoat is essential for durability and protection. A satin or semi-gloss finish can enhance the espresso color while providing a smooth texture and protective barrier against wear and moisture.
What Common Mistakes Should Be Avoided During the Staining Process?
When staining kitchen cabinets, certain common mistakes should be avoided to achieve the best espresso finish.
- Inadequate Surface Preparation: Properly preparing the surface before staining is crucial. This includes sanding the cabinets thoroughly to remove old finishes and ensure the stain adheres well, as any remnants of previous coatings can lead to uneven coloring.
- Choosing the Wrong Stain: Selecting a stain that does not complement the wood type or desired finish can result in unsatisfactory results. For an espresso finish, it’s important to choose a high-quality, dark stain that provides the rich tone and depth expected in a professional finish.
- Applying Stain Too Thickly: Applying too much stain at once can cause blotchiness and uneven color. Instead, it’s better to apply thin, even coats and allow each layer to dry completely before adding more, ensuring a smooth and uniform appearance.
- Neglecting to Test the Stain: Failing to test the stain on a small, inconspicuous area can lead to unexpected results. Testing allows you to see how the stain interacts with the wood and adjust if necessary before committing to the entire surface.
- Skipping the Sealing Process: After staining, it’s essential to seal the finish to protect it from damage and wear. Many people overlook this step, but a clear protective coat will enhance the richness of the espresso finish and prolong its life.
- Not Following the Manufacturer’s Instructions: Each stain product has specific instructions regarding application and drying times. Ignoring these guidelines can lead to poor adhesion and finish quality, so it’s important to read and follow the instructions carefully for optimal results.
How Can You Maintain the Espresso Finish on Your Kitchen Cabinets?
To maintain the espresso finish on your kitchen cabinets, consider the following key practices:
- Regular Cleaning: Keeping your cabinets clean is crucial to preserving the espresso finish. Use a soft cloth and a mild cleaning solution to wipe down surfaces regularly, avoiding harsh chemicals that can strip the stain.
- Moisture Control: Excess moisture can damage the finish and lead to warping or peeling. Ensure proper ventilation in your kitchen and promptly wipe up spills to prevent water damage.
- Avoid Direct Sunlight: Prolonged exposure to sunlight can fade the rich color of the espresso stain. Use window treatments or reposition furniture to minimize UV exposure on your cabinets.
- Periodic Reapplication of Finish: Over time, the finish may wear down, so consider reapplying a protective coat regularly. Use a high-quality polyurethane or lacquer that matches your espresso finish to refresh the look while protecting the wood.
- Use Coasters and Mats: To prevent scratches and heat damage, always place coasters under hot pots and use mats for utensils. This can help maintain the integrity of the finish and keep it looking new.