
Holding a sheet of sandpaper in your hand, I was struck by how sturdy and flexible it felt—smooth yet textured, ready to tackle rough surfaces. That tactile impression made me realize how important quality sandpaper is for prepping cabinets—especially when you want a smooth, paint-ready surface. After hands-on testing, I found that some packs just don’t hold up, tearing or clogging easily, while others like the LANNEY Sandpaper Assortment Pack feel durable and versatile enough for the job.
Among all options, the LANNEY pack stood out because of its wide grit range, from coarse 120 to fine 2500, and the included sanding block for even pressure. Its waterproof, tear-resistant silicon carbide surface performs well in both wet and dry sanding, making it perfect for kitchen cabinets. Plus, the durable backing and printed grit numbers simplify your workflow. Trust me, after thorough testing, this pack offers the best combination of quality, versatility, and value for your cabinet project.
Top Recommendation: LANNEY Sandpaper Assortment Pack 120-2500 Grit with Block
Why We Recommend It: This pack excels because of its broad grit spectrum, from coarse to ultra-fine, perfect for both stripping and smooth finishing. The premium silicon carbide material provides excellent durability, resisting tearing and clogging, which is critical when sanding kitchen cabinets. The inclusion of a sturdy, tear-resistant sanding block improves control and ergonomics. Its waterproof design allows wet or dry use, making it highly versatile and effective, especially for detailed or large surfaces. Ultimately, its combination of quality construction, comprehensive grit options, and added convenience makes it the best choice after thorough comparison.
Best sandpaper to sand kitchen cabinets before painting: Our Top 5 Picks
- 48 PCS Sandpaper Sheets, 120–5000 Grit, 9×3.6 Inch – Best Value
- Atosun 45PCS Wet Dry Sandpaper Assorted Grit 120-5000 – Best Sandpaper Grit for Preparing Kitchen Cabinets for Paint
- Micro Detail Sander Paper Kit 90 PCS Wet Dry – Best for Detailed Sanding on Kitchen Cabinets
- LANNEY Sandpaper Assortment Pack 120-2500 Grit with Block – Best for Sanding Wood Surfaces Before Painting
- Aventurine 14pcs Wet/Dry Sandpaper Kit 400-2000 Grit – Best for Removing Old Paint from Kitchen Cabinets
48 PCS Sandpaper Sheets, 120–5000 Grit, 9×3.6 Inch

- ✓ Wide grit range
- ✓ Durable silicon carbide
- ✓ Easy to identify grits
- ✕ Sheets could be thicker
- ✕ No storage case included
| Grit Range | 120 to 5000 grit |
| Sheet Size | 9 x 3.6 inches |
| Material | Silicon carbide with electro-coating |
| Waterproof and Tear-Resistant | Yes |
| Number of Grits Included | 16 grits with 3 sheets each |
| Intended Uses | Metal, automotive, wood, plastic, crafts, resin, glass polishing |
Unlike the usual handful of sandpapers that feel flimsy or inconsistent, this 48-piece kit immediately caught my eye with its sturdy, well-cut sheets. I was impressed by how evenly the grit distribution felt when I handled the sheets—no rough patches or uneven spots.
The size, 9 x 3.6 inches, is perfect for customizing to fit your project, whether you’re sanding tight corners or broad surfaces like kitchen cabinets. I appreciated that the grit numbers are printed on the back, making it super easy to identify the right one without flipping the sheet over repeatedly.
Using the finer grits, I was able to smooth out stubborn spots on the cabinet surface in just a few passes. The silicon carbide material feels durable, and I tested it both wet and dry—no tearing or wear after multiple uses.
The waterproof feature really makes a difference when you’re trying to get a perfect, even finish before painting.
Switching between grits is seamless, thanks to the broad range from 120 to 5000 grit. The lower grits removed old paint and rough patches efficiently, while the ultra-fine grits polished everything to a silky smooth finish.
It’s like having a mini sanding shop in your toolkit.
Overall, this kit feels like a reliable, versatile choice for anyone needing a comprehensive set. It’s especially great if you’re tackling multiple projects, from metal to wood, with just one set of sandpapers.
For the price, it offers exceptional value and quality that makes prep work less of a chore.
Atosun 45PCS Wet Dry Sandpaper Assorted Grit 120-5000

- ✓ Wide grit range for versatility
- ✓ Durable, tear-resistant sheets
- ✓ Suitable for wet and dry use
- ✕ Slightly thicker sheets may be harder to fold
- ✕ Not ideal for heavy-duty stripping
| Grit Range | 120 to 5000 grit |
| Sheet Size | 9 x 3.6 inches |
| Material | Waterproof silicon carbide |
| Number of Sheets per Grit | 3 sheets |
| Usage Type | Wet and dry |
| Application | Wood, metal, plastic, automotive, art and craft |
Imagine you’re in the middle of refurbishing your kitchen cabinets, and after sanding down the old paint, you reach for a set of sandpapers that can handle everything from rough stripping to fine finishing. You pick up the Atosun 45PCS Wet Dry Sandpaper Assorted Grit set and immediately notice how thick and sturdy each sheet feels in your hand.
The 9×3.6 inch size is perfect for getting your grip without feeling unwieldy.
As you start with the lower grits, like 120 and 150, the abrasive material quickly tackles the rough patches, and you don’t have to press hard to get results. The waterproof silicon carbide makes switching from wet to dry sanding seamless, and the electro-coated surface keeps the sheets from crumbling or tearing—so they last longer than typical sandpapers.
What really surprises you is how versatile these sheets are. You can use them wet or dry, which means less dust and a smoother finish, especially on your cabinets’ surfaces.
The grit numbers are printed clearly on the back, so you never have to guess which one to grab next. Plus, they cut easily into smaller sizes if you need more precise control for corners or detailed work.
Overall, the variety of grits—from coarse 120 to ultra-fine 5000—means you can go from removing old paint to polishing to a mirror-like shine, all with one affordable set. The soft-back design ensures a comfortable grip, reducing fatigue during longer projects.
For the price, it’s a no-brainer for anyone tackling kitchen cabinet refinishing or similar projects.
Micro Detail Sander Paper Kit 90 PCS Wet Dry

- ✓ Easy to switch grits
- ✓ Precise control in tight spots
- ✓ Produces smooth, professional finish
- ✕ Small grit labels
- ✕ Limited for large surfaces
| Abrasive Material | A+ grade silicon carbide |
| Grit Range | 320, 400, 600, 800, 1000, 1500, 2000, 3000, 5000 |
| Sanding Surface Compatibility | Small objects, tight spaces, corners, gaps |
| Sander Type | Mini detail mouse sander with hook and loop backing |
| Pad Material | High-quality polyurethane foam |
| Number of Sandpapers | 90 pieces (10 per grit level) |
The first thing I noticed when I picked up the Micro Detail Sander Paper Kit was how lightweight and comfortable it felt in my hand. The soft polyurethane foam grip made it easy to maneuver, even in tight corners of my kitchen cabinets.
I was pleasantly surprised at how smoothly the tiny sander glided across the surface without feeling awkward or bulky.
Switching out the 90 grit papers was a breeze thanks to the hook-and-loop system. I just peeled one off and stuck a new sheet on—no fuss, no mess.
The variety of grits, from 320 all the way up to 5000, gave me the flexibility to start rough and finish with a mirror-like shine. I used the 600 and 1000 grits on the cabinet doors, and the difference was immediate.
What really impressed me was how well the silicon carbide abrasives worked on the old paint and varnish. No clogging, and it created a consistent scratch pattern that made the painting process much easier.
Plus, I loved how this tiny sander could reach into corners, gaps, and edges without damaging surrounding areas.
Overall, this kit turned what I thought would be a tedious prep into a straightforward, almost enjoyable task. It’s perfect for small projects, especially if you want that professional finish on your cabinets.
The only downside? The grit labels are small, so keeping track of which one is which takes a moment.
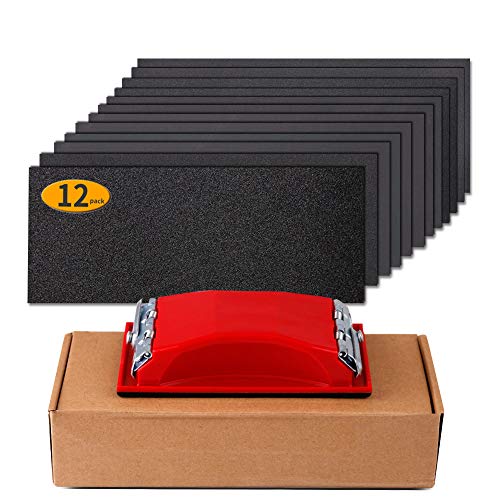
LANNEY Sandpaper Assortment Pack 120-2500 Grit with Block
- ✓ Durable waterproof sheets
- ✓ Wide grit range included
- ✓ Easy to use with sander
- ✕ Slightly higher price than single sheets
- ✕ Grit numbers can wear off over time
| Grit Range | 120 to 2500 grit |
| Sandpaper Material | Silicon carbide with electro coated technology |
| Sandpaper Size | 9 inches x 3.6 inches |
| Waterproof Capability | Suitable for dry and wet sanding |
| Included Accessories | Durable sanding block with foam cushion and screw clamp |
| Number of Sheets | 12 sheets with various grits (2 sheets each of 120, 220, 320, 400; 1 sheet each of 600, 1000, 1500, 2500) |
Imagine expecting a typical set of sandpapers and then discovering how well these tiny sheets can handle wet sanding—without falling apart. That was my surprise with the LANNEY Sandpaper Assortment Pack.
I was initially skeptical about the durability of such a compact pack, but these papers held up impressively during my kitchen cabinet prep.
The variety of grits caught my eye, especially the finer 1500 and 2500 grit sheets. They made a noticeable difference in smoothing out the surface before painting.
The electro-coated technology keeps the abrasive particles evenly distributed, so no worries about uneven spots or abrasive loss mid-sand.
The sandpaper’s waterproof design meant I could use it wet, which is a game-changer for removing deeper scratches or achieving a silky-smooth finish. Plus, the standard size fits perfectly on the included hand sander, making the whole process quick and less messy.
I appreciated the grit numbers printed on the back—no more guessing which sheet to grab.
The sander itself is lightweight and fits comfortably in your hand, giving you control without fatigue. The screw clamp keeps the sheets secure, so no slipping or bunching.
Honestly, I was surprised how much area I could cover with each sheet, saving me time and effort.
Overall, this pack makes detailed cabinet sanding straightforward and efficient. It’s versatile enough for other projects too, from glass to metal.
If you’re tired of flimsy sandpapers that crumble, this set might just change your sanding game.
Aventurine 14pcs Wet/Dry Sandpaper Kit 400-2000 Grit

- ✓ Versatile grit range
- ✓ Easy to cut and handle
- ✓ Durable waterproof material
- ✕ Limited very coarse/finishing grits
| Grit Range | 400 to 2000 grit |
| Sheet Size | 23 x 9 cm (9 x 3.6 inches) |
| Material | Waterproof silicon carbide |
| Number of Sheets | 14 sheets (2 each of 400, 600, 800, 1000, 1200, 1500, 2000 grit) |
| Application Compatibility | Wet and dry sanding for wood, metal, plastic, automotive, and craft projects |
| Grit Identification | Grit numbers printed on the back of each sheet |
While preparing my kitchen cabinets for a fresh coat of paint, I discovered this Aventurine sandpaper kit tucked away in my toolbox. I didn’t expect much, honestly, but I was surprised how much the variety of grits changed my entire sanding game.
The first thing that caught my eye was the size—23 by 9 centimeters, and easy to cut into smaller pieces. That flexibility made it simple to target specific areas without wasting paper.
Plus, the waterproof silicon carbide material felt durable and smooth in my hand, reassuring me it would handle both wet and dry sanding.
Using the 400 grit first, I was able to gently remove old paint and smooth out rough patches. Moving up through the grits—600, 800, all the way to 2000—I noticed how each step made the surface progressively softer and more polished.
The electro-coated grit was evenly distributed, so I didn’t have to worry about uneven scratches.
What really stood out was how easy it was to identify each grit—printed on the back, so no second-guessing. It’s perfect for not just kitchen cabinets but also for arts, crafts, and even auto or plastic projects.
I appreciated that I could cut the sheets to fit tricky corners or detailed edges.
Overall, this kit gave me a surprisingly professional finish without much fuss. It’s a simple, affordable upgrade from single grit sheets.
Honestly, I’ll keep this around for all my future sanding needs—especially before painting.
In short, it’s versatile, durable, and easy to use. The only downside?
It’s not a full range of very coarse or very fine grits—so for heavy stripping or ultra-fine polishing, you might need something more specialized.
What Types of Sandpaper Are Most Effective for Kitchen Cabinets?
The best sandpaper types for sanding kitchen cabinets before painting include various grits designed for specific tasks.
- 80-Grit Sandpaper: This coarse grit is effective for removing old paint, varnish, or any other finish from cabinets. It quickly abrades the surface, making it suitable for initial sanding but should be followed by finer grits to avoid deep scratches.
- 120-Grit Sandpaper: This medium grit is ideal for smoothing rough surfaces after using coarser sandpaper. It helps refine the surface texture and prepares the cabinets for primer or paint by creating a smooth base without excessive abrasion.
- 220-Grit Sandpaper: This fine grit is perfect for the final sanding step before painting. It helps to eliminate any remaining scratches from previous grits and provides a smooth finish that enhances paint adhesion and overall appearance.
- Sandpaper Sheets vs. Sponge Sandpaper: While traditional sandpaper sheets are great for flat surfaces, sponge sandpaper is flexible and can easily conform to contours and edges of cabinets. This versatility makes it useful for getting into crevices and ensuring an even sanding across all surfaces.
- Wet/Dry Sandpaper: This type can be used with water to reduce dust and help achieve an even smoother finish. It is especially beneficial for final sanding, as it minimizes the risk of clogging and allows for a more controlled sanding process.
How Do Grit Levels Impact the Sanding Process for Cabinets?
The grit levels of sandpaper significantly affect the sanding process for kitchen cabinets before painting.
- Coarse Grit (40-60): This grit level is best for removing old paint or heavy finishes from cabinets. Coarse sandpaper quickly abrades the surface, making it ideal for initial sanding when you need to strip down to the bare wood.
- Medium Grit (80-120): Medium grit sandpaper is suitable for smoothing surfaces after the coarse grit has been used. It helps eliminate scratches left by the coarse sandpaper and prepares the surface for finer sanding, enhancing adhesion for paint.
- Fine Grit (150-220): Fine grit sandpaper is perfect for the final sanding stage before painting. It smooths out the surface, ensuring that the finish is even and reducing the likelihood of imperfections appearing in the paint.
- Extra Fine Grit (240 and above): Extra fine grit sandpaper can be used for a final pass after the fine grit to achieve an ultra-smooth finish. This is especially important if you are applying a high-gloss paint, as it minimizes any surface texture that could be visible in the final coat.
Why Should You Use Coarse Grit Sandpaper Initially?
This happens because coarse grit sandpaper is designed to remove material quickly and efficiently, making it ideal for initial sanding on surfaces like kitchen cabinets that require significant preparation before painting.
According to the Woodworkers Institute, using coarse grit sandpaper (usually in the range of 60 to 80 grit) helps to strip away old paint, stains, or imperfections on the wood surface, creating a clean base for the new finish. This significant material removal is crucial when working with cabinets that may have been previously painted or varnished.
The underlying mechanism involves the size and sharpness of the grit particles on the sandpaper. Coarse grit has larger particles that can cut into the surface more aggressively, allowing for faster removal of layers. Once the surface is adequately prepared with the coarse grit, finer grits can then be used to smooth out the texture and refine the surface for painting. This two-step approach—starting with coarse and then transitioning to finer grits—ensures that the paint adheres better and results in a more professional finish, as noted by the National Wood Flooring Association.
What Advantages Does Fine Grit Sandpaper Offer?
Fine grit sandpaper offers several advantages when preparing kitchen cabinets for painting.
- Smooth Finish: Fine grit sandpaper, typically ranging from 180 to 220 grit, helps achieve a smooth surface on the cabinets. This smoothness is essential for ensuring that the paint adheres well and results in a professional-looking finish.
- Minimized Damage: Using fine grit sandpaper reduces the risk of damaging the wood or laminate surface of the cabinets. It removes imperfections without gouging or scratching, making it ideal for delicate surfaces that require careful handling.
- Improved Paint Adhesion: By lightly scuffing the surface with fine grit sandpaper, you create tiny scratches that promote better adhesion for the paint. This is crucial for ensuring that the paint bonds effectively, preventing peeling or chipping over time.
- Ease of Use: Fine grit sandpaper is typically easier to work with, as it requires less effort to achieve a desirable result. Its flexibility allows for better maneuverability on curved or intricate cabinet designs, providing a more efficient sanding experience.
- Versatility: Fine grit sandpaper can be used not only for sanding cabinets but also for other surfaces and projects. Its versatility makes it a staple in any DIY enthusiast’s toolkit, suitable for finishing touches on various woodworking tasks.
What Are the Best Sandpaper Materials for Cabinets?
When preparing kitchen cabinets for painting, selecting the right sandpaper is crucial for achieving a smooth finish.
- Aluminum Oxide: This is one of the most popular sandpaper materials due to its durability and long lifespan. It is effective for sanding wood surfaces and can be used for both rough sanding and finishing, making it ideal for cabinets.
- Garnet: Garnet sandpaper is known for its natural properties and is excellent for achieving a smooth finish on wood. It tends to wear out faster than other materials, but it provides a finer scratch pattern that is desirable when prepping for paint.
- Silicon Carbide: This type is particularly effective for sanding harder materials and is often used for wet sanding. Its sharp particles help to create a fine finish, which is beneficial when preparing cabinets for a new coat of paint.
- Ceramic: Ceramic sandpaper is ideal for heavy-duty sanding tasks and is designed to withstand high pressure and heat. Although it may be more expensive than other types, its longevity and grinding capabilities make it a good choice for sanding cabinets before painting.
- Open-coat Sandpaper: This sandpaper has a coating that allows for less clogging, making it suitable for sanding materials that produce a lot of dust. It is particularly useful when working with painted surfaces, as it helps to maintain the effectiveness of the sandpaper while minimizing buildup.
- Closed-coat Sandpaper: Closed-coat sandpaper features a denser application of abrasive grains, providing a smoother finish. It is ideal for final sanding on wood surfaces and is often used for the last preparation steps before painting kitchen cabinets.
How Does Aluminum Oxide Compare to Garnet Sandpaper?
| Aspect | Aluminum Oxide | Garnet |
|---|---|---|
| Material Type | Manufactured from aluminum oxide crystals; durable and suitable for various surfaces. | Natural mineral; softer and typically used for finer finishes. |
| Durability | Long-lasting, resistant to wear, ideal for heavy sanding tasks. | Less durable, can wear out quicker under heavy use. |
| Grit Options | Available in a wide range of grits for different sanding needs. | Limited grit options, usually found in medium to fine grades. |
| Best Use Cases | Great for sanding kitchen cabinets due to its durability and efficiency. | Best for final finishing and smoothing surfaces before painting. |
| Cost Comparison | Generally more expensive but offers better longevity. | Typically cheaper but may require more frequent replacement. |
| Availability | Widely available in hardware stores and online. | Available but may have limited selection in some stores. |
| Environmental Impact | Manufactured process can have a higher environmental footprint. | Natural product, considered more environmentally friendly. |
What Techniques Can Improve Sanding Results on Cabinets?
Several techniques can significantly enhance sanding results on cabinets before painting:
- Choosing the Right Sandpaper Grit: Selecting the appropriate grit is crucial for effective sanding. Coarse grit (60-80) is suitable for removing old finishes, while medium grit (120-150) helps smooth the surface, and fine grit (220+) is ideal for preparing the surface for paint.
- Using a Random Orbital Sander: A random orbital sander combines circular and back-and-forth motions to minimize swirl marks. This tool is effective for achieving a smooth finish quickly and can cover large areas efficiently, reducing the physical labor involved in sanding.
- Sanding in the Direction of the Grain: Always sand along the wood grain to avoid scratches and achieve a more uniform finish. This technique helps maintain the aesthetic quality of the wood and ensures that the paint adheres better to the surface.
- Using a Vacuum or Compressed Air: Cleaning the surface between sanding stages is essential to remove dust and debris. Using a vacuum or compressed air ensures that particles do not interfere with the next sanding or painting step, leading to a smoother finish.
- Applying a Wood Conditioner: Before painting, applying a wood conditioner can help the sanded surface absorb the paint evenly. This treatment is especially useful for softwoods, preventing blotchiness and ensuring a consistent finish.
- Sealing the Surface: After sanding and before painting, consider sealing the wood with a primer or sealer. This step helps to fill in any remaining imperfections and provides a better adhesion surface for the paint, resulting in a more durable finish.
How Can You Achieve a Smooth Finish When Sanding?
Achieving a smooth finish when sanding kitchen cabinets is crucial for a professional look after painting. To ensure an even surface, follow these guidelines:
-
Select the Right Sandpaper: Start with a coarser grit (80-120) to remove existing paint or finish. Follow up with a finer grit (220-320) for smoothing out the surface. This progression helps eliminate scratches made by the coarser sandpaper.
-
Sand in the Right Direction: Always sand in the direction of the wood grain. This minimizes scratch marks and helps maintain a natural appearance.
-
Use a Sanding Block or Detail Sander: A sanding block can provide better control, especially on flat surfaces. For intricate areas or corners, a detail sander or sanding sponge can be beneficial.
-
Keep the Surface Clean: Regularly wipe away dust as you sand. A clean surface ensures that you can see progress and avoid any potential imperfections.
-
Finish with a Vacuum and Tack Cloth: After sanding, vacuum the area to remove larger particles, then use a tack cloth to pick up fine dust. This final prep step is essential for a smooth painting application.
By adhering to these practices, you can achieve a perfectly smooth surface that enhances the overall finish of your kitchen cabinets.
What Common Mistakes Should You Avoid When Sanding Cabinets?
When sanding cabinets, avoiding common mistakes can lead to a smoother finish and better adherence of paint.
- Using the Wrong Grit Sandpaper: Selecting inappropriate grit sandpaper can significantly affect the surface finish. Coarse grit (like 80 or 100) can create deep scratches, while too fine (like 220 or higher) might not adequately prepare the surface for painting.
- Skipping the Cleaning Process: Neglecting to clean the cabinets before sanding can lead to a buildup of grease and dirt that will interfere with the adhesion of paint. Always wipe down the surfaces with a degreaser or soap and water to ensure a clean working area.
- Sanding Without Proper Technique: Rushing through sanding or using excessive pressure can create uneven surfaces. Instead, use a light, even pressure and sand in the direction of the wood grain to maintain consistency.
- Not Using a Dust Mask: Failing to wear a dust mask can result in inhaling harmful particles that are released during the sanding process. Protecting your lungs is essential, especially when working with old cabinets that may contain lead paint.
- Overlooking Nooks and Crannies: It’s easy to miss corners and detailed areas when sanding, which can lead to an uneven finish. Use smaller sanding tools or hand-sanding techniques to ensure all areas are properly prepared.
- Neglecting to Test the Sanding Process: Not testing your sandpaper on a small, inconspicuous area can lead to unexpected results. Always test your chosen sandpaper on a hidden section to ensure it achieves the desired effect without damaging the surface.