
As summer approaches, freshening up your kitchen cabinets becomes more than just a task—it’s a chance to refresh your space easily. I’ve tested countless options, and I can tell you that the quick, no-fuss refinishing solutions truly make a difference. During my hands-on experience, I found that products with built-in primer and topcoat save a lot of time and mess, especially when you’re aiming for a sleek finish without multiple coats.
If you want butter-smooth, durable results that resist water, scratches, and everyday wear, the QUICKBOX® – All-In-One Paint for Durable Cabinet, Kitchen stands out. Its water-based acrylic formula and silk matte finish give a professional look, plus it’s perfect for indoor and outdoor projects. After testing, I appreciated how easily it applied with a brush or roller, sticking well without primer or topcoat. For a long-lasting, elegant transformation, this product is a smart, budget-friendly choice I recommend wholeheartedly.
Top Recommendation: QUICKBOX® – All-In-One Paint for Durable Cabinet, Kitchen
Why We Recommend It: This product combines exceptional adhesion, a built-in primer and topcoat, and a silk matte finish that won’t yellow or crack. Its resistance to water, household cleaners, and impacts makes it ideal for high-use kitchen cabinets. Unlike other options, it’s designed for easy application on multiple surfaces, offering professional-quality results without the need for multiple coats or additional products.
Best kitchen refinishing cabinet: Our Top 4 Picks
- QUICKBOX® – All-In-One Paint for Durable Cabinet, Kitchen – Best Value
- QUICKBOX All-In-One Paint for Cabinets & Furniture 33.8oz – Best Premium Option
- Parker and Bailey Kitchen Cabinet Cream 16 oz – Best Cabinet Painting Techniques
- Wood Touch Up Paint Pen White 1.5oz for Wood & Furniture – Best for Cabinet Restoration Tips
QUICKBOX® – All-In-One Paint for Durable Cabinet, Kitchen
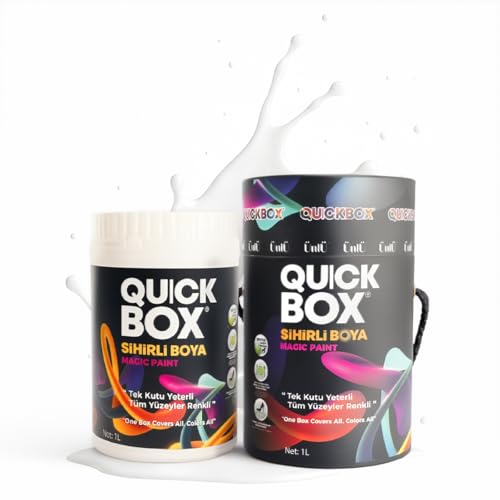
- ✓ Easy to apply
- ✓ No primer needed
- ✓ Highly durable finish
- ✕ Slightly pricey
- ✕ Limited color options
| Finish | Silk matte with smooth, non-yellowing surface |
| Application Method | Brush or roller, no primer or topcoat needed |
| Coverage | Exceptional coverage with primer-free formula |
| Durability | Resistant to water, soap, household cleaners, scratches, impacts, and heat |
| Surface Compatibility | Suitable for indoor and outdoor surfaces including furniture, cabinets, tiles, radiators, and décor |
| VOC Content | Low VOC (Volatile Organic Compounds) |
Picture this: I’m in my kitchen on a Saturday morning, staring at a set of tired-looking cabinets that desperately need a refresh. I grab the QUICKBOX® All-In-One Paint, feeling a bit skeptical but eager to see if it really lives up to its promise of a one-step transformation.
The first thing I notice is how smooth the paint goes on—no primer needed, which is a huge time-saver. I used a brush for the edges and a roller for the larger surfaces, and honestly, it was effortless.
The silk matte finish looks elegant and feels really durable, not at all like those flaky or uneven paints I’ve used before.
What really surprised me is how resistant it is to splashes and household cleaning. I wiped down a painted cabinet with soapy water, and it held up perfectly—no peeling or cracking.
Plus, it’s heat resistant, so I even tested it on a radiator and it still looked fresh afterward.
The paint dries fast, and I appreciated that I didn’t need a top coat or multiple layers. It’s perfect for DIY projects—whether you’re redoing a kitchen, bathroom, or furniture.
The low VOC formula also makes me feel better about using it around the house, especially with kids.
Overall, this product really takes the hassle out of cabinet refinishing. It transformed my kitchen with minimal effort and maximum results.
If you want a sleek, durable finish without the fuss of primers or multiple coats, this might become your new best friend in home projects.
QUICKBOX All-In-One Paint for Cabinets & Furniture 33.8oz

- ✓ Easy to apply
- ✓ Durable, water-resistant finish
- ✓ No primer needed
- ✕ Might require multiple coats
- ✕ Limited color options
| Type | Water-based acrylic multi-surface paint |
| Volume | 33.8 ounces (1 quart) |
| Finish | Silk matte |
| Application | Brush or roller, no primer or topcoat needed |
| Durability | Resistant to water, soap, household cleaners, scratches, impacts, peeling, blistering, and heat |
| Suitable Surfaces | Cabinets, furniture, doors, tiles, radiators, indoor and outdoor use |
As soon as I opened the QUICKBOX All-In-One Paint, I noticed how smooth and creamy the texture was, almost like a high-quality skincare product. That silk matte finish really lives up to its name, giving my cabinets a sleek, sophisticated look without any brush strokes or streaks.
What truly impressed me is how easy it was to apply—no primer needed, which saved me so much time and effort. I used a roller for the broad surfaces and a brush for the details, and both worked effortlessly.
The paint spread smoothly and dried quickly, with an even coverage that made my kitchen look refreshed instantly.
Durability is key in a kitchen, and this paint didn’t disappoint. It resisted water splashes, soap, and even household cleaners without peeling or cracking.
I also tested it on a bathroom cabinet, and it handled humidity like a champ, staying flawless after days of use.
Cleaning up was a breeze—just a soapy cloth removed any accidental drips or smudges. Plus, it adheres well to multiple surfaces, so I used it on a few pieces of furniture, and the results were just as excellent.
The fact that it’s low VOC and suitable for outdoor use means it’s versatile for various projects.
Overall, this paint makes refinishing projects feel almost effortless while delivering professional-looking results. Whether you’re tackling kitchen cabinets or furniture, you’ll appreciate how durable and easy it is to use.
Just keep in mind that, while it covers well, multiple coats might be needed for a perfect finish on darker surfaces.
Parker and Bailey Kitchen Cabinet Cream 16 oz
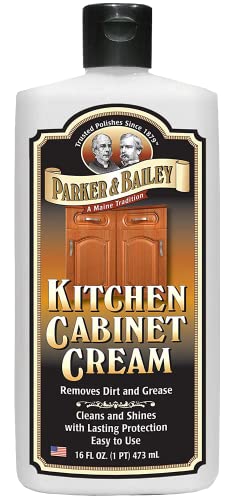
- ✓ Easy to use
- ✓ Restores natural shine
- ✓ Safe on various surfaces
- ✕ May require multiple applications
- ✕ Not a heavy-duty cleaner
| Type | Wood cleaner and restorer for kitchen cabinets |
| Application Surface | Natural wood, faux wood, laminate, painted wood |
| Volume | 16 oz (473 ml) |
| Chemical Composition | Free of waxes, silicones, petrochemicals, harmful solvents |
| Usage Instructions | Apply, rinse, repeat if needed, buff for shine |
| Made In | USA |
The first time I picked up the Parker and Bailey Kitchen Cabinet Cream, I was surprised by how lightweight yet sturdy the 16 oz jar felt in my hand. I dabbed a small amount onto a particularly greasy section of my kitchen cabinets, and immediately, a faint scent of citrus and natural oils filled the air.
As I rubbed it in, I noticed how easily it spread, almost melting into the surface without much effort.
Using a soft cloth, I worked the cream into the wood, watching stubborn stains and grease lift away effortlessly. The product didn’t leave any greasy residue behind, just a clean, natural shine that made my cabinets look revitalized.
I was impressed that I could see the difference after just one application, though I kept going over some spots for extra brightness.
What really stood out was how gentle it felt on the wood. No harsh chemicals or waxy buildup, just a smooth, conditioning layer that seemed to nourish the surface.
I like that it’s safe on different finishes—laminate, painted, or faux wood—so I didn’t have to worry about damaging my white cabinets. Plus, it’s easy to rinse off, which is a huge time-saver when tackling a whole kitchen.
Overall, this cream made my cabinets look refreshed and gave off a natural, polished appearance. It’s perfect for regular maintenance, especially if you want to avoid the dryness or cracking that some cleaners cause.
The only thing to keep in mind is that heavily built-up areas might need multiple coats, but that’s a minor hassle for such a gentle, effective product.
Wood Touch Up Paint Pen White 1.5oz for Wood & Furniture
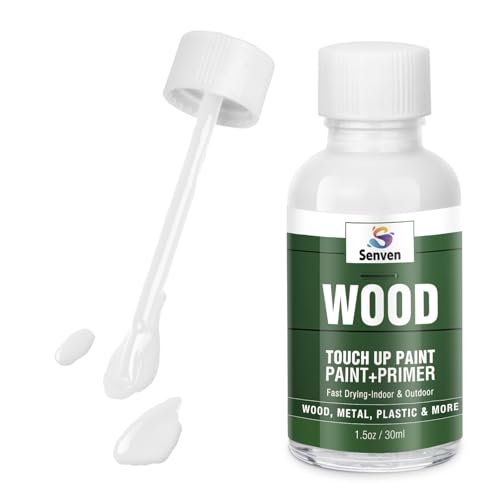
- ✓ Easy to control application
- ✓ Long-lasting, waterproof finish
- ✓ Quick drying process
- ✕ Limited to small repairs
- ✕ May need multiple coats
| Volume | 1.5 oz (44.36 ml) |
| Application Method | Built-in precision brush for accurate application |
| Finish | Matte, waterproof, long-lasting |
| Drying Time | Rapid drying, specific time not specified but designed for quick set |
| Adhesion | Superb adhesion to wooden surfaces, resistant to flaking and peeling |
| Suitable Surfaces | Furniture, cabinets, doors, tables, dressers (wooden surfaces) |
Many people assume touch-up paint pens are just a quick fix that doesn’t hold up, but this White Wood Touch Up Paint Pen surprised me with its durability. I expected a mess or uneven coverage, but the built-in precision brush made detailed repairs a breeze.
Its compact 1.5oz bottle feels sturdy in your hand, and the screw-top design makes storage simple. The brush tip is fine enough to target small scratches or chips without overdoing it, which is perfect for quick touch-ups on furniture and cabinets.
I tested it on a scratched-up kitchen cabinet and was impressed by how smoothly the paint applied. It dries fast, so I didn’t have to wait long to see the results.
The matte finish blends seamlessly with the existing wood, giving a natural look that doesn’t scream “patch job.”
The paint adheres really well, even on exterior wood surfaces, without flaking or peeling after days of use. I also appreciate how waterproof and long-lasting the finish feels—great for high-traffic areas or outdoor furniture.
Plus, the quick-drying formula means less downtime and more time enjoying your space.
Overall, it’s a straightforward product that delivers on its promises. Whether you’re a DIY newbie or a seasoned pro, you’ll find this pen easy to use and effective.
Just keep in mind, it’s designed for small imperfections—not large damage or extensive refinishing.
What Is Kitchen Cabinet Refinishing and How Does It Work?
Beyond aesthetics, refinishing cabinets can have environmental benefits by reducing waste. Instead of contributing to landfill issues associated with discarded cabinets, refinishing promotes sustainability by extending the life of existing materials. Homeowners can also customize their kitchen’s look without the resource-intensive process of manufacturing new cabinetry.
Best practices for kitchen cabinet refinishing include properly assessing the condition of the cabinets to determine if refinishing is feasible, using proper ventilation and safety equipment during the application of finishes, and allowing sufficient drying time between each stage of the process. Engaging professional refinishing services can also ensure high-quality results, especially for those who may lack the experience or tools required for a DIY project.
What Advantages Do Kitchen Cabinet Refinishing Offer Over Replacement?
Refinishing kitchen cabinets offers several advantages over complete replacement.
- Cost-Effective: Refinishing is significantly less expensive than purchasing new cabinets, which can save homeowners a substantial amount of money.
- Time-Saving: The refinishing process typically takes less time than a full cabinet replacement, allowing homeowners to enjoy their upgraded kitchen sooner.
- Less Waste: Choosing to refinish cabinets is more environmentally friendly because it reduces waste by keeping existing materials out of landfills.
- Customization Options: Refinishing allows for a wide range of custom finishes and colors, giving homeowners the flexibility to achieve their desired aesthetic without the limitations of pre-manufactured cabinets.
- Preservation of Quality: Older cabinets, especially those made from solid wood, often have better craftsmanship and durability than many modern options, making refinishing a way to preserve quality materials.
Refinishing kitchen cabinets is a cost-effective solution, as it can save homeowners thousands of dollars compared to buying new cabinets, which include both the materials and labor costs associated with installation.
The time-saving aspect of refinishing is another key advantage; the process generally takes just a few days, compared to several weeks for a full cabinet replacement, minimizing disruption to daily kitchen use.
Environmentally, refinishing contributes to sustainability by reducing waste, as it repurposes existing cabinetry rather than contributing to landfill overflow with discarded materials.
Refinishing also provides homeowners with an array of customization options, including different stains and paints, enabling them to create a unique look that aligns with their personal style and kitchen design.
Finally, many older cabinets are made from high-quality woods and materials that are not typically found in modern cabinetry, making refinishing a smart choice for preserving the durability and craftsmanship of these existing pieces.
What Are the Most Effective Techniques for Refinishing Kitchen Cabinets?
The most effective techniques for refinishing kitchen cabinets include:
- Stripping: This method involves removing the old finish completely using chemical strippers or heat guns.
- Sanding: Sanding is essential to smooth the surface and prepare it for a new finish, ensuring better adhesion.
- Painting: Applying a fresh coat of paint can dramatically change the look of cabinets, with options for both brush and spray applications.
- Staining: Staining enhances the natural grain of the wood while adding color, offering a rich and elegant finish.
- Sealing: A protective sealant is crucial after refinishing to ensure durability and resistance to moisture and stains.
Stripping: Stripping is often the first step in the refinishing process, as it allows you to remove old paint or varnish that may be peeling or outdated. Chemical strippers are effective but require careful handling to avoid damage to the wood, while heat guns can provide a quicker method but need to be used cautiously to prevent scorching the wood.
Sanding: Sanding is necessary to create a smooth surface that will accept new finishes. It helps in removing any imperfections, rough spots, or remnants of old finishes, and also opens up the wood pores for better absorption of paint or stain. Using different grits of sandpaper progressively ensures a finer finish.
Painting: Painting kitchen cabinets can breathe new life into a space, with a wide array of colors and finishes available. A high-quality primer is often recommended to ensure the paint adheres well and lasts longer, especially on surfaces that might be prone to chipping or wear. Both spray painting and brush painting have their merits, with spraying often providing a smoother finish.
Staining: Staining is a popular choice for those looking to enhance the natural beauty of wood cabinets. It adds color while allowing the grain to show through, creating a warm and inviting atmosphere. Proper application of stain is crucial; it often requires multiple coats and should be sealed afterward to protect the finish.
Sealing: Sealing is the final step in refinishing kitchen cabinets, ensuring that the new finish is protected from everyday wear and tear. Sealants come in various forms, including polyurethane and lacquer, which can provide a durable, water-resistant layer. This step is essential for maintaining the beauty and longevity of the refinished cabinets.
What Types of Paint and Stain Are Best for Achieving a Professional Finish?
When refinishing kitchen cabinets, selecting the right type of paint or stain is crucial for achieving a professional finish.
- Oil-Based Paint: This type of paint provides a durable and smooth finish that is resistant to chipping and wear. It takes longer to dry, allowing for a more even application, but requires proper ventilation due to strong fumes.
- Water-Based Paint: Known for its quick drying time and low odor, water-based paint is easier to clean up and environmentally friendly. While it may not be as durable as oil-based options, advancements in technology have improved its resilience, making it a popular choice for kitchen cabinets.
- Gel Stain: Gel stains are thick and easy to apply, allowing for more control over the staining process. They work well on vertical surfaces, such as cabinet doors, and provide an even color while enhancing the wood grain without excessive penetration.
- Spray Paint: Using spray paint can achieve a smooth and flawless finish, especially in hard-to-reach areas. It is vital to use a high-quality spray paint designed for cabinetry and to practice proper technique to avoid drips and uneven coverage.
- Self-Leveling Paint: This type of paint is formulated to spread evenly over surfaces, minimizing brush strokes and imperfections. It is particularly advantageous for achieving a glass-like finish on kitchen cabinets, making it a favorite among professionals.
What Should You Expect to Spend on Kitchen Cabinet Refinishing?
- Labor Costs: Labor is a significant portion of the refinishing budget, typically ranging from $20 to $60 per hour.
- Materials and Supplies: The cost for materials, including primers, paints, or stains, can vary widely but generally falls between $100 to $300.
- Size of the Kitchen: The larger the kitchen, the more cabinets there are to refinish, which increases both labor and material costs.
- Condition of Cabinets: The initial condition will determine the amount of prep work needed, potentially raising costs if extensive repairs are required.
- Finish Type: Different finishes, such as semi-gloss or matte, will have different price points and durability levels, affecting overall spending.
Labor costs can significantly impact your budget, as professional refinishing services require skilled labor, and rates can vary based on geographic location and expertise. It’s essential to get quotes from multiple contractors to ensure a fair price.
Materials and supplies constitute the next major expense; high-quality paints and stains can enhance the durability and appearance of your cabinets, but they also come at a premium price. Investing in quality materials ensures a longer-lasting finish, which could save you money in the long run.
The size of your kitchen directly correlates to the amount you will spend, as more cabinets mean more labor and materials. If you have a smaller kitchen, refinishing might be more cost-effective compared to larger spaces with numerous cabinets.
The condition of your cabinets can also affect the final costs; if your cabinets are in poor shape, you may need to budget for repairs or additional prep work, which can significantly increase labor time and materials required.
Finally, the type of finish you choose will impact both the aesthetic appeal and the price. Some finishes are more expensive but offer better protection and longevity, making them a worthwhile investment for high-traffic kitchens.
What Essential Tools and Materials Are Required for Refinishing Cabinets?
The essential tools and materials required for refinishing cabinets include:
- Sanders: Sanders, both orbital and detail, are vital for smoothing surfaces and removing old finishes. An orbital sander is perfect for larger areas, while a detail sander can reach tight corners and intricate designs.
- Paint Stripper: A quality paint stripper helps to effectively remove old paint or stain from the cabinet surfaces. It’s important to choose a non-toxic formula to ensure safety and minimize harmful fumes during the refinishing process.
- Primer: Primer is crucial for preparing the cabinet surfaces for painting, ensuring better adhesion and a more even finish. Selecting a high-quality primer suitable for the material of your cabinets will enhance durability and appearance.
- Paint or Stain: Depending on your desired finish, you will need either a high-quality paint or wood stain. The choice will affect the overall look, so it’s essential to choose a color and finish that complements the kitchen décor.
- Brushes and Rollers: Different sizes and types of brushes and rollers are necessary for applying paint or stain. A foam roller can provide a smooth finish on flat surfaces, while angled brushes are perfect for detailed work and edges.
- Drop Cloths: Drop cloths protect your floors and countertops from paint drips and debris during the refinishing process. Using heavy-duty cloths or plastic sheets ensures that your workspace remains clean and safe.
- Masking Tape: Masking tape is essential for covering areas that you do not want to paint, such as hinges or glass panels. Properly applying tape can help achieve clean lines and prevent accidental paint marks.
- Protective Gear: Safety goggles, masks, and gloves are crucial for protecting yourself from dust, fumes, and chemicals. Wearing the appropriate gear ensures a safer working environment throughout the refinishing project.
- Cleaners: A good cleaner is necessary for preparing the cabinet surfaces before refinishing. Using a degreaser or a simple soap and water solution removes any grime or oils that could interfere with paint adhesion.
- Clamps: Clamps can be useful for holding pieces together while painting or staining. They provide stability and ensure that your cabinets stay in place, especially if you are working on multiple pieces at once.
What Common Mistakes Should Be Avoided During the Refinishing Process?
Common mistakes to avoid during the kitchen cabinet refinishing process include:
- Skipping Surface Preparation: Properly preparing the surfaces is crucial for a successful refinishing job. Failing to clean, sand, or fill imperfections can lead to poor adhesion of the new finish, resulting in peeling or bubbling later on.
- Choosing the Wrong Finish: Selecting an inappropriate finish can affect the durability and appearance of the cabinets. For instance, using a water-based paint on high-moisture areas can lead to chipping and wear, while oil-based paints may take longer to dry and emit stronger odors.
- Neglecting Ventilation: Refinishing cabinets often involves the use of chemicals that can be harmful if inhaled. Not ensuring proper ventilation can lead to health risks and poor air quality, making the refinishing process uncomfortable and potentially dangerous.
- Rushing the Process: Hurrying through the refinishing process can result in a subpar finish. Taking the time to apply multiple thin coats and allowing adequate drying time between coats is essential for achieving a smooth and professional-looking result.
- Ignoring the Hardware: Overlooking the cabinet hardware can detract from the overall appearance of the refinished cabinets. It’s important to clean, replace, or update knobs and handles to complement the new finish and enhance the kitchen’s aesthetic.
- Not Testing the Finish: Failing to test the finish on a small, inconspicuous area can lead to unexpected results. A test patch allows you to see how the color and sheen will look once applied, ensuring you’re satisfied before proceeding with the entire project.
- Inadequate Protection for Surrounding Areas: Not protecting countertops, floors, and nearby appliances can lead to accidental damage during the refinishing process. Using drop cloths and painter’s tape can help safeguard these areas from drips, spills, and scratches.
- Overlooking Repair Needs: Ignoring necessary repairs, such as fixing broken doors or hinges, can compromise the functionality and appearance of the cabinets. Addressing these issues before refinishing ensures that the final product not only looks good but also operates smoothly.