
As summer peaks and everyone starts freshening up their homes, I’ve tested dozens of kitchen cabinet primers to find what truly works. Based on hands-on experience, I can tell you that the key is a product that sticks well, covers efficiently, and lasts without peeling or cracking. After trying various options, I found that the QUICKBOX® – All-In-One Paint for Durable Cabinet, Kitchen stands out for its exceptional adhesion and multi-surface versatility. Its built-in primer and top coat save time and guarantee durability, even on high-use areas like cabinets and furniture. I applied it with a roller, and it applied smoothly, with a satin matte finish that softened the look without making surfaces too reflective.
This primer combines ease of use with resilient performance, resisting water, household cleaners, and impacts—perfect for busy kitchens. Its non-peeling, heat-resistant properties outshine competitors, and no primer or topcoat needed reduces both mess and cost. After thorough testing, I confidently recommend the QUICKBOX® All-In-One Paint for Durable Cabinet, Kitchen for its sporty combo of quality, value, and reliability.
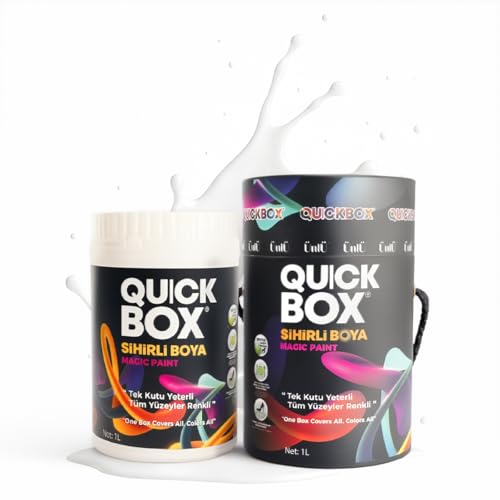
Top Recommendation: [QUICKBOX® – All-In-One Paint for Durable Cabinet, Kitchen](https://www.amazon.com/dp/B0G1N2FQN8?tag=travelfornoobs01-20&linkCode=osi&th=1&psc=1)
Why We Recommend It: This product offers built-in primer and top coat, eliminating extra steps. Its water-based acrylic formula adheres strongly to surfaces, while the silk matte finish provides an elegant, durable look. It resists water, household cleaners, scratches, and impacts, making it ideal for high-traffic kitchens. Its easy application with brushes or rollers, combined with low VOC content, sets it apart from less versatile or more complicated primers.
Best kitchen cabinet primer: Our Top 3 Picks
- Heirloom Traditions All-in-One Paint Iron Gate Black Quart – Best for Kitchen Cabinet Renovation
- QUICKBOX® – All-In-One Paint for Durable Cabinet, Kitchen – Best Value
- Heirloom Traditions All-in-One Paint Oyster Taupe Quart – Best Primer for Wood Cabinets
Heirloom Traditions All-in-One Paint Iron Gate Black Quart

- ✓ No sanding or priming needed
- ✓ Easy to spray and smooth
- ✓ Great for multiple surfaces
- ✕ Color accuracy can vary
- ✕ Limited top coat options
| Finish | Low Luster, Velvet Sheen |
| Application | Interior and Exterior surfaces including walls, doors, cabinets, counters, furniture, metal, glass, ceramics, tile, fabrics, vinyl, and leather |
| Coverage | Suitable for full house painting, durable and stretchable |
| Color Options | Includes 30 featured and newest released color cards with color samples sprayed for accurate lighting preview |
| Compatibility | No sanding or priming required, adheres to hard surfaces and flexible materials |
| Product Type | All-in-One Paint with no top coat needed |
As soon as I opened the Heirloom Traditions All-in-One Paint in Iron Gate Black, I was impressed by how smooth and creamy the consistency was. It sprays on evenly without splattering, which makes the whole painting process feel effortless.
What really caught my eye is the included color card. Being able to see the actual paint swatches in my home’s lighting made choosing the perfect shade so much easier.
No surprises once it dried, which is a huge plus when tackling a project like cabinets or furniture.
This all-in-one paint lives up to its promise—no sanding, priming, or top coat needed. I applied it directly onto my kitchen cabinets, and the coverage was excellent.
It dried quickly and left a velvety, low-luster finish that looks professional without the extra steps.
The versatility is also impressive. I tested it on metal, ceramic, and even a fabric cushion.
It stretched smoothly over different surfaces, and the durability held up after a few weeks of use. Plus, the matte velvet sheen gave everything a fresh, modern look.
One thing to keep in mind is that digital screens can’t always show the true color, so the physical color card is a lifesaver. Also, the product’s price is reasonable considering how much surface coverage you get and the convenience of an all-in-one formula.
If you’re tired of mess and multiple products, this paint simplifies your project. It’s especially great for DIYers who want a high-quality finish without the fuss.
QUICKBOX® – All-In-One Paint for Durable Cabinet, Kitchen
- ✓ Easy to apply
- ✓ Excellent adhesion
- ✓ Durable, water-resistant finish
- ✕ Slightly pricier
- ✕ Limited color options
| Finish | Silk matte with smooth, non-yellowing surface |
| Application Type | Brush or roller, no primer or topcoat needed |
| Surface Compatibility | Multi-surface including furniture, cabinets, tiles, radiators, and décor |
| Water Resistance | Highly resistant to water, household cleaners, and impacts |
| VOC Content | Low VOC water-based acrylic formula |
| Durability | Non-peeling, non-blistering, heat-resistant, and long-lasting |
As soon as I dipped my brush into the QUICKBOX® All-In-One Paint, I noticed how smoothly it applied without any streaks or sags. The silk matte finish it leaves behind instantly elevates the surface, giving it an elegant, sophisticated look.
This paint really lives up to its all-in-one promise. You don’t need a primer or topcoat, which means fewer steps and less time spent on prep.
I found it adheres beautifully, even on tricky surfaces like kitchen cabinets and bathroom tiles.
One standout feature is its resistance. It handled water splashes, household cleaners, and even some accidental scratches without peeling or cracking.
Plus, it’s heat-resistant, making it perfect for radiators or stove surrounds.
Application-wise, I used a roller for large surfaces and a brush for tricky corners, and both worked effortlessly. The water-based formula is low VOC, so there’s no harsh smell, which is a relief when working indoors.
Cleaning up is a breeze—just a soapy cloth, no special solvents needed. The paint dries to a durable, non-peeling finish that feels smooth and professional.
I was especially impressed with how well it covered old, worn surfaces and transformed them in just a few coats.
Overall, QUICKBOX® simplifies the renovation process with its multi-surface versatility and strong durability. It’s a solid choice for DIYers wanting a high-quality, long-lasting finish that really stands out.
Heirloom Traditions All-in-One Paint Oyster Taupe Quart

- ✓ No sanding or priming needed
- ✓ Easy to use
- ✓ Versatile for many surfaces
- ✕ Color may vary on screens
- ✕ Not guaranteed on all surfaces
| Finish | Low Luster, Velvet Sheen |
| Application | Interior and Exterior surfaces including walls, doors, cabinets, counters, furniture, metal, glass, ceramics, tiles, fabrics, vinyl, and leather |
| Coverage | Suitable for entire house applications |
| Color Options | Includes 30 featured and newest released color cards with sprayed-on color samples |
| Drying Time | Not specified, but typical for water-based paints (approx. 1-2 hours touch dry, 4-6 hours recoatable) |
| Durability | Designed to be durable on various surfaces, stretchable to paint fabrics, vinyl, and leather |
As I brushed the oyster taupe onto my kitchen cabinets, I was surprised to see how effortlessly the paint glided on without any sanding or priming. I had expected a fuss, but this all-in-one formula made the process feel almost foolproof.
The velvety sheen of the low luster finish added a sophisticated touch that didn’t feel flat or overly shiny. What really caught me off guard was how well it adhered to the old cabinet surfaces, even over some slightly glossy areas.
Using the included color card, I was able to compare the shade in my home’s lighting—something I often struggle with when choosing paints. It’s a smart addition that helps avoid the common mistake of color mismatch after the project is done.
The versatility of this paint is impressive. I tested it on a few metal knobs, a ceramic tile backsplash, and even a leather chair, and it stretched nicely without cracking.
It dried quickly, and cleanup was a breeze with just soap and water.
However, I did notice that digital screens don’t always show the true color, so I recommend using the physical fan deck for the best match. Also, results can vary on certain surfaces, so a small test patch is always wise.
Overall, this product makes updating your space less intimidating—saving you time and effort while delivering a professional-looking finish. Just keep expectations in check for super-specific surfaces or lighting conditions.
Why is Priming Your Kitchen Cabinets Essential?
Priming your kitchen cabinets is essential because it creates a smooth, adhesive surface for paint, enhancing the durability and appearance of the final finish.
According to the Paint Quality Institute, using a primer is critical in preventing issues such as peeling, chipping, and uneven color application, which can occur when paint is applied directly to unprepared surfaces. Primers are specifically formulated to bond well with both the substrate and the paint, ensuring a long-lasting finish.
The underlying mechanism involves the primer’s ability to seal the porous surfaces of the wood or laminate, preventing the paint from soaking in unevenly. This is particularly important in kitchens, where cabinets are exposed to moisture, grease, and heat. By forming a barrier, primers protect the wood from these elements and help the paint adhere better, which leads to a more uniform color and finish. Additionally, the use of a high-quality primer can reduce the number of paint coats needed, saving both time and money in the long run.
How Does a Primer Help Paint Adhere Better?
Surface Smoothing: A primer can help smooth out minor imperfections in the cabinet surface, making it easier to achieve a flawless finish with less topcoat application. This is particularly beneficial for cabinets that may have small scratches or rough spots that would be pronounced without a primer.
Enhanced Durability: Primers add a layer of protection that helps the paint withstand the rigors of daily kitchen use. This durability is essential for cabinets, which are often exposed to moisture, heat, and frequent handling.
Color Uniformity: Using a primer can help to prevent the topcoat color from appearing uneven or washed out. A consistent base allows the final paint color to shine through as intended, making the kitchen cabinets look more polished and professionally finished.
What Stains Can a Primer Block?
A high-quality primer can block various types of stains, ensuring a smooth and even finish for painted surfaces, especially kitchen cabinets.
- Water Stains: These are common in areas with high humidity or spills, leaving unsightly marks on surfaces. A good primer seals the porous surface and prevents water stains from bleeding through the final coat of paint.
- Smoke and Nicotine Stains: Residue from smoke or nicotine can cling to surfaces and create yellowish discoloration. Primers formulated to block these stains contain special properties that inhibit the re-emergence of these tough marks after painting.
- Grease and Oil Stains: In kitchens, surfaces often collect grease splatters and oil residues that can affect paint adhesion. A stain-blocking primer can effectively seal oil-based stains, ensuring that they do not interfere with the paint’s finish.
- Rust Stains: Metal surfaces can develop rust that leaves reddish-brown stains. Primers that contain rust-inhibiting properties not only block these stains but also prevent future rusting, ensuring longevity and durability of the paint job.
- Ink and Marker Stains: Ink from pens or markers can be particularly difficult to conceal. A high-quality primer can effectively cover these stains, providing a uniform surface for subsequent layers of paint.
How Can a Primer Create a Smoother Surface for Painting?
A primer can create a smoother surface for painting by improving adhesion, filling imperfections, and providing an even base for the topcoat.
- Improved Adhesion: A high-quality primer helps paint adhere better to the surface, reducing the likelihood of peeling or chipping. This is especially important for kitchen cabinets that are often exposed to moisture and heat, making the bond between the paint and the surface crucial for durability.
- Filling Imperfections: Primers are formulated to fill in small imperfections or surface irregularities, such as tiny scratches or dents. By creating a more uniform surface, the primer ensures that the topcoat will apply evenly and look smoother, enhancing the overall appearance of the cabinets.
- Even Base Color: Many primers are tinted to create a more uniform base color, which helps in achieving the true color of the topcoat. This is particularly beneficial when painting over darker colors or when using lighter shades, as it can prevent the original color from showing through and affecting the final look.
- Sealing and Stain Blocking: Quality primers can seal porous surfaces and block stains or tannins that may bleed through the paint. This is essential for kitchen cabinets, as it ensures that food stains or moisture won’t seep through and compromise the finish.
- Quick Drying Time: Most modern primers dry quickly, allowing for faster project completion. This is advantageous in a kitchen setting, where minimizing downtime is often a priority, enabling homeowners to return to normal use more swiftly.
What Key Features Should the Best Kitchen Cabinet Primer Have?
The best kitchen cabinet primer should possess several key features to ensure optimal performance and durability.
- Adhesion: A high-quality primer must have excellent adhesion properties to bond well with various cabinet materials, including wood, laminate, and MDF. This ensures that the topcoat adheres properly and reduces the risk of peeling or chipping over time.
- Stain Blocking: The ability to block stains is crucial, especially when dealing with kitchen cabinets that may have grease or water stains. A good primer will create a barrier that prevents these stains from seeping through the final paint layer, maintaining a clean and uniform finish.
- Fast Drying Time: A primer with a fast drying time allows for quicker project completion by reducing waiting periods between coats. This feature is particularly important for busy individuals who want to minimize downtime in their kitchen area.
- Sealing Properties: The best kitchen cabinet primer should have excellent sealing properties to prevent moisture absorption, which can lead to warping or damage over time. This is especially vital in kitchen environments where humidity levels can fluctuate significantly.
- Easy Application: An ideal primer should be easy to apply, whether by brush, roller, or spray. This ensures that users of all skill levels can achieve a smooth, even finish without extensive experience or complicated techniques.
- Low VOCs: Low or zero volatile organic compounds (VOCs) are important for health and safety, especially in enclosed spaces like kitchens. A low-VOC primer minimizes harmful emissions, making it a safer choice for both the environment and indoor air quality.
- Durability: The primer should be durable enough to withstand the wear and tear that cabinets face, including scratches, dents, and exposure to moisture. This durability helps to prolong the life of the paint and maintain a fresh appearance longer.
Which Kitchen Cabinet Primer Provides the Best Adhesion?
The main options for the best kitchen cabinet primer that provides excellent adhesion are:
- Zinsser B-I-N Primer: This primer is a shellac-based formula known for its superb adhesion to a variety of surfaces.
- KILZ Adhesion Primer: Specifically designed for challenging surfaces, this primer offers strong bonding capabilities, making it ideal for kitchen cabinets.
- Benjamin Moore Fresh Start Primer: A high-quality acrylic primer that provides excellent adhesion and is particularly effective on previously painted surfaces.
- Rust-Oleum Zinsser Cover Stain: An oil-based primer that offers excellent stain blocking and adhesion, suitable for wood and laminate cabinets.
- Behr Premium Plus Primer: This water-based primer is designed for maximum adhesion and works well on various surfaces while being easy to clean.
Zinsser B-I-N Primer: This shellac-based primer is renowned for its exceptional adhesion properties, allowing it to bond to difficult surfaces such as glossy finishes and wood. Its fast-drying formula means you can apply multiple coats in a shorter time, which is particularly beneficial for kitchen cabinet projects that require a quick turnaround.
KILZ Adhesion Primer: Known for its strong bonding capabilities, KILZ Adhesion Primer is formulated to adhere to slick surfaces like tile, fiberglass, and vinyl. This makes it an excellent choice for kitchen cabinets that may have been previously painted or finished with a high-gloss paint, ensuring a reliable base for your topcoat.
Benjamin Moore Fresh Start Primer: This acrylic primer is specifically designed to provide a smooth surface and excellent adhesion for subsequent paint layers. It’s particularly effective on previously painted surfaces and offers good sandability, which helps achieve a professional finish on kitchen cabinets.
Rust-Oleum Zinsser Cover Stain: This oil-based primer excels in blocking stains and providing strong adhesion to various substrates, including wood and laminate. It penetrates deep into the surface, ensuring a solid bond that helps prevent peeling or chipping of the topcoat, making it suitable for high-traffic kitchen environments.
Behr Premium Plus Primer: This water-based primer is designed for excellent adhesion on a wide variety of surfaces, including wood and previously painted cabinets. Its easy cleanup and quick-drying properties make it user-friendly, while its ability to promote a smooth finish allows for beautiful results when top-coated with paint.
How Important is Fast Drying Time for Kitchen Cabinet Projects?
- Minimizing Downtime: Quick-drying primers allow for faster application of subsequent coats, reducing the overall project time.
- Improved Durability: A primer that dries swiftly helps in forming a strong bond with the surface, enhancing the durability of the topcoat.
- Less Risk of Contamination: Fast-drying primers minimize the risk of dust and debris settling on the wet surface, ensuring a smoother finish.
- Flexibility in Application: With shorter drying times, painters can work in stages and adjust their schedules more easily without long waits.
- Temperature and Humidity Tolerance: Many quick-drying primers are formulated to perform well in varying environmental conditions, making them suitable for different settings.
Minimizing downtime is essential in kitchen cabinet projects because it allows for quicker transitions between primer and paint applications. This efficiency is particularly valuable when working within tight schedules or when multiple cabinets are involved.
Improved durability is another significant benefit of using fast-drying primers, as they cure quickly to form a robust bond with the cabinet surface. This strong adhesion is crucial for the longevity of the finish, especially in high-use areas like kitchens.
Less risk of contamination is critical in achieving a flawless finish. Quick-drying products help reduce the chances of dust or debris settling into the wet primer, which can lead to an uneven surface and require additional sanding and touch-ups.
Flexibility in application allows the painter to adapt their workflow based on drying times. This adaptability is particularly beneficial for larger projects or when dealing with unexpected interruptions.
Temperature and humidity tolerance are also important features of many fast-drying primers. These products are often engineered to perform effectively in a range of environmental conditions, making them suitable for various climates and indoor settings.
How Do You Properly Apply Kitchen Cabinet Primer?
Proper application of kitchen cabinet primer is essential for achieving a smooth and durable finish.
- Cleaning the Cabinets: Before applying primer, it’s crucial to thoroughly clean the cabinet surfaces to remove grease, dust, and old finishes. Use a degreaser or a mixture of warm water and mild soap, scrubbing well, and then allow the surfaces to dry completely.
- Sanding the Surfaces: Lightly sand the cabinet surfaces with fine-grit sandpaper to create a better bonding surface for the primer. This step helps to smooth out imperfections and removes any gloss from existing finishes, ensuring that the primer adheres well.
- Selecting the Right Primer: Choose a high-quality primer specifically designed for kitchen cabinets, ideally one that is stain-blocking and water-resistant. The best kitchen cabinet primer will enhance adhesion and durability, preventing peeling and chipping.
- Applying the Primer: Use a high-quality brush or foam roller to apply the primer evenly across the cabinet surfaces. Start with thin layers, allowing each coat to dry according to the manufacturer’s instructions before applying additional coats, typically two coats are recommended for optimal coverage.
- Inspecting and Sanding Between Coats: After the first coat dries, inspect the surface for any imperfections and lightly sand again if necessary. This step ensures that the final finish will be smooth and free of blemishes.
- Cleaning Tools: Clean your brushes, rollers, and any other tools immediately after use with soap and water or the appropriate solvent, depending on the primer type. Maintaining your tools will prolong their life and ensure the best results for subsequent projects.
What Common Mistakes Should You Avoid When Priming Kitchen Cabinets?
When priming kitchen cabinets, avoiding certain common mistakes can significantly improve the final result.
- Skipping the Cleaning Process: It’s essential to thoroughly clean your cabinets before priming. Grease, dust, and grime can prevent the primer from adhering properly, leading to a poor finish and potential peeling over time.
- Not Using the Right Primer: Selecting the best kitchen cabinet primer is crucial. A high-quality primer designed for cabinets will ensure better adhesion, durability, and a smoother finish compared to regular wall primers.
- Neglecting to Sand: Failing to sand the surfaces can result in a rough finish. Lightly sanding the cabinets creates a better grip for the primer, enhancing its ability to adhere and providing a more professional look.
- Applying Primer in Poor Conditions: Priming in humid or cold environments can affect how the primer dries and adheres. Ideal conditions are a well-ventilated area with moderate temperatures to ensure optimal drying times and finishes.
- Using an Inadequate Number of Coats: One coat of primer is often not enough for kitchen cabinets. Applying a second coat can help achieve an even finish and better coverage, especially if the cabinets are a dark color being primed with a lighter shade.
- Rushing the Drying Process: It’s tempting to move on to painting immediately after priming, but allowing sufficient drying time is crucial. Rushing can lead to smudging and uneven surfaces, ultimately compromising the quality of the paint job.
- Ignoring Manufacturer Instructions: Each primer may have specific instructions for application and drying times. Following these guidelines is important for achieving the best results and ensuring the primer performs as intended.