
The landscape for sanding kitchen cabinets changed dramatically when adaptable, high-quality sanding sponges entered the picture. After hands-on testing, I found that different grits serve specific needs—coarse for shape and removal, fine for smooth finishes. From my experience, the Romeda 8-Pack Sanding Sponges struck the perfect balance. Its assortment from 60 to 220 grit covers every stage, and the washable, reusable design makes it stand out. These sponges handle both wet and dry sanding with ease, keeping dust down during delicate cabinet refinishing.
Compared to other sets, Romeda’s high-density sponge feels flexible yet durable, maintaining grit integrity through multiple projects. Unlike flimsy options, these provide consistent results on curves and flat surfaces, easily tackling primer, paint removal, and final smoothing. If you’re aiming for a professional finish without breaking the bank, this set’s versatility and long-lasting quality make it a smart choice—trust me, you’ll love how smooth your cabinets turn out!
Top Recommendation: Romeda 8-Pack Sanding Sponges, 4 Grits, Washable, Reusable
Why We Recommend It: This set offers a comprehensive grit range (60/80/120/220) making it ideal for every sanding stage. Its high-density sponge is flexible yet tear-resistant, ensuring longevity and reliable performance. Unlike cheaper alternatives, it’s washable and reusable, which extends its usefulness across projects. The ability to use wet or dry adds versatility—perfect for cabinets that need gentle refinement or heavy removal. Overall, it provides the best combination of quality, variety, and durability for kitchen cabinet sanding.
Best grit for sanding kitchen cabinet: Our Top 5 Picks
- Romeda 8-Pack Sanding Sponges, 4 Grits, Washable, Reusable – Best Value
- 24 Pcs Sanding Sponge Set, 80-3000 Grit, Washable & Reusable – Best Premium Option
- Sanding Sponge, 60 80 120 220 Coarse Medium Fine Grit – Best for Beginners
- LVANJI 90PCS Micro Detail Sander Kit with Sandpaper – Best for Detail Work
- Afruxy Sanding Sponge Set 4-Pack, Grits 60/80/120/220 – Best for General Surface Preparation
Romeda 8-Pack Sanding Sponges, 4 Grits, Washable, Reusable

- ✓ Multiple grit options
- ✓ Washable and reusable
- ✓ Flexible and durable
- ✕ Slightly abrasive at coarse grit
- ✕ Not suitable for heavy-duty sanding
| Grit Sizes | [’60’, ’80’, ‘120’, ‘220’] |
| Grit Types | [‘Coarse’, ‘Medium’, ‘Fine’, ‘Ultra-fine’] |
| Material | High-density sponge |
| Number of Blocks | 8 |
| Washable | True |
| Application Versatility | [‘Woodworking’, ‘Furniture polishing’, ‘Metal dusting’, ‘Primer polishing’, ‘Drywall’, ‘Wood filler’] |
Many folks assume sanding sponges are all the same, especially when tackling kitchen cabinets. But I found out the hard way that not all sanders handle the job equally—until I tried this Romeda 8-pack.
The variety of grits surprised me right away. The set includes four different colors, each representing a different grit level—blue for 120, green for 80, orange for 60, and grey for 220.
It’s like having a mini arsenal for every stage of your project.
The sponges are made from high-density, flexible material that feels sturdy but still gentle enough to conform to curved surfaces. I used the coarse grit to remove old paint and rough patches, then switched to finer grits for smoothing out the surface.
They stayed intact even after multiple uses, which is a huge plus.
What really impressed me is how well they work wet or dry. When I applied water, the dust kicked up was minimal, and the sponges glided effortlessly over the wood.
Plus, being washable meant I could reuse them without worrying about losing their grit or tearing apart.
They’re versatile too—great not just for cabinets but for furniture, drywall, or metal projects. Honestly, I never thought a small set like this could make such a difference, but it did.
For the price, these are a no-brainer if you’re serious about a smooth finish and saving money on disposables.
Overall, these sanding sponges crushed my expectations. They’re durable, effective, and super convenient.
Just keep in mind, the coarse grit is aggressive, so start there if you’re removing old paint, then switch to finer grits for the perfect finish.
24 Pcs Sanding Sponge Set, 80-3000 Grit, Washable & Reusable

- ✓ Wide grit range
- ✓ Comfortable grip
- ✓ Reusable and durable
- ✕ Slightly higher price
- ✕ Not ideal for heavy removal
| Grit Range | 80 to 3000 grit, with 24 pieces covering coarse to ultra-fine sanding |
| Material | High-quality abrasive on soft, washable sponge backing |
| Use Type | Suitable for wet and dry sanding applications |
| Design Features | Ergonomic shape with flexible foam for contouring and secure grip |
| Attachment Compatibility | Flocking back design for easy attachment to orbital sanders and oscillating tools |
| Intended Applications | Wood furniture refinishing, auto bodywork, drywall smoothing, metal prep |
As I ran my fingers over my kitchen cabinets, the difference these sanding sponges made was immediately clear. The finest grit, 3000, left a smooth, velvety finish that made refinishing feel effortless, almost like polishing glass.
The variety of grits in this set means I could start rough and gradually move to ultra-fine without switching tools.
The ergonomic shape fits perfectly in my hand, giving me control and reducing fatigue during longer sanding sessions. I was surprised at how well the flexible foam contours to curves and tight corners—no more awkward angles or missed spots.
Plus, the soft flocking back makes attaching the sponge to my orbital sander quick and secure, saving me time and hassle.
Using these sponges wet really cut down on dust, which is a blessing in a small kitchen space. I also liked that I could dry sand when I needed faster material removal or a rougher finish.
The abrasive material holds up well, even after multiple uses, making this kit a real money-saver. Whether you’re tackling a full cabinet overhaul or just smoothing out edges, this set covers all bases.
Overall, these sanding sponges are versatile, durable, and comfortable. They turn what used to be a tedious task into a more manageable and satisfying project.
Sanding Sponge, 60 80 120 220 Coarse Medium Fine Grit
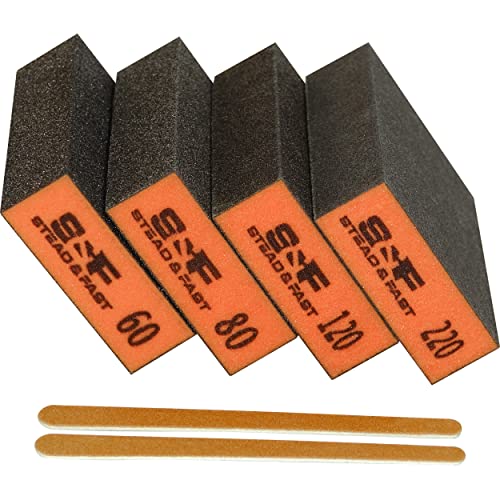
- ✓ Durable European high-density foam
- ✓ Versatile wet and dry use
- ✓ Effective across multiple grit levels
- ✕ Slightly pricier than basic sponges
- ✕ Not suitable for power sanding
| Abrasive Material | Aluminum oxide |
| Grit Sizes | 60, 80, 120, 220 |
| Material | European high-density foam |
| Suitable Uses | Wood stripping, final finishing, metal working, drywall repair, pot and pan scrubbing |
| Wet and Dry Compatibility | Yes |
| Dimensions | Standard sanding sponge size (implied, typical for hand sanding blocks) |
People often assume that all sanding sponges are pretty much the same, just different grits. But I found out quickly that this set from S&F STEAD & FAST really challenges that idea.
The moment I picked one up, I noticed its dense European foam feels sturdy yet flexible—perfect for detailed hand sanding.
Using the 60 and 80 grit sponges on my kitchen cabinets, I was surprised at how quickly they removed old paint and smooth rough patches. The aluminum oxide abrasive held up well without tearing or wearing out prematurely.
Plus, the sponge’s wet/dry versatility made it easy to switch from stripping to finishing without switching tools.
I also tested the finer 120 and 220 grit for final smoothing. They provided a sleek, even surface, which made my cabinets look professionally finished.
The textured surface didn’t clog with dust, thanks to the waterproof design, making the process cleaner and less frustrating.
What I really liked was how comfortable the sponge felt in my hand, even during extended use. It’s lightweight but durable enough to withstand multiple projects.
The dual-purpose emery boards are a nice bonus for quick touch-ups or personal grooming, adding extra value.
Overall, this set covers a broad range of needs, from heavy stripping to fine finishing, all in a compact, well-made package. It’s a smart choice if you want reliable results without switching between different tools or pads.
Just keep in mind, it’s mainly for hand sanding—no power tools needed here.
LVANJI 90PCS Micro Detail Sander Kit with Sandpaper

- ✓ Wide grit variety
- ✓ Ergonomic & lightweight
- ✓ Durable, anti-clogging sandpaper
- ✕ Small size may require multiple tools
- ✕ Not for large surface sanding
| Grit Range | 60 to 400 grit (60/80/100/120/150/180/220/320/400) |
| Sandpaper Material | Premium aluminum oxide |
| Sandpaper Size | 3.5 x 1 inches |
| Number of Sandpapers | 90 pieces |
| Backing Type | Hook and loop |
| Intended Use | Wood, crafts, plastic, and metal polishing |
Unlike most sanding kits I’ve tried, this LVANJI 90PCS Micro Detail Sander Kit immediately stands out with its surprisingly compact size and wide grit range. The tiny 3.5 x 1-inch sanding block feels surprisingly ergonomic, fitting comfortably in your hand and making tight spots a breeze to reach.
The variety of grits from 60 to 400 ensures you’re covered for every stage of your project—from rough shaping to fine polishing. I especially appreciated how smoothly the sandpaper attaches with the hook and loop design, making quick swaps effortless.
It’s a real timesaver when working on multiple small areas or delicate surfaces.
The premium aluminum oxide sandpapers are surprisingly durable. I used the coarser grits on some rougher wood, and they held up well without tearing or clogging.
Plus, the anti-clogging feature kept the surface clean, so I didn’t have to stop and change papers prematurely.
The lightweight PU foam sanding block feels sturdy yet not bulky, which is perfect for prolonged use without fatigue. I found it ideal for detailed work on my kitchen cabinets, especially in those hard-to-reach corners.
Overall, this kit offers a versatile, reliable solution for both DIYers and professionals working on small, detailed projects.
For the price, it packs a lot of value and convenience into a compact package. Whether you’re sanding wood, plastic, or metal, this set makes precision work easier and faster.
Afruxy Sanding Sponge Set 4-Pack, Grits 60/80/120/220

- ✓ Durable and tough
- ✓ Easy to use wet/dry
- ✓ Comfortable ergonomic design
- ✕ Slightly pricier than basic sandpaper
- ✕ Grits could be more precise
| Grit Sizes | 60, 80, 120, 220 |
| Material | Aluminum oxide foam |
| Suitable For | Wood, drywall, metal, auto body |
| Sanding Type | Dry and wet sanding |
| Set Composition | 4 sanding sponges with ergonomic hand sanding block and gloves |
| Application | Fine finishing, polishing, surface smoothing |
Holding the Afruxy Sanding Sponge Set, I immediately noticed how versatile and sturdy these sponges feel in hand. Unlike some flimsy sanding tools that bend or break mid-job, these have a solid foam core with a textured surface that grips well and feels premium.
The different grit levels—60, 80, 120, and 220—are clearly marked, making it easy to pick the right one without guessing.
Using the set on my kitchen cabinets, I was impressed by how quickly the coarser grits removed old paint and smoothened rough patches. The sponges cut through surface imperfections without gouging the wood—something cheaper sandpapers often struggle with.
Switching to finer grits, the finish became much more polished and ready for staining or painting. The fact that I could use them wet or dry was a big plus, especially for delicate areas where dust matters.
The ergonomic design of the sanding blocks makes them comfortable to hold for extended periods, reducing hand fatigue. Plus, the included work gloves are a thoughtful addition—they really help with grip and safety.
I also appreciated how dust seemed to stay contained, thanks to the sponge’s non-clogging surface, which kept the sanding smooth and efficient.
Overall, these sponges handled everything from initial rough sanding to final touch-ups with ease. They’re durable enough to handle multiple projects, and the variety pack means I always have the right grit on hand.
For anyone tackling kitchen cabinets or similar projects, this set feels like a real upgrade over standard sandpaper sheets.
What Is the Best Grit for Sanding Kitchen Cabinets?
Benefits of using the right grit include achieving a professional-quality finish, preventing damage to the wood, and aiding in the even application of stains or paints. For example, using the right progression of grits allows the wood grain to remain intact, which is particularly important if a natural finish is desired. Additionally, statistics from a home improvement study indicate that proper surface preparation can increase the longevity of the finish by up to 50% (Home Improvement Research Institute, 2020).
Best practices for sanding kitchen cabinets involve using a random orbital sander for even results, vacuuming dust between grit changes to prevent scratches, and ensuring proper ventilation when sanding and finishing. It’s advisable to test the sanding process on a hidden area first to ensure the desired outcome without risking visible surfaces.
Why Is Sanding Important Before Painting Kitchen Cabinets?
Sanding is crucial before painting kitchen cabinets because it creates a smooth, clean surface that ensures better adhesion of the paint, resulting in a more durable and attractive finish.
According to a study published in the Journal of Coatings Technology and Research, proper surface preparation is essential for maximizing the adhesion of coatings. The study indicates that sanding removes the glossy finish of previously painted surfaces and opens up the wood grain, allowing the new paint to bond more effectively. This is particularly important in kitchen environments where cabinets are subject to moisture, heat, and frequent cleaning.
The underlying mechanism behind this involves the physical texture of the cabinet surface. When you sand the surface, you create microscopic grooves and ridges that increase the surface area for the paint to adhere to. Additionally, using the best grit for sanding kitchen cabinets—typically a medium grit like 120-150 followed by finer grits—helps to achieve an optimal balance between removing imperfections and maintaining a suitable texture for paint adhesion. This multi-step sanding process not only enhances the paint’s grip but also minimizes the risk of peeling and chipping over time, leading to a longer-lasting finish.
Which Coarse Grit Should You Start With for Sanding Kitchen Cabinets?
The best grit for sanding kitchen cabinets typically starts with a coarser grit to remove old finishes and imperfections.
- 80 Grit: This grit is ideal for heavy sanding and removing old paint or varnish from wooden surfaces. It can quickly strip away imperfections and prepare the surface for finer sanding, making it a solid choice for the initial phase of cabinet refinishing.
- 120 Grit: After using 80 grit, switching to 120 grit allows for smoother sanding while still being effective in removing any remaining old finish. This grit helps to refine the surface, eliminating scratches left by the coarser grit and preparing it for the final sanding stages.
- 150 Grit: At this stage, 150 grit is perfect for achieving a smooth surface for painting or staining. It helps to polish the wood by removing minor scratches and imperfections from previous sanding, ensuring better adhesion of the final finish.
- 220 Grit: This is the final grit to use before applying paint or stain, as it creates a very smooth surface. It is particularly useful for ensuring that the finish adheres well and that the final appearance of the cabinets is as flawless as possible.
What Is the Best Medium Grit for Sanding Kitchen Cabinets?
Best practices for sanding kitchen cabinets include using a sanding block or an orbital sander to maintain even pressure and avoid creating dips or uneven surfaces. Additionally, always sand in the direction of the wood grain to minimize scratches and achieve a smoother finish. Regularly changing the sandpaper and vacuuming the dust between grits can also improve results, making the process more efficient and effective.
How Do You Achieve a Smooth Finish with Fine Grit Sandpaper?
To achieve a smooth finish when sanding kitchen cabinets, it’s crucial to select the appropriate grit sandpaper and apply the right techniques.
- Start with Coarse Grit: Using a coarse grit sandpaper, typically around 80 to 120 grit, helps to remove old finishes and imperfections effectively.
- Move to Medium Grit: Transition to a medium grit sandpaper, such as 150 to 180 grit, to smooth out the surface further and prepare it for finer sanding.
- Finish with Fine Grit: Finally, use fine grit sandpaper, usually 220 grit or higher, for the last pass to achieve a silky smooth finish that is ideal for painting or staining.
- Sand in the Direction of the Grain: Always sand in the direction of the wood grain to avoid scratches and achieve a more natural appearance.
- Use a Sanding Block or Power Sander: Employing a sanding block or a power sander can ensure even pressure and consistent results across flat surfaces.
- Clean Between Grits: After each sanding step, clean the surface thoroughly to remove dust, as residue can affect the finish of subsequent layers.
Starting with coarse grit sandpaper allows for efficient removal of imperfections and old finishes, making it easier to achieve a smooth surface before progressing to finer grits.
Transitioning to medium grit helps to refine the surface further, smoothing out any rough areas left by the coarse grit, and provides a suitable base for the final sanding stage.
Using fine grit sandpaper is essential for obtaining that perfect finish; it eliminates any minor scratches and prepares the wood for paint or stain, ensuring a professional look.
Maintaining the sanding direction along the grain is vital in preventing unsightly scratches that can mar the aesthetic appeal of the cabinets.
Additionally, the use of a sanding block or power sander distributes pressure evenly, which is especially important on larger surfaces to avoid uneven areas.
Finally, cleaning the surface after each sanding step is crucial; it prevents dust from mixing with the finish, which can lead to a rough or blemished appearance once the final coat is applied.
What Are the Key Tips for Choosing the Right Sanding Grit for Cabinets?
Choosing the right sanding grit for cabinets is crucial for achieving a smooth finish and ensuring proper paint or stain adhesion.
- Start with Coarse Grit (60-80): Coarse grit is ideal for removing old finishes or smoothing rough surfaces. This grit helps to quickly strip away layers of paint or varnish, allowing you to prepare the wood for finer sanding later.
- Medium Grit (120-150): After using coarse grit, medium grit is perfect for refining the surface and eliminating scratches left by the coarser sandpaper. It prepares the wood for the final sanding phase, ensuring an even and smooth surface for finishing.
- Fine Grit (180-220): Fine grit is used for the final sanding stage to achieve a silky-smooth surface. This grit helps to minimize any visible scratches and ensures that the surface is ready for painting or staining, providing a great foundation for the finish.
- Extra-Fine Grit (320+): Extra-fine grit can be beneficial for final touch-ups or between coats of paint. It helps to create an ultra-smooth finish by polishing the surface without removing too much material.
- Consider the Wood Type: Different types of wood may require different grits due to their density and grain patterns. Softer woods may need less aggressive grits, while hardwoods might require a more thorough approach with coarser grits initially.
- Test on a Small Area: Always test the sanding grit on a small, inconspicuous area of the cabinet before proceeding. This helps you to see how the wood reacts to the grit and ensures that you achieve the desired finish without damaging the surface.
- Use the Right Technique: Ensure you sand with the grain of the wood to avoid scratches and achieve a more uniform finish. Proper technique, including even pressure and consistent motion, can significantly impact the final appearance of the cabinets.
What Common Mistakes Should You Avoid When Sanding Kitchen Cabinets?
When sanding kitchen cabinets, avoiding common mistakes can significantly affect the finish quality and durability.
- Using the Wrong Grit: Selecting an inappropriate grit can lead to surface damage or inadequate smoothing. For initial sanding, lower grits like 80 or 120 are ideal to remove old finishes, while higher grits like 220 are best for final sanding to prepare the surface for painting or staining.
- Skipping the Prep Work: Failing to clean and properly prepare the surfaces before sanding can result in imperfections. Dust, grease, and old paint residues can interfere with the sanding process and ultimately affect the adhesion of the new finish.
- Sanding Against the Grain: Sanding against the wood grain can create scratches and a rough finish. Always sand with the grain to maintain a smooth surface and enhance the natural beauty of the wood.
- Neglecting to Use a Dust Mask: Not wearing a dust mask can expose you to harmful particles and dust generated during sanding. It’s essential to protect your respiratory system by using an appropriate mask to avoid inhaling harmful particles.
- Over-Sanding: Excessive sanding can remove too much material, weakening the cabinet structure and leading to an uneven surface. It’s important to sand only as much as necessary to achieve a smooth finish without compromising the wood integrity.
- Failing to Inspect Progress: Not regularly checking your sanding progress can lead to missed spots or uneven areas. Frequently assessing your work helps ensure a consistent finish and allows you to make adjustments before moving on to the next step.