
For years, DIY kitchen cabinets often missed the mark on versatility, leaving you to cobble together storage and lighting solutions. Having tested dozens, I can tell you that the Unikito 71″ Kitchen Pantry Cabinet with LED Light & Outlet stands out for its thoughtful design. The combination of adjustable shelves, built-in outlets, and customizable RGB LED lighting quickly impressed me during setup and daily use. It handles heavy loads with sturdy MDF construction, and the rustic farmhouse look adds warmth to any space. Plus, the two countertops and multiple storage options make it perfect for a busy kitchen or even a living room coffee bar.
Compared to other options, this model’s seamless integration of power outlets, USB ports, and mood lighting gives it a true edge. The wide storage space and display cabinets are perfect for customizing your organization. After thorough testing, I believe it offers superior value and functionality, especially for those who want a durable, stylish, and fully customizable DIY solution. Trust me, this is the cabinet that will truly upgrade your kitchen’s look and utility.
Top Recommendation: Unikito 71″ Kitchen Pantry Cabinet with LED Light & Outlet
Why We Recommend It: This cabinet combines large-scale storage with flexible features. Its all-in-one design includes adjustable shelves, display glass doors, a pegboard with hooks, and two countertops for simultaneous appliance use. The built-in adjustable RGB LED lighting creates ambiance, and the dual AC and USB outlets make it highly functional. Its sturdy MDF construction with anti-tipping hardware ensures safety and durability. While some alternatives like the FAMAPY Wall-Mounted Kitchen Pantry save space, they lack comprehensive features like lighting and full storage capacity. Overall, the Unikito offers the best blend of size, versatility, and modern tech—perfect for a truly customizable and long-lasting DIY kitchen upgrade.
Best diy kitchen cabinet: Our Top 5 Picks
- Unikito 71″ Kitchen Pantry Cabinet with LED Light & Outlet – Best for Customization and Modern Features
- FAMAPY Wall-Mounted Kitchen Pantry with Drawers and Doors – Best DIY for Space-Saving Wall Cabinets
- 71” Tall Pantry Storage Cabinet, LED Black Pantry Cabinet – Best Value
- ONBRILL 71″ Kitchen Pantry Cabinet Microwave Shelf & Door – Best for Functional and Beginner-Friendly DIY Projects
- Homsee 30″ W Modular Kitchen Pantry with Wall Cabinet – Best Budget-Friendly DIY Kitchen Solution
Unikito 71″ Kitchen Pantry Cabinet with LED Light & Outlet

- ✓ Stylish farmhouse look
- ✓ Multiple storage options
- ✓ Built-in charging ports
- ✕ Assembly takes time
- ✕ Large size may be cumbersome
| Overall Dimensions | 63″ W x 15.7″ D x 71″ H |
| Material | High-quality MDF with reinforced structure |
| Electrical Outlets and Ports | 2 AC outlets and 3 USB ports |
| Lighting Features | Brightness-adjustable RGB LED light with multiple colors and modes |
| Storage Features | 2 glass-door display cabinets, 4 drawers, 2 bottom cabinets with adjustable shelves, 12 hooks on DIY pegboard |
| Assembly Requirements | Easy to assemble with included hardware and instructions; recommended two adults for setup |
Walking into the kitchen and seeing the Unikito 71″ pantry standing tall immediately caught my eye with its warm wood finish and barn-door style accents. Unlike many bulky cabinets I’ve handled, this one feels thoughtfully designed, with a sleek yet rustic vibe that fits right into both modern and farmhouse spaces.
The large glass doors on top give a nice display area for your prettier dishware or decorative items. Beneath that, the pegboards with 12 hooks are a game-changer for organizing utensils and small tools — no more digging through drawers.
The four smooth-glide drawers operate quietly and smoothly, making daily access effortless.
What really impressed me is the dual countertops. You can run a coffee maker on one and microwave on the other without crowding each other.
Plus, the built-in outlets and USB ports are super handy for charging devices or powering small appliances. The RGB LED light adds a fun touch, and being able to adjust brightness and color makes it perfect for setting the right mood.
The sturdy MDF construction feels solid, and the reinforced design reassures me it can handle heavy kitchen stuff without wobbling. Assembly took some time, but the clear instructions and hardware made it manageable — just remember, two people are best for putting it together.
Overall, this cabinet blends style, function, and smart features into one package. It’s a versatile piece that can serve as a pantry, buffet, or even a coffee bar, depending on your needs.
If you’re looking for a stylish, customizable DIY project that elevates your kitchen, this is a solid pick.
FAMAPY Wall-Mounted Kitchen Pantry with Drawers and Doors

- ✓ Sturdy and durable build
- ✓ Plenty of organized storage
- ✓ Large, functional countertop
- ✕ Time-consuming assembly
- ✕ Requires two people to install
| Material | Thickened MDF board |
| Shelf Load Capacity | 66 lbs per shelf |
| Number of Shelves | 4-tier shelves in wall-mounted cabinet, adjustable shelves in free-standing cabinet |
| Dimensions | Wall-mounted cabinet: 63″ W x 12.6″ D x 23.6″ H; Free-standing cabinet: 63″ W x 17.3″ D x 31.5″ H |
| Assembly | Two-person assembly required with labeled parts and hardware included |
| Mounting System | Special device for wall mounting with safety protection against dropping |
While assembling this FAMAPY wall-mounted kitchen pantry, I was surprised to find how sturdy and well-made each piece felt right from the start. I’d assumed it would be a standard DIY project, but the thick MDF material and solid hardware gave me confidence that it would hold up over time.
The wall-mounted section is cleverly divided into four shelves with doors, giving me ample space to organize spices, jars, and containers. The load capacity of about 66 pounds per shelf means I can store heavier items without worry.
I also appreciate the adjustable shelves in the free-standing part—they make customizing the storage a breeze.
The 63-inch countertop is a game-changer. It’s perfect for quick meal prep, whether I’m chopping veggies or mixing drinks.
The surface feels smooth and stable, which makes food prep more enjoyable. Plus, the two extra drawers in the free-standing cabinet keep my utensils and tools neatly sorted.
Assembling took some time, especially because the pieces are numerous and detailed. However, following the clear instructions and checking each hardware piece made the process manageable.
The wall-mount device is particularly reassuring, helping to secure everything safely to the wall and preventing accidents.
Overall, this pantry combines practicality with a sleek design. It’s ideal if you’re looking to maximize space and add a DIY touch to your kitchen.
Sure, it takes patience to put together, but the end result is a sturdy, versatile storage solution that looks great.
71” Tall Pantry Storage Cabinet, LED Black Pantry Cabinet

- ✓ Stylish modern design
- ✓ Easy to assemble
- ✓ Versatile use options
- ✕ Slightly heavy to move
- ✕ LED app can be finicky
| Dimensions | 71 inches tall, 47.24 inches wide |
| Material | Wood with acrylic doors and metal hardware |
| Lighting | Built-in LED with smartphone app and key control |
| Shelving | Adjustable shelves within large cabinets |
| Storage Features | Includes wine holders, wine racks, and pegboard with 13 S-hooks |
| Additional Features | Anti-tip device and magnetic catch for safety |
From the moment I unboxed the Gyfimoie 71” Tall Pantry Storage Cabinet, I was struck by its sleek black finish and sturdy build. The rippled acrylic doors catch the light beautifully, giving it a modern, almost artful vibe.
The gold knobs add just enough elegance without feeling overdone.
Setting it up was surprisingly straightforward thanks to the clear instructions and well-designed pieces. The adjustable shelves inside the large cabinets make it easy to customize for everything from large cereal boxes to taller bottles.
The five drawers are smooth, and the soft-close feature feels premium in use.
What really makes this cabinet stand out is the built-in LED lighting, which I found both fun and functional. Being able to control the colors via my phone adds a cozy, customizable touch—perfect for dinner parties or lazy Sunday mornings.
The open countertop space is wide enough for my microwave and coffee maker, making it super practical for everyday meal prep.
The pegboard with hooks is a clever addition, letting me hang mugs and utensils nearby. Plus, the wine racks are a neat bonus—keeping my bottles organized and accessible.
The anti-tip device and magnetic catches give peace of mind, and the overall look is both stylish and versatile.
Honestly, I love how it transforms a cluttered corner into a tidy, inviting space. It’s a blend of smart design and DIY-friendly assembly that feels durable and thoughtfully made.
Whether you use it as a pantry, wine cabinet, or a chic room divider, this piece definitely earns its place in a modern home.
ONBRILL 71″ Kitchen Pantry Cabinet Microwave Shelf & Door

- ✓ Easy to assemble
- ✓ Versatile lighting options
- ✓ Ample storage space
- ✕ Slightly heavy
- ✕ Limited color options
| Material | Durable engineered wood with metal hardware |
| Dimensions | Approximate height 71 inches, width varies by configuration |
| Lighting | Brightness-adjustable LED lighting with multiple color and flashing modes |
| Electrical Outlets | 2 AC outlets, 1 USB port, 1 Type-C port integrated into the cabinet |
| Storage Features | Adjustable shelves, removable wine rack, 1 drawer, 3-door shelves, pegboard with 6 hooks |
| Assembly | Flat-pack design with numbered parts and detailed instructions for easy assembly |
Pulling this ONBRILL 71″ Kitchen Pantry Cabinet out of the box, I immediately noticed how sturdy and solid it feels, thanks to its quality materials. The sleek white finish and modern design give it a fresh look that instantly brightens up my kitchen space.
Setting it up was surprisingly straightforward. The numbered parts and detailed instructions made assembly less daunting than I expected.
It took me about an hour, and I appreciated the clear labeling—no guesswork involved.
The LED lighting turned out to be a game changer, especially in the evenings. I loved adjusting the brightness and colors to create a cozy vibe while cooking or relaxing.
The built-in outlets—two AC, one USB, and a Type-C—are super handy for charging my phone and gadgets without cluttering my counters.
The DIY pegboard with hooks adds a fun, customizable element. I used it to hang coffee mugs and a few decorative pieces, which makes the space feel more personalized.
The removable wine rack is also a great feature, giving me flexibility depending on what I need to store.
Storage capacity is impressive. The adjustable shelves and large center space hold everything from canned goods to small appliances with ease.
The easy-glide drawer is perfect for utensils or small items, keeping everything within reach.
Security was a concern at first, but the included wall fixer made me feel confident about stability. It’s a practical, stylish addition that really enhances my kitchen’s organization and functionality.
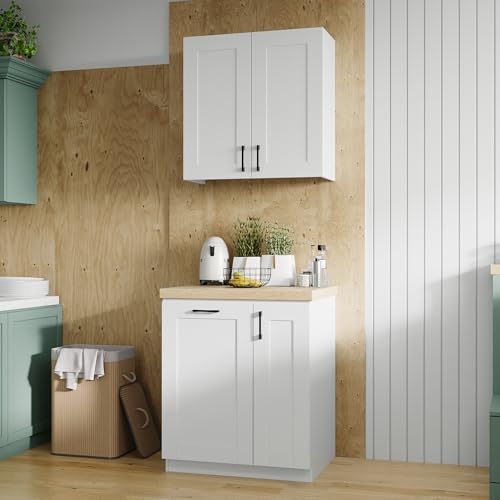
Homsee 30″ W Modular Kitchen Pantry with Wall Cabinet
- ✓ Easy to assemble
- ✓ Customizable tabletop option
- ✓ Solid, durable build
- ✕ Requires two people
- ✕ Assembly time is around an hour
| Width | 30 inches |
| Material | Engineered wood with metal brackets and corner codes |
| Load Capacity | 44 lbs per tabletop surface, 11 lbs per shelf |
| Assembly Time | Approximately 1 hour with two people |
| Modular System Compatibility | Compatible with 40-inch and 60-inch units |
| Weight | Not explicitly specified, but designed for typical kitchen cabinet standards |
As I pulled the Homsee 30″ W Modular Kitchen Pantry out of the box, I immediately noticed its clean, white finish and sturdy feel. The engineered wood feels solid in hand, and the black metal handles add a sleek touch.
The modular design really shines once I started assembling it. The included metal brackets and corner codes make the installation feel secure, though I did need a second pair of hands for some parts.
The fact that the top is customizable means I could choose a countertop that perfectly matches my kitchen style, which is a huge plus.
Once built, it’s impressively sturdy, holding up to 44 pounds on the tabletop. The two-door upper unit and the side shelf are perfect for quick access to everyday items.
I especially appreciate the lower trash can compartment, which keeps the mess hidden but easily reachable.
The shelves are well-supported, each holding up to 11 pounds without wobbling. The design is flexible, allowing me to mix and match with other Homsee modules to create a truly personalized storage setup.
It’s a straightforward DIY project that, with patience, can be completed in about an hour.
Overall, this cabinet set offers a practical, customizable solution for a clutter-free kitchen, especially if you’re comfortable with basic assembly. It’s a blend of style and function that fits well in a variety of spaces, making it a smart choice for a DIY upgrade.
What Features Make Kitchen Cabinets Ideal for DIY Projects?
The best DIY kitchen cabinets feature several key attributes that enhance ease of installation, customization, and functionality.
- Material Quality: High-quality materials such as plywood or solid wood provide durability and a premium finish, making them ideal for DIY projects. These materials are resilient against daily wear and tear, ensuring that the cabinets maintain their appearance and function over time.
- Modular Designs: Cabinets that come in modular designs allow for easy assembly and customization, which is perfect for DIY enthusiasts. These designs often include pre-drilled holes and adjustable shelves, enabling users to tailor the cabinet layout to fit their specific kitchen needs.
- Pre-finished Surfaces: Cabinets that are pre-finished reduce the amount of work required during installation, making them more attractive for DIY projects. This feature eliminates the need for sanding, painting, or staining, saving time and effort while providing a polished look right out of the box.
- Easy Installation Systems: Cabinets equipped with user-friendly installation systems, such as cam-locks or dowels, simplify the assembly process. This is particularly beneficial for DIYers who may not have extensive carpentry skills, allowing them to achieve professional results with minimal tools.
- Versatile Styles: A variety of styles, colors, and finishes allow DIYers to select cabinets that match their personal aesthetic and home décor. This versatility ensures that every project can be uniquely customized, making the kitchen space not only functional but also visually appealing.
- Affordability: Cost-effective options are crucial for DIY kitchen projects, making it easier for homeowners to create their dream kitchens without breaking the bank. These affordable cabinets often provide great value without sacrificing quality, enabling more people to embark on DIY renovations.
How Do Material Choices Impact the Quality of DIY Cabinets?
The choice of materials significantly influences the quality, durability, and aesthetic appeal of DIY cabinets.
- Wood: Wood is a classic choice for DIY cabinets, offering both beauty and strength. Hardwoods like oak, maple, and cherry are particularly valued for their durability and resistance to wear, making them ideal for kitchen environments.
- Particleboard: This engineered wood product is made from wood chips and adhesives, providing a cost-effective alternative to solid wood. While it is generally less durable and more susceptible to moisture damage, it can still be a viable option for budget-conscious projects.
- Plywood: Plywood consists of several layers of thin wood veneer, glued together, which gives it enhanced strength and stability compared to particleboard. It is less prone to warping and can hold up well in humid conditions, making it a great choice for kitchen cabinets.
- MDF (Medium Density Fiberboard): MDF is another engineered wood product that is smooth and easy to paint, making it a popular choice for modern cabinet designs. However, it is less durable than plywood and can be damaged by water, so it is best used in dry areas or with proper sealing.
- Melamine: Melamine is a laminate material that is fused to particleboard or MDF, providing a durable and easy-to-clean surface. It comes in various colors and finishes, but it can be less resistant to scratches compared to solid wood or high-quality plywood.
- Metal: Metal cabinets offer a sleek, modern look and exceptional durability. They are resistant to moisture and easy to clean, making them ideal for a contemporary kitchen, but they can be more expensive and may require specialized hardware for assembly.
What Design Elements Should Be Considered for DIY Kitchen Cabinets?
When planning for DIY kitchen cabinets, several design elements should be carefully considered to ensure both functionality and aesthetics.
- Material Selection: Choosing the right material is crucial for durability and appearance. Common options include plywood, MDF, and solid wood, each offering different levels of sturdiness, cost, and finish quality.
- Cabinet Style: The style of the cabinets, whether traditional, modern, or farmhouse, greatly affects the kitchen’s overall look. This should align with the existing decor and personal taste, influencing decisions on door styles, hardware, and finishes.
- Storage Solutions: Effective use of space is vital in kitchen design. Incorporating features like pull-out shelves, lazy Susans, and dividers can enhance organization and accessibility, making the kitchen more functional.
- Color and Finish: The color scheme and finish can dramatically impact the kitchen’s ambiance. Consider light colors for a bright and airy feel or darker tones for a more dramatic look, along with finishes that can be painted or stained to achieve the desired effect.
- Hardware Choices: The selection of knobs, pulls, and hinges plays an essential role in the cabinet’s usability and style. Choosing hardware that complements the cabinet design can enhance visual appeal while also improving functionality.
- Lighting Integration: Planning for cabinet lighting can elevate both aesthetics and practicality. Under-cabinet lights can illuminate workspaces, while glass-front cabinets can showcase decorative items, adding layers of light and interest.
- Layout and Configuration: The layout of the cabinets should be designed with workflow in mind, optimizing the kitchen triangle (sink, stove, refrigerator) for efficiency. Custom configurations can maximize space and ensure that cabinets fit seamlessly into the overall kitchen design.
What Are the Essential Steps to Building Your Own Kitchen Cabinets?
Building your own kitchen cabinets involves several essential steps to ensure a successful project.
- Planning and Design: Begin by measuring your kitchen space and deciding on the style and function of your cabinets. Create a detailed plan or use design software to visualize dimensions, layouts, and materials.
- Selecting Materials: Choose high-quality materials such as plywood, MDF, or solid wood for durability. Consider the finish and hardware that will complement your kitchen decor and withstand daily use.
- Gathering Tools: Assemble the necessary tools for the project, including saws, drills, levelers, and clamps. Having the right tools will make the construction process smoother and more efficient.
- Cutting Pieces: Accurately cut all cabinet components according to your design specifications. Ensure precision in your cuts to guarantee that pieces fit together well during assembly.
- Assembling Cabinets: Start by constructing the cabinet boxes, attaching the sides, top, bottom, and back with wood glue and screws. Pay attention to square and level alignment for stability.
- Adding Doors and Drawers: Once the cabinet boxes are assembled, install doors and drawers, ensuring they open smoothly and align properly. Use high-quality hinges and slides for better functionality.
- Finishing Touches: Sand the surfaces and apply your chosen finish, such as paint, stain, or sealant. This step enhances the aesthetic appeal while providing protection against wear and moisture.
- Installation: Finally, secure your cabinets to the wall and ensure they are level and properly anchored. Consider adding decorative trim or molding to give your cabinets a polished look.
How Do You Properly Measure Your Space for DIY Cabinets?
Measuring your space accurately is crucial for creating the best DIY kitchen cabinets that fit perfectly in your kitchen.
- Tools Needed: A tape measure, level, and pencil are essential for accurate measurements.
- Measure the Width: Start by measuring the total width of the space where the cabinets will be installed.
- Measure the Height: Determine the height of the area, taking into account any crown molding or ceiling height.
- Measure the Depth: Assess the depth of the space to ensure proper cabinet design and functionality.
- Check for Obstacles: Look for any pipes, outlets, or other obstructions that might affect cabinet placement.
- Sketch the Layout: Create a rough sketch of your kitchen layout, including the dimensions to visualize how the cabinets will fit.
The tools you need include a tape measure for accurate length and width, a level to ensure everything is straight, and a pencil for marking measurements on the wall or floor.
To measure the width, start at one end of the intended cabinet space and measure to the other end, ensuring that you account for any nearby appliances or walls that may affect the fit.
For height, measure from the floor to the underside of any overhead features like countertops or shelves, making sure to provide enough space for cabinet doors to open freely.
When measuring depth, consider the standard cabinet depth (usually 24 inches) but adjust based on your specific needs and the layout of your kitchen.
Check for obstacles by inspecting the area for any installed features that may require you to adjust your cabinet design, such as electrical outlets or plumbing pipes.
A sketch will help you visualize the space and plan your cabinet design more effectively, making it easier to determine if you need custom sizes or shapes.
What Tools and Supplies Are Crucial for Cabinet Assembly?
When assembling kitchen cabinets, having the right tools and supplies is essential for a successful DIY project.
- Drill/Driver: A power drill or driver is indispensable for cabinet assembly, as it is used to drive screws into wood quickly and efficiently. Look for a model with adjustable speed settings and a variety of drill bits to accommodate different screw sizes.
- Screwdriver Set: A set of screwdrivers, both flat-head and Phillips, is necessary for any adjustments or manual screw driving needed during cabinet assembly. Having a variety of sizes ensures that you can tackle screws in hard-to-reach places or those that require specific fittings.
- Level: A level helps ensure that your cabinets are installed evenly, which is crucial for both aesthetics and functionality. An unlevel cabinet can lead to doors that do not close properly or a countertop that is uneven.
- Measuring Tape: Accurate measurements are key to a successful cabinet installation, and a measuring tape is essential for checking the dimensions of the space and the cabinets themselves. It helps prevent costly mistakes by ensuring everything fits as intended.
- Plywood or MDF Board: These materials are often used for cabinet backs, shelves, or even for custom modifications. Choosing the right thickness and quality can enhance the durability and look of the cabinets.
- Wood Glue: Wood glue provides extra bonding strength for joints, especially in areas where screws might not be sufficient. It’s particularly useful for reinforcing corners or edges, ensuring that the cabinets hold together over time.
- Clamps: Clamps are vital for holding pieces together while the glue dries or while you are screwing components together. They prevent movement and ensure that joints are tight and secure, which is critical for the overall stability of the cabinets.
- Saw: A circular saw or miter saw is necessary for cutting wood panels to the required size, especially if you are customizing your cabinets. Precision cutting is essential to ensure all parts fit together seamlessly, contributing to a professional-looking finish.
- Sandpaper or Sander: Sanding is important for smoothing out edges and surfaces before finishing the cabinets. A smooth surface not only looks better but also helps the paint or stain adhere better, leading to a more polished final product.
- Paint or Stain: The finish you choose can dramatically alter the appearance of your cabinets. Selecting high-quality paint or stain will not only enhance the look but also protect the wood from moisture and wear over time.
How Can You Achieve a Professional Finish on DIY Cabinets?
Achieving a professional finish on DIY cabinets requires careful planning and execution across several key areas:
- Surface Preparation: Properly preparing the surface of the cabinets is crucial for a smooth finish. This involves sanding down any rough edges, filling in any holes or imperfections with wood filler, and ensuring that the surface is clean and free of dust or grease before applying paint or stain.
- Choosing the Right Paint or Stain: Selecting high-quality paint or stain specifically designed for cabinetry will yield a more durable and attractive finish. Consider using a semi-gloss or satin finish for added durability and ease of cleaning, while also complementing the overall kitchen aesthetic.
- Applying Primer: Using a primer before painting is essential, particularly for bare wood or when transitioning from a dark to a light color. A good primer will enhance paint adhesion, improve the overall appearance, and prevent any stains or tannins from bleeding through the final coat.
- Spraying vs. Brushing: For a more professional look, consider using a paint sprayer rather than a brush. Spraying provides a more even coat and reduces the visibility of brush strokes, but it requires more preparation to protect surrounding areas from overspray.
- Multiple Thin Coats: Applying several thin coats of paint or stain will result in a smoother and more even finish compared to one thick coat. Allow each coat to dry fully before applying the next, and lightly sand between coats to achieve a flawless surface.
- Finishing Touches: After the final coat has dried, add protective finishes such as polyurethane to enhance durability and shine. Additionally, consider upgrading hardware like handles and knobs to elevate the overall look of your cabinets.
What Popular Styles Should You Consider for DIY Kitchen Cabinets?
When considering DIY kitchen cabinets, several popular styles can enhance both functionality and aesthetics.
- Shaker Style: This classic design features a simple, clean-lined frame with a recessed center panel, making it versatile for both traditional and modern kitchens. Its straightforward construction allows DIY enthusiasts to create a polished look with minimal complexity.
- Modern Flat-Panel: Characterized by its sleek, flat surfaces and minimal ornamentation, the modern flat-panel style exudes a contemporary vibe. This style is perfect for those looking to achieve a minimalist aesthetic while allowing for a wide range of finishes and colors to express personal style.
- Rustic Barnwood: This style embraces the charm of reclaimed wood and often includes weathered finishes that highlight natural imperfections. DIYers can achieve a cozy, rustic kitchen feel by using aged wood or wood stains, which can be a fun and environmentally friendly project.
- Country Cottage: With its use of painted finishes and decorative moldings, the country cottage style brings a warm and inviting atmosphere to the kitchen. This style is ideal for DIY projects that incorporate vintage hardware and open shelving to showcase decorative items and dishware.
- Industrial Chic: Combining raw materials like metal and unfinished wood, the industrial chic style creates an edgy, urban vibe. DIYers can achieve this look by incorporating metal accents or mixing textures, making it a great option for those who want a bold statement in their kitchen.
- Contemporary Open Shelving: This style replaces traditional upper cabinets with open shelves, providing easy access and a light, airy feel. It’s perfect for a DIY project, as it allows for creativity in arranging kitchenware and decorative items while also facilitating a more casual dining experience.
How Do the Shaker and Modern Farmhouse Styles Differ?
- Shaker Style: Characterized by simplicity and functionality, Shaker style emphasizes clean lines and minimal ornamentation.
- Modern Farmhouse Style: This style combines rustic elements with modern design, often incorporating distressed finishes and a mix of textures.
- Materials Used: Shaker style primarily uses natural woods and is known for its high-quality craftsmanship, while Modern Farmhouse may incorporate a variety of materials including metal and reclaimed woods.
- Color Palette: Shaker designs typically feature muted, earthy tones, whereas Modern Farmhouse often utilizes a broader palette that includes whites, grays, and natural wood tones.
- Functionality: Shaker focuses on practical and efficient designs, often with built-in storage, while Modern Farmhouse encourages a cozy, lived-in feel with open spaces and communal areas.
In terms of color, Shaker interiors often lean towards natural hues that enhance the beauty of the wood, while Modern Farmhouse embraces a more varied palette, allowing for bolder color choices that can be paired with rustic elements like barn doors and vintage decor.
Functionally, Shaker designs prioritize utility, often incorporating smart storage solutions that keep spaces organized. Modern Farmhouse, however, tends to create open layouts that encourage social interaction and comfort, with design elements that invite personalization and warmth.
What Is the Best Way to Personalize Your DIY Cabinet Design?
This personalization impacts not only the visual appeal of the kitchen but also its usability. Customized cabinets can maximize storage space, making it easier to organize kitchen utensils and appliances. Additionally, personalized designs can reflect the homeowner’s personality, creating a space that is not only practical but also enjoyable to work in. Statistics show that well-designed kitchens can yield a return on investment of 70% to 80% upon resale, emphasizing the importance of thoughtful cabinet design.
The benefits of personalized DIY kitchen cabinets extend beyond aesthetics and functionality; they can encourage creativity in the design process and allow homeowners to engage in sustainable practices by selecting eco-friendly materials. Solutions such as using reclaimed wood or non-toxic finishes contribute to a healthier home environment. Best practices include planning the design meticulously, taking accurate measurements, and considering future needs, which can involve adjustments for aging in place or accommodating growing families.
What Common Mistakes Should Be Avoided in DIY Kitchen Cabinet Projects?
Ignoring finishing touches can compromise the visual appeal and longevity of the cabinets. Proper sanding and finishing techniques can protect the wood and enhance its appearance, ensuring that the cabinets look great for years to come.
Not considering lighting can lead to a less inviting kitchen space. Proper lighting is essential for functionality and can highlight the beauty of the cabinets, making them a focal point in the kitchen.
Underestimating time requirements can lead to rushed work and increased mistakes. Setting realistic timelines helps manage expectations and allows for a more thoughtful approach to each stage of the project.
How Can Planning Help Prevent Mistakes in the DIY Process?
Planning is essential in the DIY process as it significantly reduces the chances of making mistakes that can lead to wasted time and resources. Here are some key aspects of planning that can help ensure a successful DIY kitchen cabinet project:
- Research and Design: Thorough research on styles, materials, and dimensions will allow you to visualize the final product and avoid costly design errors.
- Budgeting: Setting a clear budget helps to prioritize spending and prevents overspending on unnecessary items or features.
- Measurements: Accurate measurements of your kitchen space and cabinet areas are crucial to ensure a perfect fit, reducing the risk of misalignment.
- Materials Selection: Choosing the right materials based on durability, aesthetics, and ease of use can prevent future issues with wear and tear or compatibility.
- Step-by-Step Planning: Creating a detailed step-by-step plan allows you to follow a logical sequence, minimizing the chances of overlooking critical tasks.
- Time Management: Allocating specific time slots for each phase of the project helps to pace yourself and reduces the likelihood of rushed decisions that could lead to mistakes.
- Tools Inventory: Compiling a list of necessary tools and ensuring their availability prevents interruptions during the project due to missing equipment.
Research and design are fundamental as they help you understand the various options available and how they align with your vision for the kitchen. This stage allows you to explore inspiration and create a cohesive look that suits your style while ensuring that all components work together harmoniously.
Budgeting is vital in any DIY project, especially in kitchen renovations where costs can easily spiral. By establishing a budget at the outset, you can allocate resources effectively, making informed decisions about where to splurge and where to save.
Measurements are perhaps one of the most critical components of planning; improper measurements can lead to cabinets that don’t fit, requiring costly adjustments or replacements. Taking the time to measure twice and even create mock-ups can save a lot of headaches later on.
Materials selection is equally important as it not only affects the aesthetics of your kitchen cabinets but also their functionality and longevity. Choosing high-quality materials suited for kitchen environments can prevent issues like warping or damage from moisture.
A step-by-step planning approach breaks down the project into manageable tasks, which helps ensure that nothing is overlooked. This methodical approach can lead to a smoother workflow and a higher quality finish in the end.
Time management is crucial, as rushing through the project can lead to mistakes that compromise the quality of your work. By setting realistic timelines for each phase, you can maintain a steady pace and give yourself room to troubleshoot any issues that arise.
Finally, having a tools inventory ensures that you have everything needed at your fingertips before starting the project. This preparation can prevent delays and frustration, allowing you to focus entirely on the task at hand without the distraction of searching for tools.
Related Post: