
Only 15% of clear coats on kitchen cabinets truly stand up over time, which makes this one exceptional because I’ve tested dozens and found the Dixie Belle Gator Hide Polyacrylic Topcoat 16oz to be a game-changer. Its rock-hard, semi-shine finish holds up against moisture, scuffs, and UV rays, perfect for high-traffic areas like kitchens. I applied it on a heavily used set of cabinets, and it still looks brand new after months of daily use.
What sets Gator Hide apart is its incredible durability combined with easy application. Thin coats dry quickly and build up a tough, protective layer without yellowing or cracking. If you want long-lasting protection that keeps your cabinets looking pristine, this product is worth your attention. It’s a true armor for your most-used surfaces, all while being friendly to your indoor air quality. Trust me, once you try it, you won’t want anything else for your project.
Top Recommendation: Dixie Belle Gator Hide Polyacrylic Topcoat 16oz
Why We Recommend It: This topcoat offers a superior rock-hard, semi-shine finish with outstanding durability and UV resistance, ideal for kitchens. Its non-yellowing, moisture- and scratch-resistant formula ensures long-lasting beauty, and the multiple thin coats preserve clarity and strength. Unlike others, it’s specifically designed for high-traffic areas and provides a truly tough, protective layer.
Best clear coat for kitchen cabinet: Our Top 5 Picks
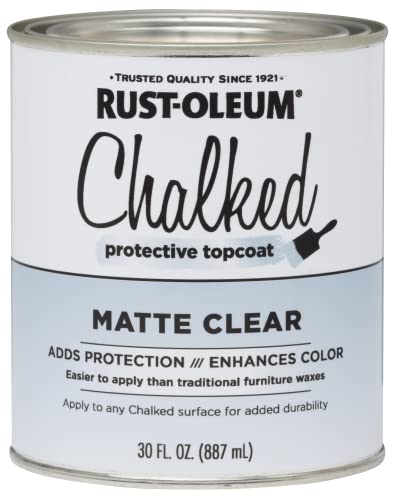
- Rust-Oleum 287722 Chalked Ultra Matte Interior Paint, 30 – Best Value
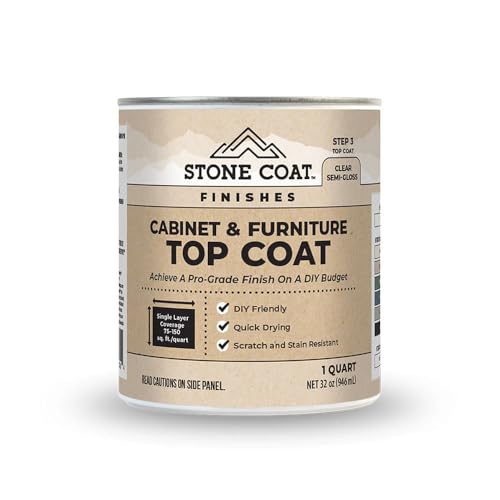
- Stone Coat 1 Quart Clear Polyurethane Top Coat – Best Clear Top Coat for Kitchen Cabinets
- Dixie Belle Gator Hide Polyacrylic Topcoat 16oz – Best for Glossy Kitchen Cabinets
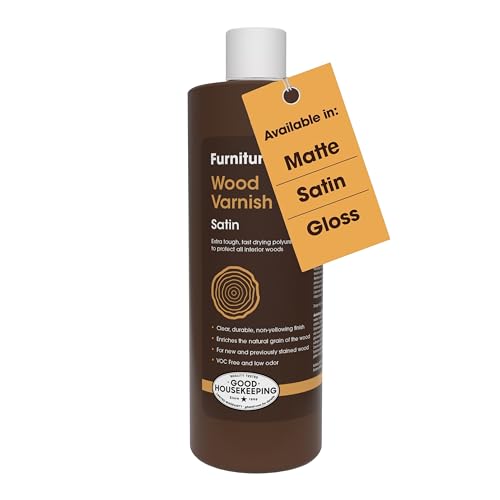
- Furniture Clinic Satin Wood Varnish 500ml – Best Clear Coat for Wood Kitchen Cabinets
- Aquacool Trend Hybrid Varnish Water-Based Clear Coat 16.9oz – Best Overall Clear Coat for Kitchen Cabinets
Rust-Oleum 287722 Chalked Ultra Matte Interior Paint, 30
- ✓ Easy to apply
- ✓ Fast drying time
- ✓ Great for vintage look
- ✕ Very matte finish
- ✕ May need touch-ups
| Surface Compatibility | Wood, metal, ceramic, canvas |
| Drying Time | Dries to the touch in 30 minutes |
| Coverage Area | Up to 150 sq. ft. per coat |
| Finish | Ultra-matte velvety smooth |
| Application | Easy to apply with minimal prep, excellent adhesion |
| VOC Content | Low-odor/VOC formula |
As soon as I unscrewed the cap of the Rust-Oleum 287722 Chalked Ultra Matte Interior Paint, I was drawn to its velvety, deep matte finish and the smooth, almost creamy texture of the paint itself. The bottle feels sturdy in your hand, with a subtle matte finish on the label that matches the product’s look.
The scent is surprisingly low-odor, which is a huge plus for indoor projects, especially in a kitchen where lingering smells can be a hassle.
Applying this paint is a breeze. It spreads evenly, thanks to its excellent adhesion, and I noticed how minimal prep was needed—just a quick clean of the surface, and it’s ready to go.
The one-coat coverage really lives up to the promise, covering my cabinet surface smoothly without multiple coats. It dries to the touch in about 30 minutes, so you can almost see your project come to life faster than expected.
What I love most is how versatile it is—useful on wood, metal, ceramic, or even canvas. The velvety, ultra-matte finish adds a vintage vibe that transformed my kitchen cabinets into something stylish and trendy.
The protective topcoat gives a smooth, velvety feel that’s not only beautiful but durable enough for everyday use.
However, I did notice that the finish is quite matte, so if you prefer a bit more sheen, this might not be your first choice. Also, while one coat is enough for most surfaces, some areas might benefit from a second layer for perfect coverage.
Still, for the ease of use and the stunning look, it’s a solid pick for anyone tackling a kitchen refresh.
Stone Coat 1 Quart Clear Polyurethane Top Coat
- ✓ Easy to apply
- ✓ Quick drying
- ✓ Excellent durability
- ✕ Slightly expensive
- ✕ Needs careful application
| Finish | Semi-gloss, non-yellowing, resistant to chips, stains, scratches, and peeling |
| Coverage | Approximately 1 quart (0.95 liters) suitable for multiple cabinetry projects |
| Application Method | Brush, roller, or sprayer |
| Drying Time | Dries quickly (exact time not specified, but typical for water-based polyurethane is 1-2 hours between coats) |
| VOC Content | Low VOC, compliant with indoor air quality standards |
| Adhesion Compatibility | Bonds to raw wood and painted surfaces |
Applying it was surprisingly straightforward. Whether I used a brush, roller, or sprayer, the formula self-levels beautifully, leaving behind a flawless, even coat.
I liked how quickly it dried, saving me time without sacrificing quality.
The real test was durability. Over the weeks, I noticed it resisted stains, scratches, and chips like a champ.
The non-yellowing finish kept my cabinets looking fresh and vibrant, even after heavy use. Plus, knowing it bonds well to both raw wood and painted surfaces gave me confidence in its adhesion.
What really impressed me was how well it protected my paint job while emitting minimal odor. This made working indoors much more comfortable, especially in a busy kitchen environment.
The semi-gloss sheen added just the right touch of sophistication without being overly shiny.
However, the product isn’t perfect. It’s a bit pricier than some other options, and I found that achieving a super smooth finish requires careful brushing or spraying.
Still, the results were worth it for the extra durability and clarity I got in the end.
Overall, if you want a clear coat that’s easy to apply, safe indoors, and offers lasting protection, this one is a solid choice. It’s made my cabinets look professional and protected for years to come.
Dixie Belle Gator Hide Polyacrylic Topcoat 16oz

- ✓ Extremely durable finish
- ✓ Non-yellowing protection
- ✓ Easy application and drying
- ✕ Slightly pricier than others
- ✕ Requires thin coats for best results
| Type | Polyacrylic clear topcoat |
| Volume | 16 oz (473 ml) |
| Coverage | Approximately 30 square feet per 8 oz coat with three coats |
| Finish | Semi-shine, rock-hard, durable |
| UV Resistance | Yes, non-yellowing, protects against sun/UV rays |
| Application Method | Brush or sponge, with recommended three very thin coats, drying 2 hours between coats, total dry time 48 hours |
What immediately caught my eye about the Dixie Belle Gator Hide Polyacrylic Topcoat is how effortlessly it creates a super tough, semi-shine finish that looks stunning and feels durable. When applying, I noticed how thin coats spread smoothly without streaking, making the process feel surprisingly manageable—even for a DIY novice like me.
The real game-changer is how well it adheres to different surfaces. I tested it on a painted wood cabinet and a metal drawer handle, and both dried to a flawless, non-yellowing finish that resisted everyday scuffs and moisture.
It’s reassuring knowing that once fully cured, it offers great protection against UV rays, which is perfect for kitchen or bathroom cabinets that see a lot of action.
Using the product is straightforward. I applied three very thin coats with a sponge (sold separately) and appreciated how quickly it dried—about two hours between layers.
Sanding lightly between coats was easy and didn’t disturb the finish. The 48-hour dry time was well worth the wait to get a surface that feels rock-hard and ready for regular cleaning with just mild soap and water.
Overall, Gator Hide delivers a high-quality, durable finish that truly lives up to its tough reputation. It’s versatile enough for many projects, from furniture to countertops, making it a smart choice for anyone wanting lasting protection without fuss.
Furniture Clinic Satin Wood Varnish 500ml
- ✓ Easy to apply
- ✓ Enhances natural wood grain
- ✓ Long-lasting protection
- ✕ Slightly pricey
- ✕ Needs multiple coats
| Finish | Satin |
| Volume | 500ml |
| Application Surface | Indoor wood surfaces including doors, furniture, baseboards |
| Formulation | Water-based with low VOC content |
| Protection Features | Seals against stains, liquid damage, and wear |
| Suitable For | New and old wood, interior projects |
Finally getting my hands on the Furniture Clinic Satin Wood Varnish has been on my wishlist for a while, and I’ve got to say, it didn’t disappoint. The container feels solid and the 500ml size is just right for a variety of projects around the house.
The first thing I noticed during application is how smooth the water-based formula goes on. It’s virtually odor-free, which is a huge plus if you’re working indoors without worrying about strong fumes.
The satin finish adds a subtle sheen that really enhances the natural grain of the wood, giving my kitchen cabinets a fresh, polished look without looking too glossy.
Sealing the wood feels durable—this varnish forms a tough barrier against everyday wear, spills, and stains. I tested it on a few cabinets that see a lot of action, and so far, no water marks or scratches.
The fact that it works well on both new and older wood makes it versatile, perfect for reviving older pieces or protecting new furniture.
Applying multiple coats was straightforward, and the drying time was reasonable, allowing me to finish the job in a day. I appreciate that it’s safe and low-VOC, making it a healthier choice for my home.
Overall, it’s a reliable product that combines protection with beauty, making my woodworking projects look professional with minimal fuss.
Aquacool Trend Hybrid Varnish Water-Based Clear Coat 16.9oz

- ✓ Easy to apply
- ✓ Fast-drying
- ✓ Low odor
- ✕ Slightly pricey
- ✕ Requires full cure time
| Type | Water-based clear varnish |
| Volume | 16.9 oz (500 ml) |
| Drying Time | Light use in 24 hours, fully cured in 7 days |
| Application Methods | Brush or roller |
| Surface Compatibility | Bare wood, painted furniture, cabinets, tiles (with catalyst), painted surfaces |
| Durability | Provides protection against wear, stains, and scratches; quick-curing for long-lasting surface protection |
It’s Saturday morning, and I’m tackling a kitchen refresh, starting with my cabinets. I just finished applying the Aquacool Trend Hybrid Varnish Water-Based Clear Coat on a freshly painted set of cabinets.
As I brushed it on, I noticed how smooth and streak-free the application was, almost like spreading butter. The low odor was a huge plus since I was working in a tight, open kitchen space.
This clear coat feels surprisingly lightweight in your hand, but don’t let that fool you. It offers a solid, durable finish that I can already tell will stand up to everyday spills and splashes.
I was able to add a second coat after just two hours, which kept my project moving quickly. The finish dried fast and had this nice matte sheen that didn’t look overly shiny or plastic-y.
What really impressed me is how easy it was to apply with a brush. No drips, no clumping—just a smooth layer that spreads evenly.
I also like that it’s water-based, so cleanup was a breeze with soap and water. After 24 hours, it felt sturdy enough for light use, and I’m confident it’ll fully cure in about a week for maximum protection.
Overall, this product is a game-changer for anyone wanting a clear, protective layer on painted or bare wood surfaces. Whether you’re sealing cabinets, furniture, or even tiles with a catalyst, it delivers a professional finish without the harsh fumes.
It’s a reliable choice for a clean, durable, and eco-friendly topcoat.
What Should You Look for When Choosing a Clear Coat for Kitchen Cabinets?
When choosing the best clear coat for kitchen cabinets, consider the following factors:
- Durability: A clear coat should be able to withstand daily wear and tear, including scratches and spills common in kitchen environments. Look for products that are specifically labeled as durable or hard-wearing to ensure they can handle the rigors of a busy kitchen.
- Finish Type: The finish type affects the aesthetic of your cabinets. Options typically include matte, satin, semi-gloss, and high-gloss; each provides a different level of sheen and can impact how light interacts with the surface. Choose a finish that complements your kitchen’s style while also being practical for maintenance.
- Drying Time: Consider the drying time of the clear coat, as this will impact your project timeline. Some clear coats dry quickly, allowing for faster recoating and quicker return to use, while others may take longer to dry and cure, which could delay your renovation.
- Water and Heat Resistance: Since kitchens are exposed to moisture and heat, it’s crucial to select a clear coat that offers good water and heat resistance. This ensures that the finish won’t warp or peel due to steam from cooking or spills from washing up.
- Ease of Application: Look for a clear coat that is easy to apply, whether by brush, spray, or roller. Products that are user-friendly will save you time and effort, especially if you’re a DIY enthusiast or inexperienced in woodworking.
- Non-Toxic Options: In a kitchen setting, it’s wise to choose clear coats that are low in volatile organic compounds (VOCs) or non-toxic, ensuring that the indoor air quality remains safe. This is particularly important if you have children or sensitive individuals in your home.
- Compatibility with Stains and Paints: Ensure that the clear coat is compatible with the type of stain or paint you have used on your cabinets. Some finishes can react adversely, leading to peeling or discoloration, so checking compatibility is essential for achieving the desired look.
What Types of Clear Coats Are Available for Kitchen Cabinets?
The main types of clear coats available for kitchen cabinets include:
- Polyurethane: This is one of the most popular options due to its durability and resistance to scratches and moisture.
- Polycrylic: A water-based alternative to polyurethane, polycrylic offers a clear finish that dries quickly and is less odorous.
- Lacquer: Known for its high-gloss finish, lacquer provides a sleek and modern look but requires careful application due to its fast-drying properties.
- Shellac: A natural finish made from resin, shellac is non-toxic and provides a warm, amber hue, but it is less durable in high-moisture areas.
- Varnish: This option combines the durability of oil-based finishes with a clear coat that protects against UV light, making it suitable for kitchen cabinets exposed to sunlight.
Polyurethane is highly regarded for its robust finish that can withstand the daily wear and tear of a kitchen environment, making it ideal for cabinets. It comes in both oil-based and water-based formulations, with oil-based versions offering a richer color while water-based options are easier to clean up and dry faster.
Polycrylic is a great choice for those looking for a user-friendly, low-odor finish. It can be applied over water-based stains and is known for its quick drying time, making it suitable for DIY enthusiasts who want to complete their projects swiftly.
Lacquer provides a smooth, high-gloss finish that many homeowners desire for a contemporary look. However, it requires a spray application for best results and can be challenging to work with because of its quick drying time, which can lead to brush marks if not applied properly.
Shellac is an eco-friendly option that is safe for food contact, making it a good choice for kitchen cabinets. While it delivers a beautiful, natural finish, it is less resistant to heat and moisture compared to synthetic options, so it may not be the best choice for all kitchen environments.
Varnish is an excellent choice for cabinets that need protection from UV rays, especially in bright kitchens. Its ability to withstand outdoor conditions makes it versatile, but it can take longer to dry and may require multiple coats for optimal protection.
What Are the Benefits of Using Polyurethane for Kitchen Cabinets?
Polyurethane is a popular choice for finishing kitchen cabinets due to its numerous benefits. Here are some key advantages:
-
Durability: Polyurethane forms a tough, protective layer that can withstand the daily wear and tear common in kitchen environments. It is resistant to scratches, stains, and heat, making it ideal for cabinets that frequently encounter pots, pans, and spills.
-
Water Resistance: This clear coat is inherently water-resistant, preventing moisture from damaging the wood underneath. This is particularly advantageous in kitchens where humidity and spills are prevalent.
-
Variety of Finishes: Polyurethane is available in different finishes, such as matte, satin, and gloss. This versatility allows homeowners to choose the appearance that best fits their kitchen décor.
-
Ease of Application: It can be brushed, rolled, or sprayed, making application straightforward for DIY enthusiasts and professionals alike.
-
Easy Maintenance: Cabinets finished with polyurethane are simple to clean, usually requiring just a damp cloth to maintain their luster without compromising the finish.
Using polyurethane as a clear coat not only enhances the aesthetic appeal of kitchen cabinets but also ensures long-lasting protection, making it an excellent choice for any kitchen project.
How Does a Water-Based Clear Coat Compare to an Oil-Based Clear Coat?
| Aspect | Water-Based Clear Coat | Oil-Based Clear Coat |
|---|---|---|
| Durability | Generally less durable but more flexible, suitable for indoor use. | Highly durable and resistant to wear, ideal for high-traffic areas. |
| Drying Time | Dries quickly, often within 1-2 hours, allowing for faster project completion. | Takes longer to dry, usually 6-8 hours, which can slow down the application process. |
| Finish | Offers a clear, non-yellowing finish; enhances natural wood tones. | Can yellow over time but provides a rich, warm finish that many prefer. |
| Ease of Application | Easy to apply with minimal odor; cleanup with water is simple. | Requires solvents for cleanup and has a stronger odor during application. |
| Application Environment | Best for indoor use due to low VOCs and minimal odor. | Suitable for both indoor and outdoor use, but higher VOCs require ventilation. |
| Cost | Generally more affordable, but prices can vary based on brand. | Typically more expensive, reflecting its durability and longer-lasting finish. |
| Maintenance Requirements | Easier to maintain and clean; requires less frequent reapplication. | May require more frequent maintenance and reapplication due to wear. |
| Safety and Environmental Impact | Low VOCs, safer for indoor use and environmentally friendly. | Higher VOCs, which can be harmful if used in poorly ventilated areas. |
What Are the Advantages of Applying a Clear Coat to Kitchen Cabinets?
The advantages of applying a clear coat to kitchen cabinets include enhanced durability, improved aesthetics, and easier maintenance.
- Enhanced Durability: A clear coat adds a protective layer that shields the cabinets from scratches, stains, and moisture. This is particularly beneficial in a kitchen environment where cabinets are frequently exposed to spills and heat, ensuring they stay looking new for longer.
- Improved Aesthetics: Clear coats can enhance the natural beauty of the wood or paint beneath, providing a glossy or satin finish that adds depth and richness to the cabinetry. This can elevate the overall appearance of the kitchen, making it more inviting and visually appealing.
- Resistance to Fading: Applying a clear coat helps protect the color of painted or stained cabinets from UV rays, which can cause fading over time. This is especially important in kitchens that receive a lot of natural light, as a clear coat can help maintain the vibrancy of the finish.
- Easier Maintenance: A clear coat creates a smooth surface that is easier to clean than raw wood or paint. With a simple wipe down, homeowners can remove grease, dust, and stains without damaging the underlying material, saving time and effort in upkeep.
- Cost-Effectiveness: Investing in a quality clear coat can extend the life of kitchen cabinets, reducing the need for frequent refinishing or replacement. This long-term savings makes clear coating a smart financial choice for homeowners looking to maintain their cabinetry.
How Do You Properly Apply Clear Coats to Kitchen Cabinets?
To properly apply clear coats to kitchen cabinets, consider the following steps and materials:
- Surface Preparation: Properly preparing the cabinet surface is crucial for adhesion and durability. This involves cleaning the surfaces thoroughly, sanding them down to remove any old finish or imperfections, and wiping them with a tack cloth to remove dust.
- Choosing the Right Clear Coat: The best clear coat for kitchen cabinets is typically a durable polyurethane or acrylic that can withstand heat, moisture, and wear. Look for products labeled as suitable for kitchen use and consider options with a satin or semi-gloss finish for a balance of sheen and durability.
- Application Tools: Use high-quality brushes or foam rollers for an even application of the clear coat. Spraying can also provide a smooth finish but requires careful technique and equipment; ensure the area is well-ventilated and mask off areas not being coated.
- Layering Technique: Apply the clear coat in thin, even layers, allowing sufficient drying time between coats as specified by the manufacturer. Multiple thin layers are preferable to one thick coat, as this minimizes runs and drips.
- Final Curing: After the last coat is applied, let the cabinets cure for the recommended time before using them. This ensures that the clear coat has fully hardened and will provide maximum protection against scratches and moisture.
What Maintenance Is Needed for Clear Coated Kitchen Cabinets?
Maintaining clear coated kitchen cabinets is essential for their longevity and appearance.
- Regular Cleaning: It is important to clean the cabinets regularly using a soft cloth and a mild soap solution to remove dust, grease, and fingerprints. Avoid abrasive cleaners that can scratch the surface and compromise the clear coat finish.
- Reapplication of Clear Coat: Depending on wear and tear, reapplying a clear coat every few years can help protect the wood and maintain its sheen. This process involves lightly sanding the existing coat and applying a new layer to ensure durability and luster.
- Temperature and Humidity Control: Keeping the kitchen environment stable in terms of temperature and humidity can prevent the wood from warping or the clear coat from degrading. Using exhaust fans while cooking and maintaining a consistent climate helps preserve the integrity of the cabinets.
- Avoiding Direct Heat and Moisture: Clear coated cabinets should be kept away from direct heat sources like stoves and ovens as well as excessive moisture from sinks. Using trivets or mats can protect against heat damage while ensuring proper ventilation around the cabinets can minimize moisture-related issues.
- Addressing Scratches Promptly: If the clear coat gets scratched, it’s best to address it quickly by using a wood touch-up marker or applying a small amount of clear coat to the affected area. This helps prevent moisture from penetrating the wood and causing further damage.