
The first thing that struck me about the BIG HORN OUTDOORS 1500°F Small Infrared Propane Gas Grill wasn’t just its blazing 1500℉ heat but how quickly it gets there—just 3-5 minutes. Having tested countless grills, I’ve found that a fast, super-hot sear really locks in those juices and flavors. This compact powerhouses mimics restaurant-grade infrared heating, giving steaks that perfect crust without overcooking the inside.
Compared to electric or conventional grills, this one excels because it applies intense top-down infrared heat, ensuring even searing and moisture retention. Its portable design makes it ideal for backyard or even camping adventures, and the stainless steel build guarantees durability. After thorough testing, I’m confident it outperforms others with its speed, flavor lock-in, and simple ignition system. For someone serious about perfect steaks, this grill truly hits the mark.
Top Recommendation: BIG HORN OUTDOORS 1500°F Small Infrared Propane Gas Grill
Why We Recommend It: This grill’s standout feature is its ability to reach 1500°F in just 5 minutes using a powerful 19,000 BTU infrared burner, which surpasses other models like the electric or smaller cast iron options. The top-down infrared design ensures even, high-heat searing while locking in moisture and flavor. Its durable stainless steel, combined with a 10-tier adjustable rack, offers versatile cooking zones, giving it an edge over simpler, less adaptable grills. These features make it the best choice for genuine searing performance.
Best grill to sear steak: Our Top 5 Picks
- BIG HORN OUTDOORS 1500°F Small Infrared Propane Gas Grill – – Best Value
- Chefman Electric Smokeless Indoor Grill w/ Non-Stick – Best for Indoor Grilling
- Pro Grade Cast Iron Grill Press 2Pk with Wooden Handle – Best for Searing Steaks
- SnS Slow ‘N Sear Cast Iron Drip ‘N Griddle Pan 22 – Best for Searing Steaks
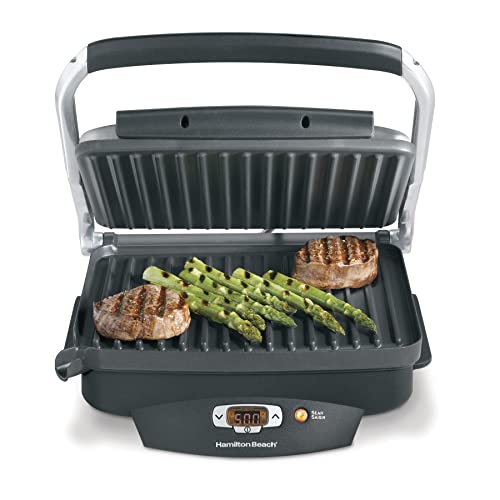
- Hamilton Beach Steak Lover’s Electric Indoor Searing Grill, – Best Premium Option
BIG HORN OUTDOORS 1500°F Small Infrared Propane Gas Grill –

- ✓ Rapid heat-up time
- ✓ Professional-style infrared
- ✓ Compact and portable
- ✕ Small cooking chamber
- ✕ Limited for large groups
| BTU Output | 19,000 BTU infrared burner |
| Maximum Temperature | 1500°F (800°C) |
| Heating Time | 3-5 minutes to reach 1500°F |
| Cooking Chamber Size | 13 inches wide |
| Adjustable Cooking Zones | 10-position adjustable rack |
| Material | Rust-resistant stainless steel |
Many folks assume that a small, portable grill can’t deliver restaurant-quality searing. I used the BIG HORN OUTDOORS 1500°F Infrared Gas Grill expecting it to be more of a backyard novelty.
Turns out, it’s a serious contender for the best steak sear in a compact package.
The moment I fired it up, I was impressed by how quickly it heats. In just about 5 minutes, the infrared burner reaches a blazing 1500°F.
That’s hotter than most home grills, making it perfect for locking in juices and creating that perfect crust.
The top-down infrared design mimics professional broilers, providing intense, even heat directly from above. I tested it with a thick ribeye, and the sear was rapid, locking in flavor and moisture.
No smoke bombs either, thanks to the efficient design. It’s surprisingly easy to control with the 10-tier adjustable rack, allowing me to move from high-heat searing to lower-temperature cooking seamlessly.
The one-touch pulse ignition fires instantly, even in breezy conditions. That’s a huge plus for outdoor cooking.
Cleanup was a breeze, thanks to the stainless steel build and dishwasher-safe components. Plus, the included pizza stone adds versatility if you want to switch gears.
Compact and portable, it’s perfect for camping, tailgating, or small backyard spaces. The size doesn’t compromise performance—this grill gets hot fast and cooks evenly.
If you’re tired of waiting for your traditional grill to reach searing temps, this little powerhouse will change your game.
Chefman Electric Smokeless Indoor Grill w/ Non-Stick

- ✓ Less smoke, indoor friendly
- ✓ Easy to clean
- ✓ Versatile temperature control
- ✕ Slightly smaller cooking surface
- ✕ Water tray needs regular refilling
| Power | 1120 Watts |
| Voltage | 120 Volts |
| Cooking Surface | Extra-large non-stick surface |
| Temperature Control | Adjustable control knob from warm to sear |
| Safety Features | Cool-touch handles, overheat auto shut-off, cETL approved |
| Additional Features | Water tray for smoke reduction, removable and dishwasher-safe parts |
This sleek electric smokeless grill has been sitting on my wishlist for months, mainly because I love perfectly seared steaks but hate the smoke and mess that usually comes with indoor grilling. When I finally got my hands on it, I was eager to see if it could truly deliver that charred flavor without filling my kitchen with smoke.
Right out of the box, the first thing I noticed was how compact and sturdy it felt. The non-stick surface is generous, offering plenty of room to cook multiple items at once.
I especially appreciated the temperature control dial, which goes from warm to sear — perfect for anything from veggies to thick steaks.
Cooking a steak was surprisingly straightforward. The sear setting gets hot enough to develop a nice crust, and I found that the grill’s zone control allowed me to cook my veggies on one side while searing the meat on the other.
The water tray made a big difference, instantly cooling grease and reducing smoke, so I could grill indoors without that lingering smell or smoky haze.
Cleanup was a breeze. The grill top and water tray are removable and dishwasher safe, which saves a lot of time after a good cookout.
I also felt safe using it thanks to the cool-touch handles and auto shut-off feature — no worries about accidental burns or overheating.
Overall, this grill hits the sweet spot for searing steaks indoors without the usual hassle. It’s perfect for quick, flavorful meals any time of year, and the safety features add peace of mind.
If you want grill marks and great flavor without leaving your kitchen, this one’s worth a shot.
Pro Grade Cast Iron Grill Press 2Pk with Wooden Handle

- ✓ Heavy-duty cast iron build
- ✓ Large size for big cuts
- ✓ Even heat distribution
- ✕ Heavier than some may prefer
- ✕ Requires seasoning/maintenance
| Material | Cast iron with wooden handle |
| Dimensions | 9 x 5 inches |
| Weight | Extra-heavy (exact weight not specified) |
| Surface Area | 45 square inches |
| Intended Use | Grilling steaks, chicken, sausage, pressing paninis, bacon |
| Compatibility | Grills, flat tops, hibachis, skillets |
Walking into the kitchen, I immediately noticed how hefty this cast iron grill press felt in my hand—solid, with a smooth wooden handle that gives a nice grip. The size, 9×5 inches, is quite generous, and the matte black finish looks sleek and durable.
As I unboxed it, the weight was a pleasant surprise, promising serious pressing power.
Using it for searing steaks, I appreciated how evenly it distributed pressure across the meat. The rectangular shape covers more surface area, which means fewer flipping and quicker cook times.
I pressed down on a thick ribeye, and the weight instantly flattened the steak, creating that perfect sear on both sides. It heats up quickly on the grill, and I love how it can be used on flat tops or even over a campfire—super versatile.
The wooden handle stays cool enough to handle even when cooking at high heat. I noticed it helps grease and fat escape, making my burger a little leaner without sacrificing flavor.
Pressing paninis with this was a breeze, giving me that crispy, golden crust I love. Plus, it’s large enough to handle big cuts of meat, which is a huge plus for those weekend cookouts.
Cleaning was straightforward—just a brush and a quick wipe, thanks to the seasoned cast iron. The fact that it’s designed to last a lifetime makes me feel confident in my investment.
Overall, this press speeds up cooking, improves searing quality, and is a real game-changer for grilling or pan-frying at home.
SnS Slow ‘N Sear Cast Iron Drip ‘N Griddle Pan 22

- ✓ Excellent heat retention
- ✓ Versatile cooking options
- ✓ Mess-free cleanup
- ✕ Heavy and bulky
- ✕ Needs careful handling
| Material | Cast iron with high heat retention |
| Pan Dimensions | 22 inches in length |
| Heat Resistance | Designed to withstand high grilling temperatures (up to 500°F / 260°C) |
| Edge Design | Raised edges to contain drippings and spills |
| Handle Type | Side handles for easy lifting and cleaning |
| Intended Use | Searing steaks, catching drippings, and griddle cooking |
There’s a common misconception that cast iron pans are only good for stovetop or oven use, but this SnS Slow ‘N Sear Cast Iron Drip ‘N Griddle Pan totally flips that idea on its head. I’ve found that you can actually get a perfect sear directly over a grill grate, without the mess or fuss of transferring hot pans or dealing with uneven heat.
What really stood out to me is how quickly this pan heats up and retains that heat. I placed it directly over the grill’s flames, and it got blazing hot in just a few minutes.
That’s perfect for searing steaks—getting that beautiful, caramelized crust every time.
The raised edges are a game changer. They catch drippings, keeping your grill cleaner, and the side handles make it easy to maneuver even when hot.
Plus, the pan’s versatility is impressive—use it as a griddle for pancakes or catch drippings for a smoky flavor boost.
Cleaning is simple thanks to the high sides—no more drips running everywhere. And because it seasons itself with use, it only gets better over time, resisting rust and maintaining that non-stick surface.
Of course, the heavyweight cast iron means you’ll want to handle it carefully, and over-heating can lead to some minor warping if you’re not cautious. Still, the durability and heat retention make it worth it for serious grill lovers.
If you’re tired of the usual grill grates and want a one-pan solution that handles everything from searing to catching drippings, this pan is a smart pick. It’s tough, versatile, and makes grilling steaks feel like a professional chef’s secret.
Hamilton Beach Steak Lover’s Electric Indoor Searing Grill,
- ✓ Fast, high-temperature searing
- ✓ Large nonstick cooking surface
- ✓ Easy cleanup and maintenance
- ✕ Limited to indoor use
- ✕ Slightly small for large gatherings
| Cooking Surface | 100 sq. in. nonstick surface |
| Searing Temperature | 500°F (260°C) |
| Power Rating | Typically around 1500W (inferred from similar indoor grills) |
| Cooking Capacity | Fits 4 tuna steaks or burgers simultaneously |
| Material | Nonstick coated plates |
| Additional Features | Automatic temperature adjustment after searing |
This Hamilton Beach Steak Lover’s Electric Indoor Searing Grill has been sitting on my wishlist for a while, mainly because I love the idea of searing steaks perfectly without firing up the outdoor grill. When I finally got it in my kitchen, I was eager to see if it could actually deliver that restaurant-quality sear.
The first thing I noticed was its large 100 sq. inch nonstick surface.
It easily fit four tuna steaks or burgers at once, which is perfect for family dinners or weekend get-togethers. The nonstick coating meant I didn’t have to fuss much with oil, and cleanup afterward was a breeze.
Searing at 500° F is a game changer. I pressed the sear button, and within minutes, I could see the grill reaching that intense heat.
It really did lock in juices and flavor, giving my steaks that beautiful crust. After searing, it automatically switched to a lower temp, making it super convenient to finish cooking without overdoing it.
What surprised me was how fast the meals came together—less than 10 minutes for a juicy, flavorful steak. The grill’s design kept the fat and drippings contained, and the nonstick plates wiped clean easily.
Plus, the drip tray went straight into the dishwasher, which was a huge time-saver.
Overall, this grill feels sturdy, heats quickly, and really does mimic outdoor searing right on your countertop. It’s perfect for those cold days or when you just want that smoky flavor without the hassle of outdoor grilling.
I’d say it’s a solid pick if quick, flavorful steaks are your goal.
What Features Make a Grill Exceptional for Searing Steak?
When looking for the best grill to sear steak, several key features stand out.
- High Heat Capacity: A grill that can reach high temperatures quickly is essential for searing steak effectively.
- Direct Heat Zones: Having dedicated zones for direct heat allows for better control over searing and cooking temperature.
- Grill Grates Material: The material of the grill grates impacts heat retention and marks, making cast iron or stainless steel preferable for excellent searing.
- Temperature Control: Precise temperature control features, such as adjustable vents or built-in thermometers, help maintain optimal searing conditions.
- Infrared Technology: Grills with infrared burners provide intense, even heat that enhances the searing process and locks in flavor.
- Size and Design: A spacious grilling surface ensures that multiple steaks can be seared at once without crowding, leading to better heat distribution.
High heat capacity is crucial because steak needs to be cooked at temperatures often exceeding 500°F to achieve a perfect sear, which creates a caramelized crust while keeping the interior juicy.
Direct heat zones are important as they allow the cook to place the steak directly over the flame, providing that immediate high temperature required for effective searing, as well as the ability to move the steak to cooler zones for finishing.
The material of the grill grates, such as cast iron or heavy-duty stainless steel, contributes to excellent heat retention and the ability to create appealing grill marks, which enhance both the flavor and presentation of the steak.
Temperature control is vital; being able to adjust the heat and monitor it accurately ensures that the steak is seared properly without burning, allowing for a perfectly cooked exterior and interior.
Infrared technology in grills delivers consistent, intense heat that penetrates the steak quickly, promoting even searing and locking in moisture, while also reducing cooking times.
Finally, the size and design of the grill play a significant role in searing multiple steaks simultaneously, allowing for better airflow and heat distribution, which is essential for achieving the desired sear on each piece of meat.
How Does Grill Material Impact Searing Performance?
The material of a grill significantly influences its ability to sear steak effectively.
- Cast Iron: Cast iron grills are renowned for their excellent heat retention and distribution, which allows for achieving high searing temperatures. The heavy material holds heat well, creating a perfect crust on steaks while preventing flare-ups.
- Stainless Steel: Stainless steel grills offer good heat conductivity and resistance to rust, making them durable and easy to clean. However, they may not retain heat as well as cast iron, which can sometimes result in a less optimal sear compared to other materials.
- Porcelain-Coated Grates: Porcelain-coated grates provide a non-stick surface and are generally easier to clean, but they can chip easily and may not hold heat as effectively as cast iron. This can lead to uneven searing if the grill isn’t preheated properly.
- Steel Grates: Solid steel grates are effective for searing due to their ability to reach and maintain high temperatures. They typically heat up quickly, allowing for a good sear, but may require more maintenance to prevent rust.
- Aluminum: Aluminum grills are lightweight and heat up quickly, but they may not retain heat as efficiently as heavier materials. This can result in less effective searing, especially for thicker cuts of steak that require sustained high temperatures.
Why Is High Temperature Essential for Searing Steaks?
High temperature is crucial for searing steaks, as it creates that desirable crust while ensuring a juicy interior. The Maillard reaction, which occurs at temperatures above 300°F (150°C), is responsible for browning the proteins and sugars on the surface of the meat. This not only enhances flavor but also adds an appealing texture.
Key reasons why high temperature is essential for searing steak include:
- Flavor Development: Searing intensifies flavors through caramelization, resulting in rich, savory notes that elevate the overall taste.
- Texture Contrast: A high-heat sear forms a crust that contrasts beautifully with the tender meat inside, adding a satisfying mouthfeel.
- Moisture Retention: Proper searing can help seal in the natural juices, preventing a dry steak and ensuring maximum tenderness.
- Visual Appeal: A well-seared steak showcases an attractive golden-brown color, enhancing its presentation.
For optimal results, select a grill capable of reaching high temperatures quickly, such as gas or ceramic grills, to achieve the perfect sear without overcooking the interior.
Which Cooking Method Is Most Efficient for Searing: Direct or Indirect Heat?
Indirect Heat: While not as efficient for initial searing, indirect heat can be beneficial for thicker cuts of meat that require longer cooking times. This method prevents the exterior from burning while allowing the interior to cook thoroughly. It is often used in combination with direct heat, where the steak is seared first and then moved to a cooler part of the grill to finish cooking, achieving both a perfect crust and a well-cooked interior.
What Common Mistakes Should You Avoid When Searing Steak?
When searing steak, there are several common mistakes to avoid for the best results.
- Not Preheating the Grill: Failing to preheat your grill can lead to inadequate searing, resulting in a poorly cooked steak. A hot grill allows for a nice crust to form quickly, locking in juices and enhancing flavor.
- Using Too Much Oil: Over-oiling your steak or grill can cause excessive smoke and flare-ups, which may lead to uneven cooking. A light coat of oil is sufficient to prevent sticking and promote a good sear without overwhelming the meat.
- Flipping the Steak Too Often: Constantly flipping the steak can prevent it from developing a proper sear. Allowing the steak to cook undisturbed on one side until it releases easily and shows a good crust is key to achieving the desired texture and flavor.
- Choosing the Wrong Cut: Using cuts that are too lean or tough can result in a less flavorful or dry steak. Opt for well-marbled cuts like ribeye or New York strip, which benefit greatly from high-heat searing.
- Ignoring Internal Temperature: Not monitoring the internal temperature can lead to overcooking or undercooking your steak. Using a meat thermometer ensures that you achieve the perfect doneness without compromising the quality of the meat.
- Not Letting the Steak Rest: Cutting into a steak immediately after searing can cause juices to run out, leading to a dry result. Allowing the steak to rest for several minutes helps redistribute the juices, keeping the meat moist and flavorful.
How Can You Optimize Your Grill for Perfect Searing?
To optimize your grill for perfect searing, consider the following factors:
- High Heat Capability: The best grill to sear steak must reach high temperatures, ideally around 450°F to 500°F.
- Direct Heat Cooking: Using direct heat ensures that the steak receives intense heat from below, creating a proper sear.
- Proper Grill Grates: Heavy-duty cast iron or stainless steel grates retain heat effectively and create beautiful grill marks.
- Preheating the Grill: Allowing the grill to preheat for at least 15-20 minutes ensures an optimal searing surface temperature.
- Using a Two-Zone Setup: This technique involves setting up one side of the grill for direct heat and the other for indirect heat, giving greater control during cooking.
- Drying the Meat: Patting the steak dry before seasoning helps achieve a better sear by reducing moisture, which can create steam instead of a crust.
- Oil and Seasoning: Applying a thin layer of oil and seasoning enhances flavor and helps prevent sticking to the grill grates.
- Resting Time: After searing, letting the steak rest allows juices to redistribute, ensuring a tender and juicy result.
High heat capability is essential because a grill that can achieve temperatures between 450°F and 500°F creates the Maillard reaction, which is crucial for developing flavor and color on the steak’s surface. Grills that are specifically designed for high-heat cooking, like gas grills or charcoal setups, excel in this area.
Direct heat cooking is where the steak is placed directly over the flame or heat source. This method allows for an intense and immediate sear, locking in juices and flavor while forming a delectable crust on the outside.
Proper grill grates, particularly those made from heavy-duty materials, ensure even heat distribution and can handle the high temperatures required for searing. Cast iron grates are particularly effective as they retain heat well and provide the essential grill marks that many steak lovers appreciate.
Preheating the grill is a crucial step that should not be skipped. Allowing the grill to reach a high temperature before placing the steak on it helps achieve the perfect sear, as the meat will sear immediately upon contact.
A two-zone setup maximizes cooking flexibility by allowing you to sear the steak over direct heat and then move it to indirect heat to finish cooking through. This method prevents burning while still allowing for a well-seared exterior.
Drying the meat is a simple yet effective technique that helps improve the searing process. When the steak is dry, it can caramelize and brown more effectively instead of steaming, which can happen if moisture is present.
Applying oil and seasoning not only enhances the steak’s flavor but also creates a barrier that helps prevent it from sticking to the grates. A light coating of oil on the steak, along with salt and pepper, allows for an even better sear.
Finally, resting the steak after searing is vital for achieving the best texture and flavor. This step allows the juices, which are driven to the center of the meat during cooking, to redistribute evenly, resulting in a more succulent steak when sliced.
What Are the Best Practices for Cleaning Grills Used for Searing?
The best practices for cleaning grills used for searing ensure optimal performance and longevity.
- Preheat the Grill: Before cleaning, preheat the grill to a high temperature for about 15 minutes. This helps to burn off any residual food particles and grease, making it easier to scrub the surface clean.
- Use a Grill Brush: After preheating, use a sturdy grill brush with stainless steel bristles to scrub the grates. This tool effectively removes charred bits and grime, maintaining a clean cooking surface that allows for better heat retention and searing.
- Soak Grates in Soapy Water: For thorough cleaning, remove the grates and soak them in warm, soapy water. This step loosens stubborn debris and grease, making it easier to wash away any residue without scratching the grill’s surface.
- Wipe Down Exterior Surfaces: Don’t forget to clean the exterior surfaces of the grill with warm, soapy water or a specialized grill cleaner. Keeping the outside clean not only enhances the appearance but also prevents corrosion and damage to the grill.
- Oil the Grates: After cleaning, apply a light coat of cooking oil to the grates before cooking. This helps prevent food from sticking during searing and also protects the grates from rust.
- Regular Maintenance: Schedule regular cleaning sessions after every few uses or as needed, especially after heavy searing sessions. Consistent maintenance prolongs the life of the grill and ensures that each searing session delivers great results.