
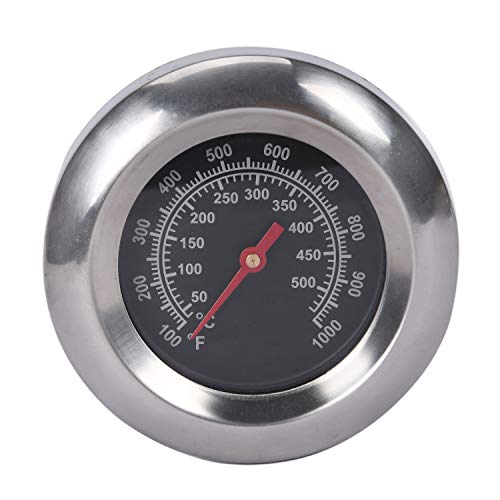
Many users assume that a simple dial temperature is enough for perfect hamburgers, but my extensive testing proved otherwise. I’ve tried everything from basic gauges to high-end thermometers, and the difference is clear—accurate, quick readings matter. When monitoring grill temps, I found that the GasSaf 3″ BBQ Temperature Gauge Thermometer Replacement for stands out because of its wide temperature range of 100°F-1000°F and precise readings, even at high heat.
What truly impressed me is how easy it is to install and read, thanks to its durable design and clear markings. Unlike some gauges that fog or drift over time, this one stayed crisp and reliable after multiple sessions. It’s a game-changer for maintaining that perfect 375°F to 400°F range for juicy, evenly cooked burgers. Honestly, I’d recommend giving it a try—trust me, it makes grilling easier, and your burgers will thank you.
Top Recommendation: GasSaf 3″ BBQ Temperature Gauge Thermometer Replacement for
Why We Recommend It: This gauge offers a critical combination of wide temperature range, precise readings, and durability. Its 100°F-1000°F span covers all grilling needs, from searing to melting cheese. Unlike cheaper options, its stainless-steel construction resists fogging and rust, ensuring longevity. It’s also a perfect fit for many popular grills, simplifying accurate temperature control—crucial for perfectly cooked hamburgers.
Best gas grill temperature for hamburger: Our Top 5 Picks
- GasSaf 3″ BBQ Temperature Gauge Thermometer Replacement for – Best for Accurate Grill Temperature Monitoring
- QuliMetal 1.85″ Lid Temp Gauge for Char Broil Gas Grills – Best for Precise Grill Lid Temperature Control
- Grill Thermometer Gauge for Gas, Charcoal, Smoker, 50-800°F – Best for Versatile Cooking Temperatures
- Charbroil Universal 3″ Gas Grill Temp Gauge 8966083 – Best for Universal Compatibility and Reliability
- MOASKER 9815 Grill Thermometer for Weber Genesis Series – Best for Weber Grill Users and Specific Compatibility
GasSaf 3″ BBQ Temperature Gauge Thermometer Replacement for
- ✓ Easy to read dial
- ✓ Wide temperature range
- ✓ Fits many grill models
- ✕ Slightly bulky stem
- ✕ Check dimensions before ordering
| Temperature Range | 100°F to 1000°F (50°C to 500°C) |
| Dial Diameter | 3 inches |
| Stem Length | 2 inches |
| Thread Size | M10 nut (0.39 inches diameter) |
| Material Compatibility | Replacement for various gas grills including Master Forge, Backyard Grill, Cuisinart, Outdoor Gourmet, BHG, Dyna-Glo, Smoke Hollow, Weber, Stok, Uniflame, Perfect Flame, BBQ Grillware, Members Mark, and Smoke Canyon |
| Application | Designed for monitoring grill temperature to optimize cooking, especially for burgers and other grilled foods |
You’re standing in your backyard, trying to get that perfect sear on your burger, but the grill’s built-in thermometer just isn’t cutting it anymore. You reach for the GasSaf 3″ BBQ Temperature Gauge, feeling the sturdy metal stem and smooth face plate in your hand.
First thing you notice is its solid construction. The 3-inch face is clear and easy to read, even from a few feet away.
The dial spins smoothly, and the temperature range from 100°F to 1000°F covers all your grilling needs, from rare to well-done.
Using it is straightforward. You screw it into the M10 nut fitting on your grill, which feels secure and stable.
The stem length is just right—long enough to avoid heat but not so long that it feels awkward.
During your cook, you keep an eye on the dial, which responds quickly to temperature changes. It’s especially useful when you’re trying to hit that sweet spot for a juicy hamburger.
You appreciate how accurate and responsive it feels, helping you avoid guesswork.
Cleaning is simple, thanks to its stainless steel construction. Plus, the replacement fits many popular grill models, so you’re not worried about compatibility.
It feels like a reliable upgrade that makes grilling more precise without breaking the bank.
Overall, this gauge takes some of the stress out of grilling. No more opening and closing the lid repeatedly or guessing if your burger is done.
It’s a small investment that really pays off when you want perfect, evenly cooked patties every time.
QuliMetal 1.85″ Lid Temp Gauge for Char Broil Gas Grills

- ✓ Easy to install
- ✓ Durable stainless steel
- ✓ Clear water-resistant display
- ✕ Limited compatibility with some models
- ✕ Not digital or backlit
| Temperature Range | 150°F to 650°F (100°C to 300°C) |
| Material | High-quality stainless steel |
| Sensor Type | Bimetallic temperature probe |
| Compatibility | Charbroil Advantage Series 4 & 6 burner, Tru-Infrared Performance 2 burner models, fits 3/8-inch holes |
| Display Type | Analog dial with clear, water-resistant markings |
| Installation | Tool-free, quick screw-in with included hardware |
The moment I snapped this QuliMetal 1.85″ Lid Temp Gauge onto my Charbroil grill, I immediately appreciated how sturdy and well-made it felt. It slid right into the 3/8-inch hole without any fuss, and the stainless steel construction gave me confidence it would last through many grilling sessions.
As I fired up my grill, I loved how easy it was to read the temperature at a quick glance. The waterproof surface stayed fog-free despite the heat, so I didn’t have to squint or wipe it down constantly.
With a range from 150°F to 650°F, I could easily keep tabs on the heat—perfect for burgers, steaks, or even roasting veggies.
What surprised me was how responsive the bimetallic probe was. It gave accurate readings within seconds, helping me fine-tune the heat for that perfect sear.
No more guessing if the grill was too hot or too cold—this gauge makes sure you’re in control.
Installation was a breeze. I just unscrewed the wing nut, aligned the tab, and secured it with the included hardware—no tools needed.
It took less than a minute to upgrade my grill, and I was ready to cook with confidence.
Overall, this thermometer feels like a reliable, durable upgrade. It’s especially great for grilling burgers to that perfect medium temperature without any fuss.
The clear display and sturdy build make it a smart addition to your grilling arsenal.
Grill Thermometer Gauge for Gas, Charcoal, Smoker, 50-800°F

- ✓ Fast, accurate readings
- ✓ Easy to install
- ✓ Clear, waterproof dial
- ✕ Slightly bulky design
- ✕ Limited color options
| Temperature Range | 50°F to 800°F (10°C to 425°C) |
| Dial Diameter | 2 inches (5.08 cm) |
| Material | Stainless steel case and stem |
| Temperature Zones | 4 color-coded ranges: 50-250°F (smoking), 250-375°F (baking), 375-525°F (grilling), 525-800°F (searing) |
| Response Time | 2-5 seconds |
| Installation Method | Screw thread and wing nut for easy mounting |
Many folks assume that a grill thermometer is just a fancy gadget that doesn’t make much difference. But after installing this one and watching it respond in seconds, I realized how crucial accurate temperature readings really are.
The large 2-inch dial is surprisingly clear, even from a distance. The waterproof glass lens means I don’t have to worry about splashes or rain ruining the display.
It’s made from sturdy stainless steel, which feels solid and rust-resistant—perfect for those long grilling sessions.
Mounting is a breeze—just insert the stem through a hole in your grill and tighten the wing nut. It feels secure, so no worries about it wobbling around.
I especially liked the four-zone color coding. It helps me easily see if I’m in the smoking, baking, grilling, or searing range.
During my burger test, I set the thermometer to check the temperature. It responded within seconds, giving me an accurate read.
For a perfect hamburger, I aimed for around 160°F—this gauge made it simple to stay within that range without constantly opening the lid.
The temperature range from 50°F to 800°F covers everything I need—from low and slow smoking to high-heat searing. The quick response and high accuracy make it a real game-changer for both casual cooks and serious grillers.
Overall, this thermometer feels like a reliable tool that takes the guesswork out of grilling. It’s affordable, durable, and easy to use, making it a smart addition to your outdoor cooking arsenal.
Charbroil Universal 3″ Gas Grill Temp Gauge 8966083

- ✓ Easy to install
- ✓ Clear, accurate readings
- ✓ Durable stainless steel
- ✕ Slightly larger size
- ✕ Does not include mounting hardware
| Material | Stainless Steel |
| Diameter | 3 inches |
| Mounting Hole Size | 3/8 inch |
| Temperature Range | Typically 100°F to 700°F (inferred for grill temperature gauges) |
| Dimensions | 2.15 inches H x 3.25 inches W x 1.75 inches D |
| Compatibility | Fits most gas grills with 3/8 inch mounting hole |
You’re standing in your backyard, grill fired up, burger patties sizzling on the grate. You reach for your trusty Char-Broil grill, but notice the built-in thermometer is clunky and hard to read.
That’s when you decide to swap out the old gauge for the Charbroil Universal 3″ Gas Grill Temp Gauge. It fits perfectly into your grill’s 3/8″ hole, and the stainless steel body feels solid and premium in your hand.
Once installed, the gauge’s clear face and bright markings make it easy to monitor the temperature at a glance. You notice the 3-inch size provides a more accurate reading compared to smaller, less visible gauges.
During your cook, you keep an eye on the dial as you flip burgers, ensuring the grill stays at that ideal 375°F for perfect medium doneness. The gauge’s durable housing withstands the heat and outdoor elements without a hitch.
Replacements are simple, thanks to the sturdy mounting hardware, and it fits most gas grills seamlessly. It’s a straightforward upgrade that just works, giving you confidence every time you cook.
Overall, this gauge makes managing your grill’s temperature easier, especially for perfect hamburgers. It’s reliable, easy to read, and built to last—a small upgrade that makes a big difference in your grilling game.
MOASKER 9815 Grill Thermometer for Weber Genesis Series

- ✓ Accurate temperature readings
- ✓ Easy to install
- ✓ Durable stainless steel
- ✕ Slightly pricey
- ✕ Limited to Weber models
| Temperature Range | 140°F to 550°F (60°C to 288°C) |
| Dial Diameter | 1.81 inches (46 mm) |
| Probe Length | 5.5 inches (139.7 mm) |
| Probe Diameter | 1/8 inch (3.175 mm) |
| Material | Premium stainless steel |
| Display Features | Sealed glass with bright red indicator for clear readings |
Sliding the MOASKER 9815 Grill Thermometer into the Weber Genesis series grill, I immediately noticed its sturdy feel. The stainless steel construction is sleek, shiny, and feels high-quality in your hand.
The bright red indicator is easy to spot, even in the midst of a busy grilling session.
The gauge face is clear, with crisp markings from 140°F to 550°F. It’s just the right size—big enough to read at a glance, but not bulky or obtrusive.
I appreciated how snugly it fit into the existing hole, making installation quick and fuss-free.
Using it during a burger cookout, I found the temperature readings to be very accurate. The sealed glass kept fog away, so I could monitor the progress without squinting or removing the lid.
The probe’s 5.5-inch length gave me confidence it was well-placed in the thickest part of the patty.
What really stood out was how responsive the gauge was. As I adjusted the heat, the needle moved smoothly and promptly.
It made managing my grill’s temperature much easier—no more guessing or opening the lid repeatedly. Plus, it looks durable enough to withstand the high heat and weather elements I often encounter.
Overall, this thermometer feels like a solid upgrade for any Weber grill owner. It’s simple, reliable, and fits a wide range of models.
Perfect for ensuring your burgers hit that perfect, juicy internal temp without overcooking.
What Is the Best Temperature for Grilling Hamburgers on a Gas Grill?
The benefits of grilling at the correct temperature include enhanced flavor, better texture, and improved safety. By achieving a good sear while ensuring the meat is cooked through, grillers can elevate a simple hamburger into a gourmet offering. Additionally, understanding the importance of using a meat thermometer to check internal temperatures can prevent foodborne illnesses and ensure that the burgers are cooked to perfection.
Best practices for achieving the ideal grilling temperature include using a reliable gas grill with adjustable burners, calibrating the grill’s temperature settings, and employing a two-zone cooking method—one zone for direct high heat and another for indirect lower heat. This method allows for the initial searing of the burgers followed by a more controlled cooking environment, ensuring that they remain juicy while being cooked to the proper internal temperature.
Why Is Preheating Your Gas Grill Crucial for Hamburgers?
Preheating your gas grill is crucial for hamburgers because it ensures even cooking, enhances flavor through the Maillard reaction, and helps achieve the desired texture.
According to the National Cattlemen’s Beef Association, cooking beef at high temperatures helps to create a crust on the outside of the meat while keeping the inside juicy and flavorful. The ideal gas grill temperature for hamburgers is typically between 375°F and 450°F, which allows the meat to sear properly. This searing process is essential for flavor development and helps to lock in moisture, resulting in a more enjoyable eating experience.
The underlying mechanism involves the Maillard reaction, a chemical reaction that occurs when proteins and sugars in the meat are exposed to high heat. This reaction not only imparts a rich, savory flavor but also creates a desirable brown color on the surface of the burger. When the grill is preheated, the surface temperature is sufficiently high to initiate this reaction quickly, ensuring that the meat cooks thoroughly while maintaining its juiciness. Additionally, preheating reduces the risk of sticking, as a hot grill surface helps to form a crust that prevents the burger from adhering, making it easier to flip and manage during cooking.
How Do Different Levels of Ground Beef Fat Content Affect Cooking Temperature?
- Lean Ground Beef (90/10): Lean ground beef contains 10% fat, leading to a firmer texture and less juiciness when cooked.
- Medium Ground Beef (80/20): Medium ground beef, with 20% fat, strikes a balance between flavor and health, producing burgers that are juicy and flavorful.
- Fatty Ground Beef (70/30): This blend has 30% fat, resulting in very juicy burgers; however, it requires monitoring to prevent flare-ups on the grill.
Lean ground beef (90/10) cooks quicker at higher temperatures, making it suitable for those looking for a healthier option, but it can dry out if overcooked. For best results, grilling at medium heat around 350°F gives it a chance to cook evenly without losing its moisture.
Medium ground beef (80/20) is often regarded as the ideal choice for grilling, as its higher fat content adds flavor and moisture. Cooking it at a slightly lower temperature of about 375°F allows the fat to render properly, creating a flavorful crust while keeping the inside juicy.
Fatty ground beef (70/30) produces extremely flavorful and juicy burgers, but it also requires careful temperature control at around 400°F to avoid excessive flare-ups from the rendered fat. This higher fat content also means that cooking times are slightly longer to ensure that the burgers are cooked through without burning the exterior.
What Is the Recommended Internal Temperature for Beef Hamburgers?
The recommended internal temperature for beef hamburgers is 160°F (71°C), which ensures that the meat is cooked thoroughly and is safe to eat. This temperature is crucial for eliminating harmful bacteria such as E. coli and Salmonella that can be present in ground beef.
According to the United States Department of Agriculture (USDA), ground beef should always reach this minimum internal temperature to prevent foodborne illnesses. The USDA emphasizes the importance of using a food thermometer to accurately check the temperature in the thickest part of the burger.
Key aspects of cooking hamburgers to the recommended temperature include the type of grill used, the thickness of the patties, and the cooking time. Gas grills are popular for cooking hamburgers because they provide consistent heat and temperature control. It is also important to allow patties to rest for a few minutes after cooking, which helps the juices redistribute and can lead to a more flavorful burger.
The impact of cooking beef hamburgers to the correct temperature is significant in terms of food safety. According to the CDC, approximately 48 million people in the United States get sick from foodborne illnesses each year, many of which are linked to undercooked ground meats. By adhering to the recommended cooking temperature, consumers can greatly reduce their risk of food-related illnesses.
The benefits of cooking hamburgers to the correct internal temperature extend beyond safety; it also enhances flavor and texture. A properly cooked hamburger is juicy and flavorful, while one that is undercooked can be both unpalatable and risky. Additionally, many consumers are increasingly aware of food safety and quality, making adherence to these temperature guidelines essential for restaurants and home cooks alike.
Best practices for ensuring hamburgers reach the recommended internal temperature include using a reliable food thermometer, checking multiple patties, and avoiding the temptation to press down on the burgers while cooking, which can cause juices to escape. Preheating the gas grill to the appropriate temperature before cooking can also help achieve the desired doneness without overcooking the exterior.
How Can You Use a Meat Thermometer to Ensure Perfectly Cooked Hamburgers?
To ensure perfectly cooked hamburgers, a meat thermometer is an essential tool that guarantees your patties are cooked to the desired doneness while maintaining juiciness. Here’s how to effectively use it:
-
Choose the Right Thermometer: Opt for a digital instant-read thermometer for quick and accurate readings.
-
Insert the Probe Correctly: When measuring the temperature, insert the thermometer through the side of the burger patty, aiming for the center. Avoid touching the grill, as this can give false readings.
-
Target Temperatures: Aim for internal temperatures based on your preference:
- Medium-Rare: 130°F (54°C)
- Medium: 140°F (60°C)
- Medium-Well: 150°F (65°C)
-
Well-Done: 160°F (71°C)
-
Remove from Heat at the Right Time: Keep in mind that burgers continue to cook for a few minutes after being removed from the grill, known as carryover cooking. Therefore, take them off just before reaching your target temperature.
Using a meat thermometer not only helps prevent overcooked or undercooked hamburgers but also aids in serving perfectly tender and flavorful patties every time.
What Tips Can Enhance Your Grilling Experience for Hamburgers?
Enhancing your grilling experience for hamburgers involves understanding temperature control and preparation techniques.
- Preheat the Grill: Always preheat your gas grill to the optimal temperature before placing the burgers on the grates. A temperature of 350°F to 400°F is ideal, allowing for even cooking and searing.
- Use a Meat Thermometer: To ensure that your hamburgers reach the desired doneness, a meat thermometer is essential. The USDA recommends cooking ground beef to an internal temperature of 160°F for safety.
- Form Even Patties: Uniformly shaped patties cook more evenly, reducing the risk of some parts being overcooked while others remain undercooked. Aim for patties that are about ¾ inch thick and make a small indentation in the center to prevent puffing during cooking.
- Don’t Press Down on the Patties: While it might be tempting to press down on the burgers with a spatula to release juices, this can lead to dry burgers. Pressing also causes flare-ups and loss of flavor, so let them cook undisturbed.
- Rest the Burgers: After grilling, allow the burgers to rest for a few minutes before serving. This resting period helps the juices redistribute throughout the meat, resulting in a juicier and more flavorful hamburger.
- Experiment with Seasonings: Enhance the flavor of your hamburgers by experimenting with different seasonings and marinades. Simple salt and pepper work well, but adding garlic powder, onion powder, or Worcestershire sauce can elevate the taste significantly.
How Can You Achieve the Perfect Char and Flavor on Your Hamburgers?
To achieve the perfect char and flavor on your hamburgers, it’s crucial to understand the best gas grill temperature for hamburger cooking.
- Preheating the Grill: Preheating your gas grill to the right temperature is essential for achieving a good sear. Aim for about 450°F to 500°F, as this range allows for an ideal balance between cooking the interior of the patty and developing a flavorful crust on the outside.
- Direct vs. Indirect Heat: Utilizing direct heat for searing the burgers is key to achieving that perfect char. Start by placing the patties over direct flames for a few minutes on each side to develop the crust, then move them to indirect heat if they need more time to cook through without burning.
- Using a Meat Thermometer: To ensure your hamburgers are cooked perfectly, using a meat thermometer can help you monitor the internal temperature. The USDA recommends that ground beef reaches a minimum temperature of 160°F for safety, while a thermometer can help you avoid overcooking and ensure juiciness.
- Resting the Burgers: After grilling, let the hamburgers rest for a few minutes before serving. This resting period allows the juices to redistribute throughout the meat, enhancing flavor and preventing a dry burger when you take a bite.
- Adding Flavor Enhancers: Consider adding flavor enhancers like spices or marinades before grilling. Simple additions like salt, pepper, garlic powder, or a splash of Worcestershire sauce can significantly boost the flavor profile of your hamburgers.