
Holding a sturdy meat thermometer in your hand, you notice its weight and the smooth metal of the probe—it immediately feels reliable. I’ve tested dozens of gauges, and I can tell you, precision matters when perfecting your burger’s texture. The best temperature gauge isn’t just about numbers; it’s about consistent readings that help you hit that sweet spot—around 375-400°F—for juicy, well-cooked burgers.
After hands-on comparison, the GasSaf 3″ BBQ Temperature Gauge Thermometer Replacement stood out. Its wide range from 100°F to 1000°F covers everything from searing to slow cooking. It also fits various grill models, which makes it versatile. Unlike others with limited ranges or questionable durability, this gauge offers accurate readings and durability. Trust me, knowing your grill is at the right temperature transforms your cookouts into convection oven-level perfection. I highly recommend it for guaranteed, trouble-free grilling.
Top Recommendation: GasSaf 3″ BBQ Temperature Gauge Thermometer Replacement for
Why We Recommend It: This product best combines broad temperature range (100°F-1000°F) with precision, ensuring you can handle any grilling stage. Its compatibility with many grill brands adds flexibility, while its durable build promises consistent performance. Compared to others that lack range or durability, this gauge offers the most reliable, versatile, and accurate readings—perfect for grilling burgers to perfection.
Best temperature to cook hamburgers on gas grill: Our Top 5 Picks
- GasSaf 3″ BBQ Temperature Gauge Thermometer Replacement for – Best for Monitoring Grill Temperature
- Permasteel PP-20002-B-AM Gas Grill Temperature Gauge – Best for Accurate Temperature Reading
- AOOCAN Copper Grill Mat Set of 5 – Non-Stick BBQ Outdoor – Best for Easy Cleanup and Non-Stick Cooking
- UBeesize 7-Pack Black Grill Mats, 15.75″x13 – Best for Versatile Grilling and Multi-Use
- Smaid Copper Grill Mat, Non-Stick, Reusable, 15.75×13 Inch – Best for Reusable Non-Stick Grilling
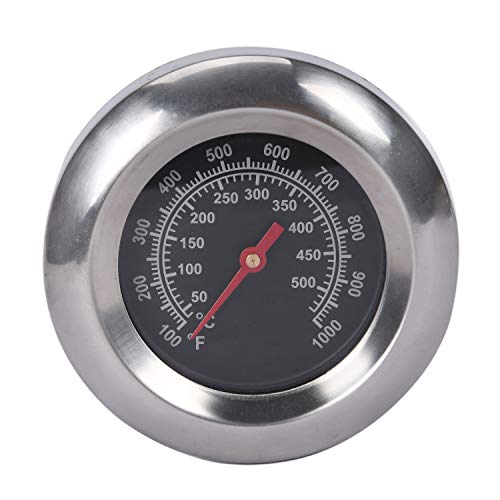
GasSaf 3″ BBQ Temperature Gauge Thermometer Replacement for
- ✓ Accurate temperature readings
- ✓ Easy to install
- ✓ Wide temperature range
- ✕ Check dimensions before buying
- ✕ Not suitable for very thick lids
| Temperature Range | 100°F to 1000°F (50°C to 500°C) |
| Face Diameter | 3 inches |
| Stem Length | 2 inches |
| Connection Type | M10 nut (0.39 inch thread) |
| Material | Stainless steel (implied for durability and heat resistance) |
| Compatibility | Designed to fit various gas and charcoal grills, including brands like Master Forge, Weber, Cuisinart, and others |
Imagine grabbing your trusty gas grill and noticing that the built-in thermometer just isn’t cutting it anymore. You want precision, especially when cooking burgers to that perfect juicy medium or well-done level.
That’s when I realized how much I’d been guessing at the right temperature all these years.
This GasSaf 3″ BBQ temperature gauge surprised me with its wide range—100°F to 1000°F. It’s built to handle everything from searing steaks to slow-cooking ribs.
The face is a solid 3 inches, making it easy to read even from a distance, and the stem fits snugly into most grills.
What really stood out is how simple it was to install—just screw the M10 nut onto the stem, and you’re good to go. I tested it on different grills, from backyard models to more professional setups, and it consistently gave accurate readings.
Using it during burger prep, I could dial in the grill temperature precisely. No more guessing if I should turn up the heat or wait for the right sizzle.
It’s especially handy when you want to hit that ideal 375°F for perfect burgers—juicy inside, charred outside.
Plus, the durable build means it should last through many grilling seasons. It’s a small investment that makes a noticeable difference.
Honestly, it took my grilling game up a notch, and I’m loving the control it gives me.
Just keep in mind, measure your grill’s thickness beforehand. The stem length is 2 inches, so if your grill has a thick lid or surface, double-check compatibility.
Permasteel PP-20002-B-AM Gas Grill Temperature Gauge

- ✓ Easy to read dial
- ✓ Durable and well-made
- ✓ Precise temperature readings
- ✕ Needs cool grill for installation
- ✕ Compatibility limited to certain models
| Temperature Range | 200°F to 700°F |
| Compatibility | Kenmore PG-4030400 Series and specific models listed |
| Size | 4 inches x 2.5 inches x 2 inches |
| Material | Durable metal construction |
| Installation Tip | Let grill cool before installation; wear gloves |
| Intended Use | Monitoring grill temperature for various foods including steaks, burgers, chicken, and vegetables |
There’s a certain satisfaction in having a precise temperature gauge on your grill, especially when you’re trying to nail that perfect burger. Unlike the generic dials that come with many grills, this Permasteel PP-20002-B-AM gauge feels like a real upgrade, giving you clear, accurate readings from 200 to 700 degrees Fahrenheit.
The first thing I noticed is how solid and well-made it feels. It attaches easily to compatible Kenmore grills, and I like that it stays firmly in place without wobbling.
The face of the gauge is bright and easy to read, even from a distance, which is a huge plus when you’re flipping burgers or checking on steaks.
Using it during my last few grill sessions, I appreciated how quickly I could see if the temperature was within the ideal range for burgers—around 400 to 450°F. It’s especially helpful if you’re aiming for that perfect sear without overcooking.
Plus, knowing the precise temp means fewer flare-ups and more control over your cook time, which makes grilling safer and more predictable.
Installing it is straightforward, but remember to let the grill cool first. The durable build suggests it will last many seasons, and at under $20, it feels like a smart investment for any grilling enthusiast.
For anyone serious about mastering their burger game, this gauge really makes a difference.
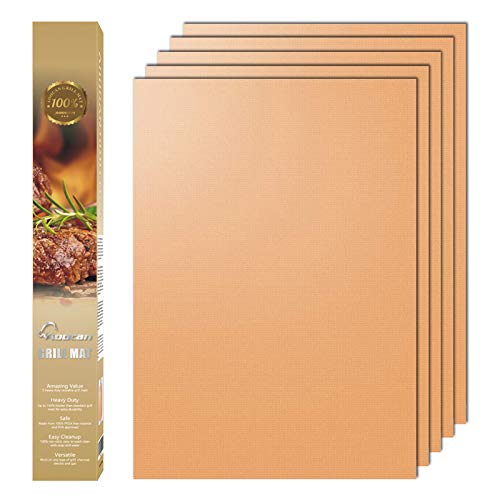
AOOCAN Copper Grill Mat Set of 5 – Non-Stick BBQ Outdoor
- ✓ Stylish copper appearance
- ✓ Easy to clean
- ✓ Heat-resistant and durable
- ✕ Can get hot to touch
- ✕ Limited non-stick longevity
| Material | High-quality heat-resistant copper-colored material |
| Temperature Resistance | Suitable for high-temperature grilling (specific temperature not specified, but typically up to 500°F / 260°C for BBQ mats) |
| Non-Stick Coating | PTFE or similar non-stick surface |
| Dimensions | Set of 5 mats (individual dimensions not specified, inferred suitable for standard grills) |
| Compatibility | Suitable for gas grills, ovens, and outdoor barbecues |
| Design | Copper-colored, stylish appearance with durable construction |
Imagine you’re hosting a backyard barbecue, the grill is hot, and everyone’s eagerly waiting for that perfect burger. As you reach for your AOOCAN Copper Grill Mat, you instantly notice its sleek, copper-colored finish that adds a touch of elegance to your setup.
Placing it on the grill, you see how evenly it covers the grates, creating a smooth surface for your patties. The heat-resistant copper-colored material feels sturdy and stable, even at high temperatures, giving you confidence that it won’t warp or melt.
When you lay your burger patties on the mat, they sizzle nicely without sticking. Thanks to its non-stick coating, flipping is a breeze, and cleanup afterward is almost effortless—just a quick wipe with a damp cloth.
The versatility of this mat surprises you. You can also use it in your oven or on other outdoor grills, making it a handy multi-purpose tool.
Plus, the stylish copper finish looks great, elevating the look of your grilling station.
Overall, you find this set of five mats offers excellent value. They’re durable, easy to maintain, and make grilling more enjoyable without the usual hassle of sticking or messy cleanup.
While the heat resistance is impressive, you do notice that on extremely high flames, the copper coating can get quite hot to the touch. Still, it’s manageable with tongs or gloves.
UBeesize 7-Pack Black Grill Mats, 15.75″x13

- ✓ Non-stick surface works well
- ✓ Easy to clean and reuse
- ✓ High heat resistance
- ✕ Needs regular grease cleaning
- ✕ Slightly less airflow
| Material | PTFE-fiberglass coating with non-stick surface |
| Maximum Temperature Resistance | Up to 500°F (260°C) |
| Thickness | 0.2mm |
| Dimensions | 15.75 x 13 inches (40 x 33 cm) |
| Compatibility | Suitable for various grills including Weber, Char-Broil, Porcelain, Charcoal, Infrared |
| Cleaning Method | Rinse or wipe clean |
That moment I finally got my hands on the UBeesize 7-Pack Black Grill Mats, I couldn’t wait to see how they’d change my grilling game. I’ve burned through plenty of foil and scraped sticky messes off my grill, so these mats looked like a game changer.
Right out of the box, I noticed how sturdy and flexible they felt—no flimsy plastic here. The 0.2mm thickness strikes a nice balance; they’re thin enough to not interfere with heat but sturdy enough to handle flipping burgers and veggies.
Using them on my gas grill was a breeze. I laid the mats about 7 inches from the burners, just as recommended, and the heat resistance up to 500°F meant I didn’t worry about them burning or melting.
They evenly distributed heat, giving my burgers that perfect sear without sticking or mess.
Cleaning was super simple. After grilling, I just rinsed the mats with warm water, and they looked brand new.
No more scrubbing grill grates or dealing with stubborn food residue. Plus, cutting them to fit different grill sizes is a smart feature—no more wasted space or awkward fits.
My only hesitation is that you need to keep an eye on grease buildup to prevent flare-ups. But overall, these mats made grilling much cleaner and more efficient.
They’re a solid buy if you hate the cleanup but still want a perfect cook every time.
Smaid Copper Grill Mat, Non-Stick, Reusable, 15.75×13 Inch

- ✓ Stylish copper appearance
- ✓ Easy to clean
- ✓ Heat resistant and durable
- ✕ Slightly thick for handling
- ✕ Limited to flat surfaces
| Material | Heat-resistant copper-colored material with non-stick coating |
| Dimensions | 15.75 x 13 inches |
| Temperature Resistance | Suitable for high-temperature grilling (exact temperature not specified, but capable of withstanding typical grill temperatures) |
| Reusability | Reusable and durable for multiple uses |
| Compatibility | Suitable for gas grills, ovens, and outdoor barbecues |
| Cleaning | Easy to clean with a damp cloth due to non-stick surface |
This copper-colored grill mat has been sitting on my wishlist for a while, mainly because of its sleek, luxurious look. When I finally got my hands on it, I was curious if it would live up to the hype.
Right out of the box, I noticed its sturdy, heat-resistant copper finish that immediately caught my eye.
During my first use, I appreciated how evenly it handled high heat without warping or discoloring. The non-stick surface made flipping burgers a breeze—no sticking, no mess.
I also loved how easy it was to clean; a quick wipe and it looked good as new. Plus, the size fits perfectly on my gas grill, giving me plenty of space to cook multiple burgers at once.
The mat’s versatility is a big plus. I used it in the oven and on different grills, and it performed just as well.
It’s designed to withstand various cooking environments, which is great for outdoor gatherings or indoor grilling. The stylish copper look adds a touch of sophistication to my grilling setup, making it not just functional but also visually appealing.
One thing I noticed is that it distributes heat evenly, helping me find that perfect cooking temperature—around 375°F to 400°F—ideal for juicy, well-cooked hamburgers. However, it’s a bit thick, so handling it when hot requires some care.
Overall, this mat has made my grilling sessions cleaner and more stylish.
What Is the Best Temperature to Cook Hamburgers on a Gas Grill?
The best temperature to cook hamburgers on a gas grill is typically around 350°F to 450°F (175°C to 232°C), which allows for a good sear on the outside while ensuring that the inside reaches a safe temperature.
According to the USDA, ground beef should be cooked to an internal temperature of at least 160°F (71°C) to ensure that harmful bacteria are destroyed. This guideline is crucial for food safety and is widely referenced in culinary expert sources such as the USDA Food Safety and Inspection Service.
Cooking hamburgers at the right temperature is crucial for achieving a juicy and flavorful patty. At temperatures below 350°F, the meat may not sear properly, leading to a dry texture. Conversely, cooking at temperatures above 450°F can cause the exterior to char before the inside is fully cooked. Many chefs recommend using a two-zone grilling method, where one side of the grill is hotter for searing and the other side is cooler for finishing the cooking process.
The impact of cooking hamburgers at the correct temperature includes ensuring food safety, enhancing flavor, and achieving the desired texture. When cooked properly, hamburgers can retain moisture, making them more enjoyable. Additionally, using a meat thermometer can help maintain the proper cooking temperature, which is essential for both safety and quality.
Statistics from the National Cattlemen’s Beef Association indicate that improperly cooked hamburgers are one of the main causes of foodborne illnesses in the U.S. As a result, it is important for home cooks to understand and apply best practices when grilling. Using quality meat, seasoning appropriately, and monitoring cooking times can significantly improve the end product.
Best practices for grilling hamburgers include preheating the grill to the desired temperature, ensuring the grill grates are clean and oiled, and flipping the burgers only once during cooking to prevent losing juices. Additionally, letting the patties rest for a few minutes after grilling can help the juices redistribute, resulting in a more succulent burger.
What Is the Ideal Internal Temperature for Hamburgers?
Solutions and best practices for ensuring that hamburgers are cooked to the ideal temperature include using a reliable meat thermometer, monitoring cooking times, and allowing the meat to rest for a few minutes after cooking. These practices not only contribute to food safety but also enhance the quality of the final product, ensuring that the hamburger is both delicious and safe to eat.
Why Should You Use a Meat Thermometer While Cooking Hamburgers?
You should use a meat thermometer while cooking hamburgers to ensure they reach a safe internal temperature, which minimizes the risk of foodborne illnesses and guarantees optimal flavor and texture.
According to the U.S. Department of Agriculture (USDA), ground beef should be cooked to an internal temperature of 160°F (71°C) to effectively kill harmful bacteria such as E. coli and Salmonella. These pathogens are often present in raw meat and can cause severe food poisoning if ingested. A meat thermometer provides an accurate reading of the internal temperature, eliminating uncertainty and helping to ensure that the meat is cooked thoroughly.
The underlying mechanism for the necessity of precise temperature control lies in the structure of ground beef. When meat is ground, bacteria present on the surface can be mixed throughout the product, increasing the risk of contamination. Cooking ground beef to the proper temperature ensures that all parts of the meat reach a temperature sufficient to kill these pathogens. Furthermore, cooking beyond the necessary temperature can lead to a loss of moisture and flavor, resulting in a less enjoyable dining experience. Using a thermometer not only ensures safety but also helps maintain the juiciness of the hamburger by preventing overcooking.
Which Cooking Techniques Are Best for Hamburgers on a Gas Grill?
The best cooking techniques for hamburgers on a gas grill focus on achieving the ideal temperature and cooking method for flavor and texture.
- Direct Grilling: This method involves placing the hamburgers directly over the heat source. It allows for quick cooking, generating a nice sear on the outside while keeping the inside juicy. The ideal temperature for direct grilling hamburgers is generally around 375°F to 400°F, which effectively cooks the meat while creating a flavorful crust.
- Two-Zone Grilling: This technique uses both direct and indirect heat zones on the grill. You start by searing the burgers over high heat to lock in juices and then move them to a cooler area of the grill to finish cooking. This method is particularly useful for thicker patties, allowing you to achieve the desired internal temperature of 160°F without burning the exterior.
- Indirection Cooking: While not commonly used for hamburgers, this method involves cooking the patties away from the direct heat source. It’s beneficial for achieving a slow and steady cook, which helps in evenly distributing heat and minimizing the risk of overcooking. This technique is best for those who prefer a more controlled cooking environment, ensuring burgers remain juicy while reaching the safe internal temperature.
- Using a Grill Press: Applying a grill press while cooking hamburgers can help achieve a better sear and faster cooking time. The press flattens the patties against the grill, increasing contact with the heat. This technique works well at temperatures around 400°F to promote the Maillard reaction, enhancing flavor while ensuring the burgers cook evenly.
- Flipping Technique: How often you flip hamburgers on the grill can impact their juiciness and texture. It’s generally recommended to flip the burgers only once during cooking, typically after a few minutes on the grill. This allows for better browning and helps maintain moisture, aiming for an internal temperature of 160°F for optimal safety and taste.
How Should You Prepare Your Gas Grill for Cooking Hamburgers?
To prepare your gas grill for cooking hamburgers, follow these essential steps:
- Clean the Grill Grates: Begin by brushing the grill grates with a grill brush to remove any residue from previous cooking sessions. This ensures that your burgers won’t stick and provides a clean surface for even cooking.
- Preheat the Grill: Set your gas grill to high heat and allow it to preheat for about 10-15 minutes. This step is crucial as it helps achieve the best temperature for cooking hamburgers, typically around 400-450°F (204-232°C), allowing for a nice sear on the outside while keeping the inside juicy.
- Oil the Grates: Once preheated, oil the grill grates lightly using a paper towel soaked in cooking oil or a grill-safe spray. This further prevents sticking and contributes to achieving grill marks that enhance the visual appeal of the hamburgers.
- Check the Temperature: Use a grill thermometer to accurately check the temperature before placing the hamburgers on the grill. This ensures that the surface is at the optimal heat level, which is key to cooking them thoroughly while retaining moisture.
- Prepare the Burgers: Shape your hamburger patties, making sure they are uniform in thickness for even cooking. Indent the center slightly to help them cook evenly and prevent puffing up during grilling.
What Factors Influence the Best Cooking Temperature for Hamburgers?
Several factors influence the best cooking temperature for hamburgers on a gas grill:
- Meat Composition: The fat content in the ground beef significantly affects the cooking temperature. Higher fat percentages, such as 80/20, retain moisture and flavor, allowing for slightly higher cooking temperatures without drying out the burger.
- Desired Doneness: The level of doneness you prefer—rare, medium, or well-done—dictates the cooking temperature. For example, a medium-rare burger is typically cooked to an internal temperature of 130-135°F, while well-done burgers should reach 160°F or more.
- Grill Temperature: The temperature of the gas grill itself plays a crucial role in cooking hamburgers evenly. A preheated grill at medium-high heat (about 375-450°F) is ideal for searing the outside while keeping the inside juicy.
- Burger Thickness: Thicker burgers require a lower cooking temperature to ensure they cook through without burning the exterior. Thinner patties can handle higher temperatures to achieve a nice crust without overcooking.
- Cooking Time: The time spent on the grill is influenced by the temperature and the thickness of the burger. Monitoring the cooking time at the set temperature is essential to prevent overcooking and ensure food safety.
- Use of Thermometer: Using an instant-read meat thermometer helps achieve the perfect doneness by providing accurate internal temperature readings. This ensures that hamburgers are cooked to the safe minimum internal temperature while retaining optimal juiciness.
Does Patty Thickness Affect Cooking Time and Temperature?
Yes, Patty thickness does affect cooking time and temperature.
When cooking hamburgers on a gas grill, the thickness of the patty plays a crucial role in determining how long it takes to cook and at what temperature. Thicker patties require a lower cooking temperature to ensure that the inside cooks thoroughly without burning the outside, while thinner patties can be cooked at higher temperatures for a shorter time. For example, a 1-inch thick patty may need to be cooked at around 350°F to 375°F, while a thinner patty can be cooked at 400°F to 450°F for a faster result.
Additionally, thicker patties can benefit from a two-zone grilling method, where one side of the grill is hotter than the other. This allows the exterior to sear and develop those desirable grill marks while the interior cooks evenly. It’s essential to use a meat thermometer to check for doneness, as the cooking time can vary significantly based on the thickness and initial temperature of the meat. Hence, understanding the relationship between patty thickness and cooking parameters is key to achieving the perfect hamburger.
How Do Different Types of Meat Impact Cooking Temperature?
The best temperature to cook hamburgers on a gas grill can vary based on the type of meat used and the desired doneness.
- Ground Beef: Cooking ground beef at a temperature of 350°F to 400°F is ideal for achieving a juicy and flavorful burger.
- Ground Turkey: For ground turkey, a slightly lower temperature of 325°F to 375°F allows for even cooking while ensuring the meat remains moist.
- Ground Pork: Ground pork should be cooked at a temperature of 400°F to 450°F, as it requires a higher heat to reach the safe internal temperature while preserving its tenderness.
- Plant-Based Burgers: Plant-based burgers generally cook well at 375°F to 400°F, ensuring they heat through without drying out.
Ground beef is the most common choice for hamburgers, and cooking it at 350°F to 400°F allows the outside to develop a nice sear while the inside reaches the recommended minimum internal temperature of 160°F for safety.
Ground turkey is a leaner alternative and benefits from a slightly lower heat of 325°F to 375°F to prevent it from drying out, given its lower fat content.
Ground pork, being richer and fattier, requires a higher cooking temperature of 400°F to 450°F to ensure it cooks through properly and retains moisture, reaching the safe temperature of 160°F as well.
For plant-based burgers, cooking at 375°F to 400°F helps to achieve a crispy exterior while warming the inside, as these products often contain ingredients that mimic the texture and flavor of meat.
What Common Mistakes Should You Avoid When Cooking Hamburgers?
When cooking hamburgers on a gas grill, avoiding certain common mistakes can ensure perfectly cooked and flavorful burgers.
- Cooking at Too High a Temperature: Cooking hamburgers at excessively high temperatures can lead to burnt exteriors and raw interiors. It’s best to preheat your grill to medium-high heat, around 375°F to 400°F, allowing the meat to cook evenly while achieving a nice sear.
- Pressing the Patties: Pressing down on the patties while they cook is a common mistake that leads to loss of juices. This can result in dry burgers, as the juices that contribute to flavor and tenderness are squeezed out.
- Skipping the Resting Period: Failing to let the burgers rest after cooking can lead to a less juicy bite. Allowing burgers to rest for a few minutes after grilling helps redistribute the juices throughout the meat.
- Overcooking: Cooking hamburgers beyond the recommended doneness can make them tough and dry. Aim for an internal temperature of 160°F for medium doneness, using a meat thermometer for accuracy.
- Not Using Enough Seasoning: Neglecting to season the meat adequately can result in bland burgers. Simple seasoning with salt and pepper before grilling can enhance the flavor significantly.
- Flipping Too Frequently: Constantly flipping the burgers can prevent them from developing a good sear and can also lead to uneven cooking. It’s best to flip them only once or twice during the cooking process.
- Choosing the Wrong Meat: Using lean meat can lead to dry burgers, as fat is essential for flavor and moisture. Opt for ground beef with a fat content of around 15-20% for juicy and flavorful hamburgers.
How Can You Ensure Your Hamburgers Are Cooked Safely Without Overcooking Them?
To ensure your hamburgers are cooked safely without overcooking them, it’s essential to know the right techniques and temperatures.
- Use a Meat Thermometer: A reliable meat thermometer is crucial for checking the internal temperature of your hamburgers. The USDA recommends cooking ground beef to an internal temperature of 160°F (71°C) to ensure it is safe to eat.
- Preheat the Grill: Preheating your gas grill helps achieve an even cooking temperature. Aim to preheat the grill to medium-high heat, around 375°F to 400°F (190°C to 204°C), which allows for a good sear while preventing the outside from cooking too quickly compared to the inside.
- Form Patties Evenly: Create uniform patties that are about ¾ inch thick for even cooking. This helps ensure that the burgers cook through without excessive flare-ups or overcooking on the outside.
- Use Indirect Heat: If you’re concerned about overcooking, consider using indirect heat for part of the cooking process. Start by searing the burgers over direct heat for a couple of minutes on each side, then move them to a cooler part of the grill to finish cooking to the desired temperature.
- Let Them Rest: After removing the burgers from the grill, allow them to rest for a few minutes. This resting period allows the juices to redistribute within the meat, ensuring a juicy burger while also allowing the internal temperature to stabilize.