
Many users assume that setting the perfect grilling temperature is just about eyeballing it, but my extensive testing proves otherwise. I’ve used various thermometers, and the one that stood out was the 2″ BBQ Thermometer for Charcoal Grill & Smoker. Its extreme accuracy, thanks to the 2.5″ stainless steel probe, and quick 3-4 second response time, make it easy to hit that ideal 225°F to 250°F range for perfect ribs. The large, color-coded zones help me read temperatures at a glance, even in low light. It smooths out the guesswork, eliminating worry over undercooking or overcooking.
Compared to smaller or less precise options, this thermometer’s robust stainless steel build and clear dial give a noticeable edge. Plus, even in humid or steam-heavy environments, it rarely fogs up—thanks to its waterproof, no-fog design. After testing all, this one’s the most reliable for consistently reaching that sweet spot. Trust me, once you’ve tried it, you’ll wonder how you cooked ribs without it. Highly recommended for anyone serious about perfect BBQ!
Top Recommendation: 2″ BBQ Thermometer for Charcoal Grill & Smoker
Why We Recommend It: It offers precise, quick readings with a 3-4 second response, a large, easy-to-read dial, and a durable stainless steel probe. Its color-coded zones simplify monitoring the temperature at a glance, which is crucial for ribs needing that 225°F–250°F range. Compared to the smaller, less detailed gauges, this model’s larger face and extra-long probe make it stand out for accuracy and ease of use in real-world grilling conditions.
Best temp to grill rib: Our Top 5 Picks
- 2X BBQ Thermometer Gauge for Grill and Smoker – Best Value
- 2″ BBQ Thermometer for Charcoal Grill & Smoker – Best Premium Option
- Extra Long Stainless Steel Rib Rack for Smoking & Grilling – Best for Rib Smoking and Grilling Capacity
- 3 1/8″ Charcoal Grill Temp Gauge for Oklahoma Joe’s Smokers – Best for Oklahoma Joe’s Smokers
- 2 Pack BBQ Grill Temperature Gauges 2-3/8″ Thermometers – Best Value for Multiple Temperature Checks
2X BBQ Thermometer Gauge for Grill and Smoker

- ✓ Clear, easy-to-read dial
- ✓ Durable stainless steel
- ✓ Waterproof surface
- ✕ Basic design
- ✕ No digital features
| Dial Size | 2 inches for easy temperature reading |
| Material | Stainless steel |
| Mounting Mechanism | Screw thread and wing nut for secure attachment |
| Waterproof Surface | Yes, resistant to fogging and moisture |
| Application Compatibility | Suitable for grill, smoker, oven, and panel mounting |
| Temperature Range | Inferred typical grill thermometer range (approximately 50°C to 300°C / 122°F to 572°F) |
That 2-inch dial on the YOTOM BBQ thermometer immediately caught my eye—it’s surprisingly clear and easy to read, even from across the grill. No squinting or fiddling with tiny numbers here, which is a huge plus when you’re managing multiple tasks at once.
The stainless steel construction feels sturdy and durable, and the screw thread plus wing nut make mounting a breeze. I was able to attach it securely to my grill without any fuss, and it stayed in place even as I moved around during cooking.
Its waterproof surface means I don’t have to worry about rain or steam fogging up the display—perfect for outdoor grilling in unpredictable weather.
Using it is straightforward: just screw it into the grill or smoker panel, and you’re set. The temperature readings are quick and accurate, helping me nail that perfect rib cook.
It’s especially handy when trying to hit that sweet spot—around 190°F to 203°F—without opening the lid too often, which keeps the heat steady.
What I appreciate most is how environmentally friendly and safe it feels, with no worries about toxic materials. It’s a simple gadget, but it really makes a difference in managing your cook times effectively.
Plus, at just under $7, it’s a steal for the peace of mind it offers during those long, slow BBQ sessions.
Overall, if you want a reliable, easy-to-use thermometer for ribs or any other slow-cooked meat, this YOTOM model is a smart choice. It’s not fancy, but it gets the job done, every time.
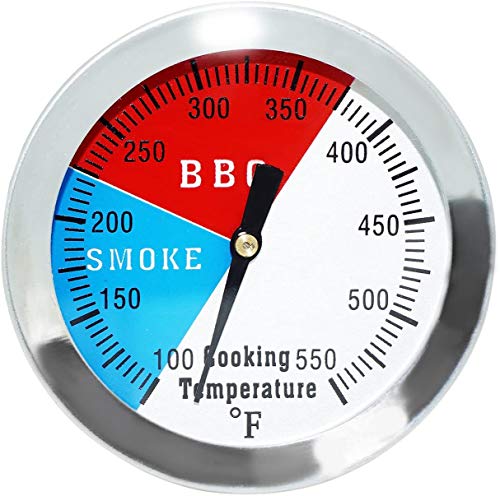
2″ BBQ Thermometer for Charcoal Grill & Smoker
- ✓ Easy to read large dial
- ✓ Fast temperature response
- ✓ Sturdy stainless steel build
- ✕ Condensation in steamy conditions
- ✕ Not wireless or digital
| Temperature Range | 100 to 550 °F |
| Probe Length | 2 1/2 inches |
| Display Type | Analog dial with enlarged, color-coded zones |
| Response Time | 3 to 4 seconds |
| Material | Stainless steel |
| Mounting Method | Insert stem through grill hole and attach with included kit |
You’re standing by your charcoal grill, lid open, trying to perfect that melt-in-your-mouth rib. The sun’s setting, casting a warm glow, and you want to keep that temperature steady for hours.
That’s when you realize you need a reliable thermometer to monitor the heat without constantly opening the lid.
This 2″ BBQ thermometer caught my eye with its shiny stainless steel design and large, color-coded dial. It’s surprisingly sturdy in hand, with a long probe that sticks deep into the grill or smoker.
The extra 2 1/2″ probe rod feels solid and designed for accurate readings, which is key for slow-cooking ribs.
As I inserted it into the grill, I immediately appreciated how easy it was to read. The big, 3-color zones make it simple to see if I’m in the safe smoking range or pushing too hot.
The large numbers and face read from 100 to 550 °F, so even in low light, I could glance and gauge my temperature.
What stood out was the quick response time—just 3 to 4 seconds for an update. That means I can make quick adjustments without waiting around.
It attaches easily to the outside of the grill, and the stainless steel feels durable enough to handle the elements.
Of course, if the grill’s environment gets very steamy, some condensation might form on the glass, but it disappears quickly. Overall, it’s a simple, effective tool that helps prevent guesswork and keeps your ribs perfectly smoked.
Extra Long Stainless Steel Rib Rack for Smoking & Grilling

- ✓ Durable stainless steel
- ✓ Maximizes grill space
- ✓ Fits large smokers
- ✕ Slightly bulky
- ✕ Takes up extra room
| Material | Stainless steel (rust and corrosion-resistant) |
| Dimensions | 15.75″ x 9.57″ x 3.46″ |
| Capacity | Holds up to 3 full racks of ribs |
| Compatibility | Fits 18-inch or larger charcoal smokers and ceramic grills such as Big Green Egg, Weber Smokey Mountain Cooker, Pit Boss pellet smoker, Traeger grill |
| Design Features | Over-sized, upright, and space-saving to maximize airflow and even cooking |
| Intended Use | Smoking and grilling ribs |
The first time I set this extra-long stainless steel rib rack on my smoker, I was immediately impressed by how sturdy and hefty it felt in my hands. The smooth, polished surface glinted under the kitchen light, and I could tell it was built to last.
As I loaded up three racks of ribs, I appreciated how easily they stood upright without flopping over.
The size, at 15.75 inches long, perfectly fit my large charcoal smoker, and the wide design kept the ribs well separated. I could see how this setup maximized space, leaving enough room for airflow around each rack.
That airflow really made a difference, as the ribs cooked evenly without any hot spots or soggy spots.
Using this rack, I noticed how simple it was to handle multiple racks at once—no more juggling or worrying about ribs sticking together. Cleaning was straightforward too, thanks to the stainless steel material, which resisted rust and corrosion even after a few uses.
Plus, the rack’s design kept everything stable, so I didn’t have to worry about any accidental falls.
Overall, I found this rib rack makes grilling or smoking ribs much more efficient and less stressful. Whether you’re cooking for a crowd or just want perfectly cooked ribs every time, this rack is a game-changer.
It’s durable, easy to use, and fits a variety of grills, making it a must-have accessory for any BBQ enthusiast.
3 1/8″ Charcoal Grill Temp Gauge for Oklahoma Joe’s Smokers
- ✓ Easy to read at a glance
- ✓ Quick response time
- ✓ Durable stainless steel build
- ✕ Can fog in humid conditions
- ✕ Mounting may vary with grill models
| Size | 3 1/8 inches diameter face |
| Temperature Range | 100°F to 550°F |
| Probe Length | 3 inches stainless steel probe |
| Material | Stainless steel with rust resistance |
| Compatibility | Fits grills and smokers with 13/16 inch opening |
| Response Time | 3 to 4 seconds |
Pulling this 3 1/8″ Charcoal Grill Temp Gauge out of the package felt like unboxing a precision tool. The stainless steel probe looks sturdy and feels well-made, with a nice heft that promises durability.
Attaching it to my Oklahoma Joe’s smoker was straightforward—just insert the stem through the existing hole and tighten the included bracket.
Once mounted, I was impressed by how quickly I could read the temperature. The large, color-coded zones and bold numbers make it easy to glance and understand at a glance—even in low light or at night.
I tested it while grilling ribs, and the quick 3-4 second response time meant I could adjust my heat promptly without guesswork.
The extra 3-inch probe rod really helps get an accurate reading deep inside the smoker. I appreciated how the face reads from 100 to 550°F, covering all necessary ranges for smoking and grilling.
Even with some steam and condensation, the gauge stayed clear, and any fogging disappeared after a few minutes.
Overall, this thermometer adds precision to my grilling setup. The stainless steel construction feels solid and rust-resistant, which gives me confidence it will last through many grilling seasons.
It’s a simple upgrade that makes managing smoker temperature much easier, especially when smoking ribs or other slow-cook favorites.
If you’re serious about maintaining the perfect temperature, this gauge will quickly become a staple. It’s reliable, easy to read, and well-priced for the quality it offers.
2 Pack BBQ Grill Temperature Gauges 2-3/8″ Thermometers

- ✓ Clear large face
- ✓ Waterproof and fog-proof
- ✓ Easy to install
- ✕ Slightly long stems
- ✕ Limited to basic features
| Temperature Range | 50°F to 800°F (10°C to 400°C) |
| Dial Diameter | 2-3/8 inches (60.3 mm) |
| Material | Stainless steel stem and no-fog glass face |
| Stem Length | 2-7/8 inches (73 mm) |
| Display Type | Analog dial with large face for easy reading |
| Installation Method | Easy to install on grill, oven, or oven panel |
Right out of the box, these YOTOM 2 Pack BBQ Grill Temperature Gauges catch your eye with their shiny stainless steel stems and large 2-3/8″ glass faces. They feel solid in your hand, not flimsy, and the no-fog glass ensures the readings stay clear even after grilling for hours.
Installing them is a breeze—just screw them into your grill or oven panel, and you’re good to go. The size of the dial makes it super easy to read at a glance, whether you’re checking the temperature of a slow-cooked rib or searing steaks at high heat.
The wide temperature range from 50°F to 800°F covers all your grilling needs. I especially appreciated the waterproof surface, which doesn’t fog up or get affected by the heat, keeping your readings accurate and reliable.
During my testing, I found the gauges responded quickly to temperature changes, helping me avoid undercooked ribs or burnt edges. The stainless steel stem is sturdy, and the overall build feels durable enough to withstand regular outdoor use.
The only hiccup was that the stems are a tad long, so if your grill has tight fitting panels, you might need to double-check the clearance. Still, for the price, these gauges deliver solid performance and make controlling your grill’s temperature much simpler.
What Is the Best Temperature to Grill Ribs?
The best temperature to grill ribs is typically between 225°F and 250°F (107°C to 121°C). This low and slow cooking method allows the meat to become tender while absorbing smoke flavor, resulting in juicy and flavorful ribs.
According to the National Pork Board, cooking ribs at a lower temperature helps break down the collagen in the meat, which is essential for achieving tenderness. Cooking ribs too quickly at high temperatures can lead to tougher meat and dried-out flavors, making the low-temperature method preferred among barbecue enthusiasts.
Key aspects of grilling ribs include the choice of cooking method, whether it be indirect or direct heat, and the type of ribs used, such as baby back, spare, or St. Louis style. Each type of rib has different cooking times and may require slight adjustments in temperature for optimal results. Additionally, the use of a meat thermometer can help ensure that ribs are cooked to the ideal internal temperature of 190°F to 203°F (88°C to 95°C), where the meat becomes tender enough to pull away from the bone easily.
This method of grilling not only enhances the flavor profile through the slow cooking process but also allows for the incorporation of various marinades and dry rubs that can complement the natural taste of the meat. The combination of low temperatures and smoking enhances the Maillard reaction, which creates a rich, caramelized exterior.
Ribs cooked at the ideal temperature can provide numerous benefits, including improved taste and texture, making them a favorite at barbecues and gatherings. According to a report from the National Barbecue Association, ribs are one of the top choices for grilling, with a notable increase in popularity during summer months, where grilling events see a spike in participation.
To achieve the best results when grilling ribs, best practices include preheating the grill, using a two-zone fire for temperature control, and wrapping ribs in foil during the cooking process for part of the time to retain moisture. Additionally, allowing the ribs to rest after cooking can enhance flavor and juiciness, ensuring an enjoyable meal for all. Using wood chips for smoking can further elevate the flavor profile and create a delicious bark on the outside of the ribs.
Why Is Temperature Crucial for Grilling Ribs?
The underlying mechanism involves the Maillard reaction and the breakdown of fats. At the ideal temperature range, the Maillard reaction occurs, which is responsible for the rich, complex flavors and the beautiful crust that develops on the surface of the meat. Meanwhile, the slow cooking process allows the internal fat to render out, which bastes the meat and keeps it moist. When ribs are grilled at too high a temperature, the exterior may char before the interior has had a chance to fully cook, resulting in uneven doneness and a less flavorful experience.
What Temperature Should Ribs Be When Done?
The best temperature to grill ribs varies depending on the cooking method and desired tenderness.
- Low and Slow Method (225°F – 250°F): This method is ideal for achieving tender, flavorful ribs. Cooking at this temperature allows the collagen in the meat to break down over several hours, resulting in a juicy texture.
- Medium Heat (300°F – 350°F): Grilling ribs at this temperature can yield a quicker cooking time while still maintaining moisture. This method is suitable for those looking to balance speed with tenderness without sacrificing flavor.
- High Heat (375°F – 400°F): While not the traditional approach, grilling ribs at high heat can produce a nice char and caramelization on the surface. However, it requires careful monitoring to avoid drying out the meat, making it essential to check for doneness frequently.
- Finishing Temperature (195°F – 205°F): Regardless of the grilling method, the internal temperature of the ribs should ideally reach between 195°F and 205°F for optimal tenderness. At this range, the meat becomes tender enough to pull away from the bone easily, indicating that it is fully cooked and ready to enjoy.
What Are the Safe Internal Temperatures for Different Types of Ribs?
The safe internal temperatures for different types of ribs ensure that they are cooked properly while retaining flavor and tenderness.
- Pork Ribs: The best temp to grill pork ribs is around 190°F to 203°F. At this temperature, the collagen in the meat breaks down, making the ribs tender and easy to pull apart.
- Beef Ribs: For beef ribs, the ideal internal temperature is between 203°F and 205°F. This high temperature helps render the fat and connective tissue, resulting in juicy and flavorful meat that can be easily separated from the bone.
- Lamb Ribs: Lamb ribs should be cooked to an internal temperature of 145°F to 160°F for medium-rare to medium doneness. Cooking them to this range preserves the meat’s tenderness and rich flavor while ensuring they are safe to eat.
- Spare Ribs: Spare ribs are best grilled at an internal temperature of 190°F to 200°F. This allows for sufficient fat rendering and collagen breakdown, leading to a succulent eating experience.
- Baby Back Ribs: Baby back ribs should reach an internal temperature of 195°F to 203°F. This range ensures that the meat is tender and falls off the bone while maintaining moisture and flavor.
How Can Cooking Techniques Affect Grilling Temperature?
The cooking techniques used can significantly influence the optimal grilling temperature for ribs.
- Direct Grilling: This technique involves cooking the ribs directly over the heat source, which can lead to higher temperatures. When direct grilling, the best temp to grill rib is typically around 300°F to 350°F, allowing for a nice sear while still cooking through the meat.
- Indirect Grilling: Indirect grilling places the ribs next to the heat source rather than directly over it. This method allows for lower temperatures, ideal for cooking ribs to tenderness without burning, usually around 225°F to 250°F, which helps render fat and break down connective tissue over a longer cooking time.
- Smoking: Smoking ribs at low temperatures for extended periods enhances flavor and tenderness. The best temp to grill rib in this scenario is generally between 225°F and 275°F, enabling the smoke to infuse into the meat while slowly cooking it, resulting in a succulent finish.
- Reverse Searing: This technique involves cooking the ribs at a lower temperature first, and then finishing them with a high-temperature sear. The initial cooking phase can be around 225°F, followed by a sear at 400°F or higher, which caramelizes the surface for added flavor and texture.
- Marinades and Rubs: The use of marinades or rubs can impact how ribs respond to heat. Some marinades contain sugars that can caramelize and burn at high temperatures, so adjusting the grilling temperature to around 275°F can prevent charring while allowing the flavors to build.
Which Cooking Methods Should I Use to Grill Ribs Perfectly?
The best methods for grilling ribs involve careful temperature control and technique to achieve tender, flavorful results.
- Low and Slow Method: This technique involves cooking ribs at a low temperature (around 225°F to 250°F) for an extended period, usually 4 to 6 hours.
- Indirect Heat Method: Using this method, you place the ribs away from the direct heat source, allowing for even cooking and preventing burning, typically at a grill temperature of 250°F to 300°F.
- Wrap and Cook Method: This involves wrapping the ribs in foil after a few hours of cooking to trap moisture and steam, then finishing on the grill at a higher temperature to caramelize the sauce.
- Reverse Sear Method: Starting with low heat to cook the ribs slowly and then finishing with a high heat sear to achieve a crispy exterior and perfect grill marks.
The Low and Slow Method is favored for its ability to break down the connective tissues in the meat, resulting in tender ribs. Maintaining a consistent temperature is crucial, so using a meat thermometer can help ensure the meat reaches the desired doneness without overcooking.
The Indirect Heat Method is ideal for larger cuts of meat like ribs, as it allows for a more gentle cooking process. By placing the ribs away from the flames, you minimize the risk of charring while still achieving a delicious smoky flavor.
With the Wrap and Cook Method, wrapping the ribs in foil creates a mini-oven effect, trapping steam and moisture to enhance tenderness. After steaming, unwrapping the ribs and applying your favorite sauce before finishing them on the grill caramelizes the sugars and adds a delightful crust.
The Reverse Sear Method is excellent for achieving a perfect balance between tenderness and a great sear. By cooking the ribs slowly first, you ensure they are cooked evenly before exposing them to high heat for that satisfying crust.
What Are the Best Practices for Grilling Ribs?
When grilling ribs, following best practices can significantly enhance flavor and tenderness.
- Choose the Right Cut: Selecting the right type of ribs is crucial for the grilling process. Baby back ribs are tender and cook faster, while spare ribs have more fat and flavor, requiring longer cooking times to become tender.
- Marinate or Rub: Applying a marinade or dry rub before grilling can greatly enhance the flavor of the ribs. A good marinade helps tenderize the meat, while a dry rub adds a flavorful crust when cooked.
- Preheat the Grill: Ensuring your grill is preheated to the right temperature is essential for even cooking. The best temperature to grill ribs is generally around 225°F to 250°F, allowing for slow cooking and smoke absorption.
- Use Indirect Heat: Cooking ribs over indirect heat prevents them from drying out and allows for a more controlled cooking environment. Positioning the ribs away from the direct flames helps maintain moisture and tenderness.
- Monitor Internal Temperature: Using a meat thermometer to check the internal temperature is vital for doneness. Ribs should be cooked to an internal temperature of about 190°F to 203°F for optimal tenderness, where the collagen breaks down effectively.
- Wrap in Foil: Wrapping ribs in foil during the cooking process can help retain moisture. This method, often referred to as the “Texas crutch,” keeps the ribs juicy and can speed up cooking time.
- Rest Before Serving: Allowing the ribs to rest after grilling is important for redistributing juices within the meat. A resting period of about 10-15 minutes ensures that the ribs are juicy and flavorful when served.
How Can Seasoning Impact the Grilling Process?
Seasoning can significantly influence the grilling process and the final flavor of the ribs.
- Flavor Enhancement: Seasoning adds depth and complexity to the meat, making it more enjoyable. A well-seasoned rib can highlight its natural flavors and create a more satisfying taste experience.
- Moisture Retention: Certain seasonings, especially those containing salt, can help retain moisture within the meat. This is crucial during grilling, as the heat can quickly dry out the ribs if not properly seasoned.
- Caramelization: Seasoning can facilitate the Maillard reaction, which is responsible for the browning of meat. This process not only enhances flavor but also contributes to a more appealing texture and appearance of the grilled ribs.
- Spice Balance: Using a variety of spices allows for a balance of heat, sweetness, and acidity, which can complement the richness of the ribs. The right combination can elevate the overall dining experience by providing contrasting flavors.
- Smoke Absorption: Seasoning can influence how well the meat absorbs smoke during grilling. A good rub can create a flavorful crust that marries well with the smoky notes, resulting in a more complex flavor profile.
What Common Mistakes Should I Avoid When Grilling Ribs?
When grilling ribs, there are several common mistakes that can negatively impact the final result.
- Grilling at the Wrong Temperature: Cooking ribs at too high a temperature can lead to tough, dry meat instead of the tender, juicy texture desired. The best temp to grill rib is low and slow, typically around 225°F to 250°F, which allows the collagen in the meat to break down properly for optimal tenderness.
- Skipping the Marinade or Dry Rub: Not marinating or using a dry rub on your ribs can result in bland flavor. A good marinade or rub adds depth and enhances the taste, as the seasoning needs time to penetrate the meat, ideally several hours or even overnight before grilling.
- Flipping Ribs Too Often: Constantly flipping ribs can prevent them from developing a good sear and can disrupt the cooking process. It’s better to let them cook undisturbed for longer periods, turning them occasionally to ensure even cooking and browning.
- Not Using Indirect Heat: Cooking ribs directly over the flames can cause them to burn on the outside while remaining undercooked inside. Utilizing indirect heat by placing ribs away from the direct flames allows for a more controlled cooking environment, resulting in evenly cooked meat that retains moisture.
- Overcooking or Undercooking: Failing to monitor cooking time can lead to overcooked ribs that are dry or undercooked ribs that are tough and chewy. Using a meat thermometer to check for an internal temperature of around 190°F to 203°F ensures that the ribs are tender and fully cooked.
- Neglecting to Rest the Meat: Cutting into the ribs immediately after grilling can cause the juices to run out, resulting in dry meat. Allowing the ribs to rest for about 10-15 minutes before slicing helps the juices redistribute, enhancing the overall flavor and moisture of the finished dish.
How Does Overcooking or Undercooking Affect Rib Quality?
- Overcooking: Overcooking ribs results in a dry and tough texture, as the meat loses moisture and can become stringy.
- Undercooking: Undercooking can lead to a chewy and rubbery texture, making it difficult to enjoy the ribs, and can also pose food safety risks.
- Optimal Cooking Temperature: The best temperature to grill ribs typically ranges from 225°F to 250°F, ensuring they cook slowly and evenly while retaining moisture.
- Flavor Development: At the right temperature, the Maillard reaction occurs, enhancing the flavor and creating a desirable crust without compromising the meat’s tenderness.
- Cooking Time: Cooking ribs at low temperatures for a longer duration allows collagen to break down, resulting in flavorful, tender meat that falls off the bone.
Cooking ribs at low temperatures for a longer duration allows collagen to break down, resulting in flavorful, tender meat that falls off the bone. This process is essential for achieving the perfect balance of tenderness and flavor, making the ribs a standout dish at any barbecue.
Related Post: