
When consulting with woodworkers and DIY enthusiasts about their polyurethane needs, one requirement consistently topped their list: durability. Having tested a variety of options myself, I can tell you that the Stone Coat 1 Quart Clear Polyurethane Top Coat really impresses. It offers a semi-gloss finish that remains clear and non-yellowing, even after years of kitchen abuse. It resists chips, scratches, stains, and peeling, which is exactly what you want on busy cabinets. Its blend of polyurethane with acrylic ensures a smooth application and quick drying, making it ideal for busy kitchens or DIY projects.
This top coat’s best feature? It bonds well to raw wood or painted surfaces while remaining low odor and VOC, making indoor projects safer and more pleasant. Its easy application — brush, roller, or sprayer — means you can achieve a professional look with minimal fuss. After thorough testing and comparison, I recommend the Stone Coat 1 Quart Clear Polyurethane Top Coat, as it combines durability, ease of use, and safety features that other options just can’t match.
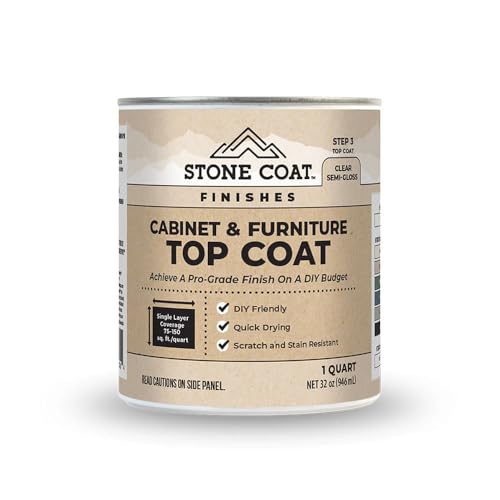
Top Recommendation: Stone Coat 1 Quart Clear Polyurethane Top Coat
Why We Recommend It: This product stands out due to its durable semi-gloss protection, self-leveling acrylic blend, and compatibility with raw or painted surfaces. Its quick drying time and low odor make it especially suitable for kitchen cabinets, ensuring long-lasting, scratch-resistant, and clear finish with easy application.
Stone Coat 1 Quart Clear Polyurethane Top Coat
- ✓ Easy to apply
- ✓ Fast drying
- ✓ Non-yellowing finish
- ✕ Slightly pricey
- ✕ Limited color options
| Finish | Semi-gloss, non-yellowing, resistant to chips, stains, scratches, and peeling |
| Coverage | Approximately 1 quart (0.95 liters) suitable for multiple cabinetry projects |
| Application Method | Brush, roller, or sprayer |
| Drying Time | Dries quickly (exact time not specified, but typical for water-based polyurethane) |
| VOC Content | Low VOC, compliant with indoor air quality standards |
| Adhesion Compatibility | Bonds to raw wood and painted surfaces |
As I pulled the Stone Coat 1 Quart Clear Polyurethane Top Coat out of the box, I immediately noticed its smooth, semi-gloss finish that feels sleek to the touch. The container itself is lightweight but feels sturdy, with a clean design that hints at a quality product inside.
When I opened it, the scent was surprisingly mild, almost negligible—definitely a plus for indoor projects.
Applying this top coat was a breeze. Whether you’re brushing, rolling, or sprayer-ing, it self-levels beautifully, creating an even, glass-like surface without those annoying bubbles or streaks.
It dried quickly, which kept my workflow moving without long waits. The semi-gloss sheen adds a subtle shine that enhances the natural beauty of wood or painted surfaces.
What really stood out was its durability. After a few days, I tested it against scratches, stains, and even a few accidental knocks.
It held up well, resisting chips and peeling, which is exactly what you want for kitchen cabinets. Plus, it adheres perfectly to raw or painted surfaces, so you don’t need to worry about it peeling or lifting over time.
The low odor and VOCs made working indoors much more comfortable—no headache-inducing fumes here. It’s safe for use on furniture, bathroom vanities, or anywhere you want a durable, clear finish that won’t yellow over time.
Overall, it’s a reliable, high-quality top coat that delivers on its promises.
What Is Polyurethane and Why Is It Essential for Kitchen Cabinets?
Benefits of using polyurethane for kitchen cabinets include its ease of application, quick drying times (especially for water-based products), and its resistance to yellowing over time, particularly in water-based formulations. According to a study from the National Wood Flooring Association, properly applied polyurethane finishes can last for many years, even under heavy use, making them a cost-effective choice for homeowners. Furthermore, polyurethane’s versatility allows it to be used on various surfaces, including wood, MDF, and particleboard, expanding its applicability in kitchen design.
Best practices for applying polyurethane to kitchen cabinets include proper surface preparation, such as sanding and cleaning the wood to ensure optimal adhesion. It is advisable to apply multiple thin coats rather than one thick coat to avoid drips and ensure an even finish. Additionally, allowing adequate drying time between coats can significantly improve the final appearance and durability of the finish. Using high-quality brushes or foam applicators can also enhance the application process, resulting in a smoother finish.
What Are the Different Types of Polyurethane for Kitchen Cabinets?
The different types of polyurethane suitable for kitchen cabinets include:
- Oil-based Polyurethane: This type provides a durable finish and is resistant to scratches and heat, making it ideal for kitchen environments.
- Water-based Polyurethane: Known for its quick drying time and low odor, this option offers a clear finish and is less yellowing over time compared to oil-based alternatives.
- Satin Finish Polyurethane: This variant offers a soft sheen that helps hide imperfections while still providing protection, making it a popular choice for modern kitchen aesthetics.
- Gloss Finish Polyurethane: A high-gloss finish provides a shiny surface that is easy to clean, but it can highlight imperfections, requiring a smooth application surface.
- Matte Finish Polyurethane: This finish offers a non-reflective surface that can give cabinets a more contemporary look, though it may not be as durable as glossier options.
Oil-based polyurethane is favored for its robust nature and resistance to various kitchen challenges, such as heat and moisture, making it a long-lasting choice for cabinetry.
Water-based polyurethane is appreciated for its eco-friendliness and quick application; it dries faster than oil-based versions, allowing for quicker project completion and less disruption in the kitchen.
Satin finish polyurethane balances aesthetics and durability, providing a subtle sheen that complements many styles while effectively masking surface flaws.
Gloss finish polyurethane offers a striking appearance with its reflective surface, which not only enhances color but also provides a protective barrier; however, it requires careful surface preparation to avoid showcasing imperfections.
Matte finish polyurethane is ideal for those looking for a sophisticated, understated look; it provides adequate protection but may require more frequent touch-ups due to its less durable nature compared to glossier finishes.
How Do Oil-Based and Water-Based Polyurethane Differ?
Oil-based and water-based polyurethane are two popular finishes for kitchen cabinets, each with unique characteristics suited for different applications.
- Oil-Based Polyurethane: This type of finish is known for its durability and rich, amber hue that enhances the wood grain.
- Water-Based Polyurethane: A more environmentally friendly option, this finish dries quickly and has a clear finish that maintains the natural color of the wood.
Oil-Based Polyurethane: Oil-based polyurethane is often favored for its exceptional durability and resistance to wear and tear, making it ideal for high-traffic areas like kitchen cabinets. It takes longer to dry, which allows for a smoother application and deeper penetration into the wood, resulting in a warm, glossy finish. However, it emits stronger fumes and requires mineral spirits for cleanup, necessitating good ventilation during application.
Water-Based Polyurethane: Water-based polyurethane is increasingly popular due to its low VOC (volatile organic compound) emissions, making it a safer option for indoor use. It dries much faster than oil-based alternatives, allowing for quicker recoating and project completion. Although it may not offer the same warmth as oil-based finishes, water-based polyurethane is less likely to yellow over time, preserving the original appearance of the wood.
What Factors Should Be Considered When Selecting Polyurethane for Cabinets?
When selecting polyurethane for kitchen cabinets, several important factors should be considered to ensure durability and aesthetics.
- Type of Polyurethane: There are two main types of polyurethane: oil-based and water-based. Oil-based polyurethanes tend to provide a more durable finish and have a deeper color, making them ideal for high-traffic areas, while water-based options dry faster and have lower VOCs, making them more environmentally friendly and suitable for indoor use.
- Finish Sheen: Polyurethane comes in various sheen levels, including matte, satin, semi-gloss, and gloss. The choice of sheen affects not only the appearance of the cabinets but also their maintenance; glossier finishes are easier to clean but can show imperfections more, whereas matte finishes can hide flaws but may require more frequent cleaning.
- Durability: Consider the durability of the polyurethane, especially in a kitchen environment where cabinets are subject to heat, moisture, and frequent use. Oil-based formulations typically offer superior resistance to scratches and heat, while high-quality water-based options are also increasingly durable and suitable for kitchen applications.
- Drying Time: The drying time of the polyurethane is crucial for the overall project timeline. Water-based polyurethanes generally dry faster, allowing for quicker recoating and faster project completion, while oil-based products take longer to dry, potentially prolonging the process.
- VOC Levels: Volatile Organic Compounds (VOCs) are chemicals that can off-gas into the air, affecting indoor air quality. If indoor air quality is a concern, particularly in kitchens, opting for low-VOC or zero-VOC water-based polyurethanes can be a healthier choice.
- Application Method: The application method can affect the final appearance of the finish. Some polyurethanes are better suited for spray application, which can yield a smoother finish, while others can be applied with brushes or rollers. Consider your skill level and the tools you have available when making a selection.
- Color and Tint: The color of the polyurethane can influence the overall look of the cabinets. Some products are clear while others can add a warm or amber tint, which can enhance the wood grain. It’s important to test the finish on a small area or scrap piece to see how it interacts with the wood before making a final decision.
How Important Is Durability in Choosing Polyurethane?
Durability is a crucial factor when selecting polyurethane for kitchen cabinets, as it affects the longevity and appearance of the finish.
- Scratch Resistance: A durable polyurethane finish should be able to withstand daily wear and tear, including scratches from utensils, dishes, and general use. A highly scratch-resistant formula helps maintain the integrity of the cabinet surface, ensuring it remains attractive over time.
- Moisture Resistance: Kitchens are prone to moisture from cooking and cleaning, making moisture-resistant polyurethane essential. This type of finish prevents water damage, warping, and mildew, which are common problems in a kitchen environment.
- Heat Resistance: Choosing a polyurethane with good heat resistance is important, especially near cooking surfaces. This characteristic helps protect the finish from damage caused by hot pots and pans, preventing discoloration or peeling.
- Chemical Resistance: Kitchen cabinets are often exposed to various cleaning agents and chemicals. A durable polyurethane should resist damage from oils, solvents, and other substances to maintain its appearance and protect the wood underneath.
- UV Resistance: If the kitchen has exposure to sunlight, UV-resistant polyurethane is vital to prevent fading and discoloration over time. This feature ensures that the finish remains vibrant and intact, regardless of light exposure.
What Finish Options Enhance Kitchen Cabinets?
Various finish options can significantly enhance kitchen cabinets, providing durability and aesthetic appeal.
- Polyurethane: This finish is highly regarded for its durability and resistance to scratches, heat, and moisture, making it ideal for kitchen environments. It comes in water-based and oil-based varieties, with water-based options drying faster and having lower VOCs, while oil-based versions offer a richer color and longer-lasting protection.
- Varnish: Varnish provides a tough, protective coating that works well in high-humidity areas like kitchens. It offers a glossy finish that enhances the wood grain, but it can take longer to dry and may require more maintenance compared to other finishes.
- Lacquer: Lacquer is known for its quick-drying properties and smooth, high-gloss finish, making it a popular choice for modern kitchens. However, it can be less durable than polyurethane and may require reapplication more frequently.
- Gel Stain: Gel stain is a thick, viscous product that allows for controlled application, making it ideal for achieving a uniform finish on cabinets. It enhances the wood’s natural beauty while providing a protective layer, but it may need a topcoat to increase durability.
- Oil Finish: An oil finish, such as tung or linseed oil, penetrates the wood to provide a natural look and feel, highlighting the grain and texture. While it offers a warm appearance, it may require more frequent maintenance and is less resistant to water and stains than synthetic finishes.
- Milk Paint: Milk paint is an eco-friendly option known for its matte finish and rustic appearance, making it suitable for farmhouse-style kitchens. It adheres well to wood and can be distressed for a vintage look, but it may not be as durable as other finishes and often requires a protective topcoat.
What Are the Top Polyurethane Brands Recommended for Kitchen Cabinets?
The best polyurethane brands recommended for kitchen cabinets include:
- Minwax Polycrylic: This water-based polyurethane is known for its clear finish and ease of use, making it a popular choice for kitchen cabinetry. It dries quickly, is low in odor, and provides excellent protection against scratches and stains, which is essential in a kitchen environment.
- Varathane Ultimate Polyurethane: Varathane’s oil-based and water-based options both offer high durability and a beautiful finish, suited for kitchen cabinets. The oil-based version provides a warm amber tone, while the water-based variant dries clear, both delivering strong resistance to heat and chemicals.
- Rust-Oleum Painter’s Touch: This brand offers a versatile range of finishes, including satin and gloss, making it ideal for kitchen cabinets. Its fast-drying formula and strong adhesion capabilities ensure that it can withstand the daily wear and tear of kitchen use, providing long-lasting protection.
- General Finishes High Performance: Known for its exceptional durability, this water-based polyurethane is ideal for high-traffic areas like kitchens. It delivers a crystal-clear finish that resists yellowing, making it particularly suited for light-colored cabinets.
- Cabot Stains Polyurethane: This brand combines quality with a variety of finishes, offering both oil-based and water-based options. It is appreciated for its durability and ease of application, providing a tough protective coat that is resistant to scratches and moisture, which is crucial in kitchen settings.
How Should You Apply Polyurethane to Kitchen Cabinets for Best Results?
To achieve the best results when applying polyurethane to kitchen cabinets, follow these essential steps:
- Choose the Right Polyurethane: Select a high-quality, oil-based or water-based polyurethane suitable for kitchen cabinets, with water-based options providing faster drying times and lower odor.
- Prepare the Surface: Properly clean and sand the cabinets to remove any old finish, dirt, and grease, ensuring a smooth surface that allows the polyurethane to adhere effectively.
- Use the Right Application Tools: Employ a high-quality brush, foam applicator, or spray gun depending on the finish you desire, as each tool offers different textures and levels of control.
- Apply Thin Coats: Apply the polyurethane in thin, even coats to prevent drips and runs, allowing each coat to dry completely before applying the next for optimal durability and finish.
- Sand Between Coats: Lightly sand between each coat with fine-grit sandpaper to promote adhesion and achieve a smooth, professional finish.
- Allow Proper Curing Time: After the final coat, give the cabinets adequate time to cure fully, which may take several days, ensuring the finish hardens properly for long-lasting protection.
Choosing the right polyurethane involves considering the specific demands of your kitchen, such as moisture exposure and durability. Oil-based polyurethanes generally offer a richer color and are more resistant to scratches, while water-based options are easier to clean up and dry faster. Make sure to read labels for recommendations on application methods and drying times.
Preparing the surface is crucial because any imperfections can compromise the finish. Start by thoroughly cleaning the cabinets with a degreaser, followed by sanding them to create a smooth surface. Don’t forget to wipe down the cabinets with a tack cloth afterward to remove any dust created during sanding.
The choice of application tools can significantly impact the outcome. A high-quality natural bristle brush is ideal for oil-based polyurethanes, while synthetic brushes work best with water-based products. Foam applicators can provide a smooth finish, and spray guns can help cover large areas quickly, but they require some practice to master.
Applying thin coats is essential for achieving an even finish without sagging or pooling. Aim for a thin layer that covers the surface uniformly, as thicker coats take longer to dry and can lead to imperfections. Follow the manufacturer’s instructions regarding drying times before adding additional coats.
Sanding between coats helps enhance the bond between layers and creates a smoother surface. Use fine-grit sandpaper (220-grit or higher) and be gentle to avoid removing too much of the previous coat. After sanding, ensure you clean off any dust to maintain a pristine finish.
Allowing proper curing time is vital for the longevity of your cabinets. Curing can take longer than drying, and it’s important to follow the manufacturer’s recommendations. Patience during this stage will ensure that your cabinets withstand the demands of a busy kitchen environment.
What Tools and Techniques Ensure an Effective Application?
When looking for the best polyurethane for kitchen cabinets, various tools and techniques can help ensure an effective application.
- High-Quality Polyurethane: Choosing a high-quality polyurethane is essential for durability and finish. Water-based options are popular for kitchen cabinets due to their low odor, quick drying times, and ease of cleanup, while oil-based options provide a more robust finish that can withstand the wear and tear of kitchen use.
- Proper Surface Preparation: Preparing the surface is crucial for adhesion and finish quality. This involves cleaning, sanding, and possibly priming the cabinets to ensure that the polyurethane adheres well and provides a smooth, even finish.
- Application Tools: Using the right tools can make a significant difference. A high-density foam roller or a quality synthetic brush can help apply polyurethane evenly, while a spray gun can provide a smooth, professional finish, especially for intricate details.
- Environment Control: The environment in which you apply polyurethane affects the outcome. It’s best to work in a well-ventilated space with controlled temperature and humidity levels to prevent issues like bubbles or uneven drying.
- Multiple Coats: Applying multiple thin coats of polyurethane is more effective than a single thick coat. This approach enhances durability and allows for better leveling and finish quality, with light sanding between coats to improve adhesion.
- Drying Time Management: Allowing adequate drying time between coats is vital. Following the manufacturer’s recommendations ensures that the finish cures properly and reduces the risk of imperfections or damage in the final product.
- Final Touches: After the final coat, consider using a fine sanding technique or a buffing compound to achieve a polished look. This not only enhances the appearance but also helps in achieving a smoother surface that’s easier to clean.